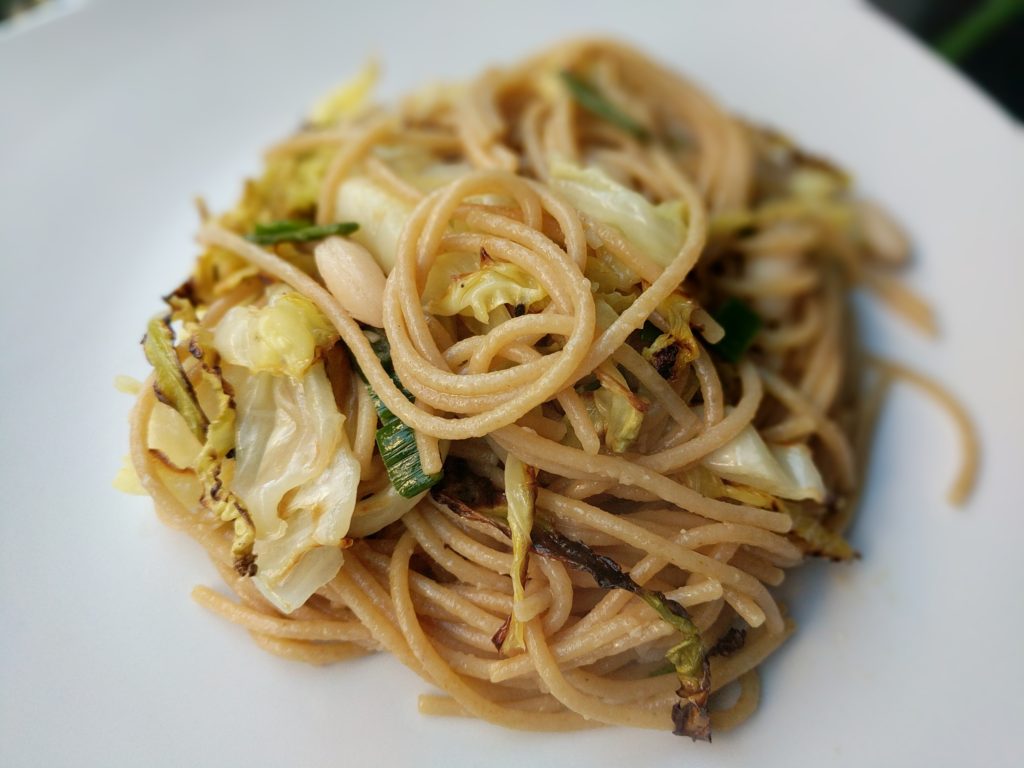
This simple, budget recipe can be adapted to your taste or to whatever ingredients you have on hand. It was created using kitchen staples during the COVID-19 pandemic in 2020.
A few recommended ingredients to keep on hand include pasta, beans, garlic, and olive oil. Some fresh vegetables actually last a long time (several weeks or longer) when stored properly, including cabbage, onions, winter squash, and carrots. Cabbage doesn’t have to be bland or boring – this recipe creates roasted ribbons of cabbage to mix into pasta for extra flavor. For fans of roasted Brussels sprouts, roasted cabbage has a similar flavor but is easier to make and typically more affordable!
1/2poundwhole wheat spaghetti or other long noodle
1/2headcabbage, savoy or greensliced into 1/4 inch slices
15ouncecan white beans, rinsed and drainedor 1 3/4 cups cooked white beans
1/4 cupolive oilor butter (or vegan butter)
3clovesgarlic, minced
salt & pepper to taste
Instructions
Preheat oven to 400°F. Brush cabbage slices with 2 tablespoons olive oil and sprinkle with salt. Bake for 20-30 minutes, turning once, until edges are browned.
Cook pasta according to package. Drain and set aside.
In a skillet, heat remaining olive oil (or butter) over medium heat. Add garlic and saute for 30 seconds. Add white beans and stir until heated. Add salt and pepper to taste.
Once cabbage is cooked, cut out the stem pieces so that the cabbage forms ribbons. Toss with cooked pasta and bean mixture.
Recipe Notes
Feel free to customize this recipe. Ideas include:
Add other proteins, such as grilled chicken
Add cheese, such as parmesan
Add other spices or herbs, such as parsley
Add other vegetables, such as onion, mushrooms, or tomatoes
With the current COVID-19 situation, you may be struggling to figure out what to cook. Here are some recipes using common kitchen staples with notes about substitutions. Please take care and be safe, everyone!
Entrees
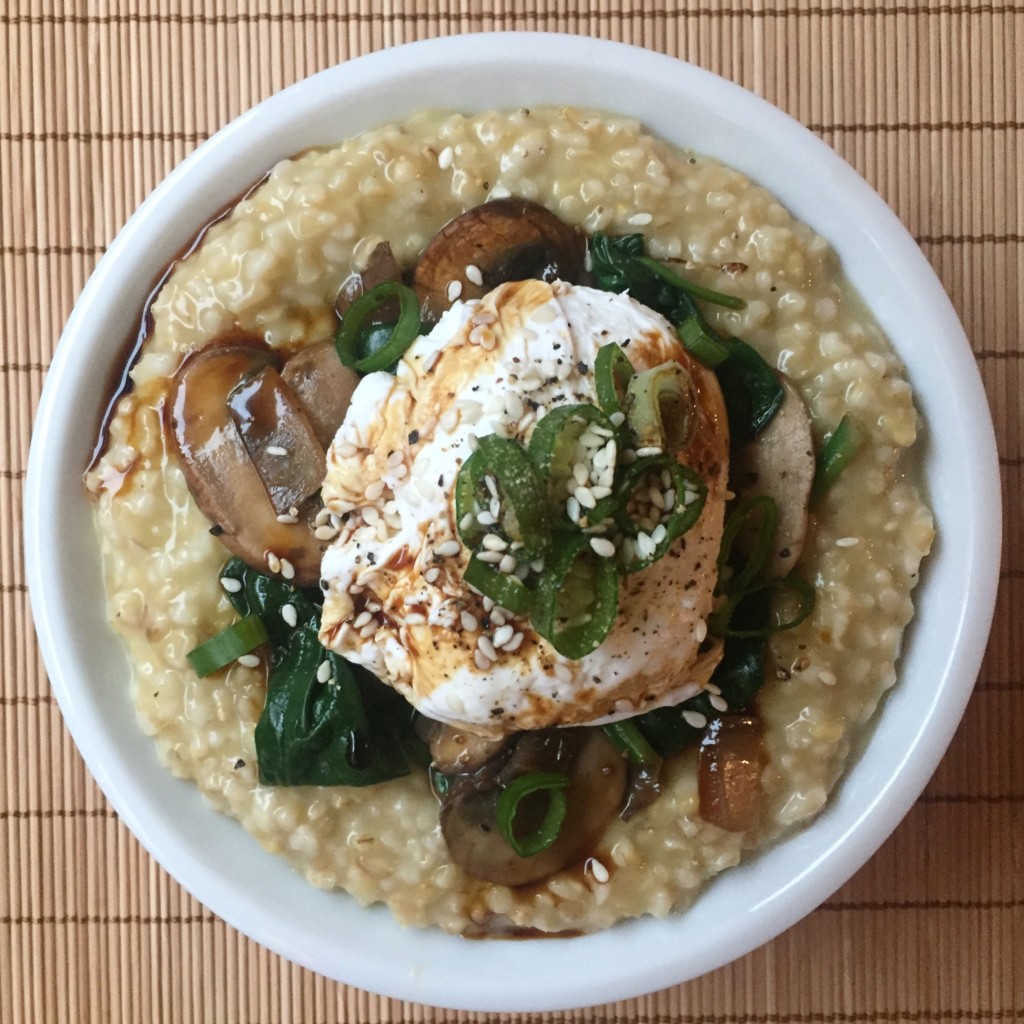
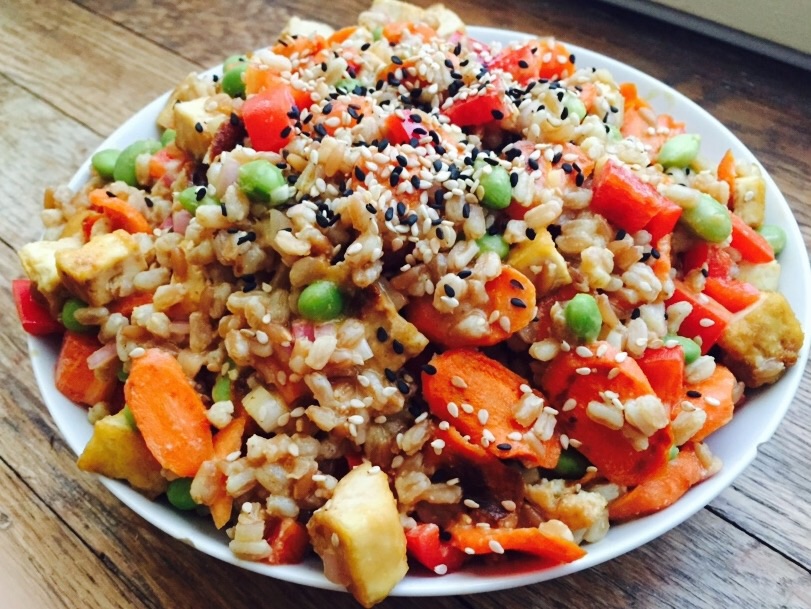
Savory Oatmeal – add any vegetables or toppings you’d like2 Ingredient Sweet Potato Pancakes – just add egg! Also works with mashed banana and probably other fruit or veggiesCurried Chickpea Salad – sub apricot or orange jam for mango chutney (or omit)Fishy Nuggets – Can sub coconut flakes for another filler like almond meal, flour, oats, etc.Mediterranean Salmon Salad – you can sub canned tuna and switch out the veggies. Would probably taste great with white beans instead of fish!Roasted Veggie Lunch Bowl – Roast whatever veggies you have in the fridge, add protein and sauce of choice!Whole Grain Salad with Miso Dressing – sub other grains or veggies. Many of us have a forgotten tub of miso in the fridge!
Sides and Snacks
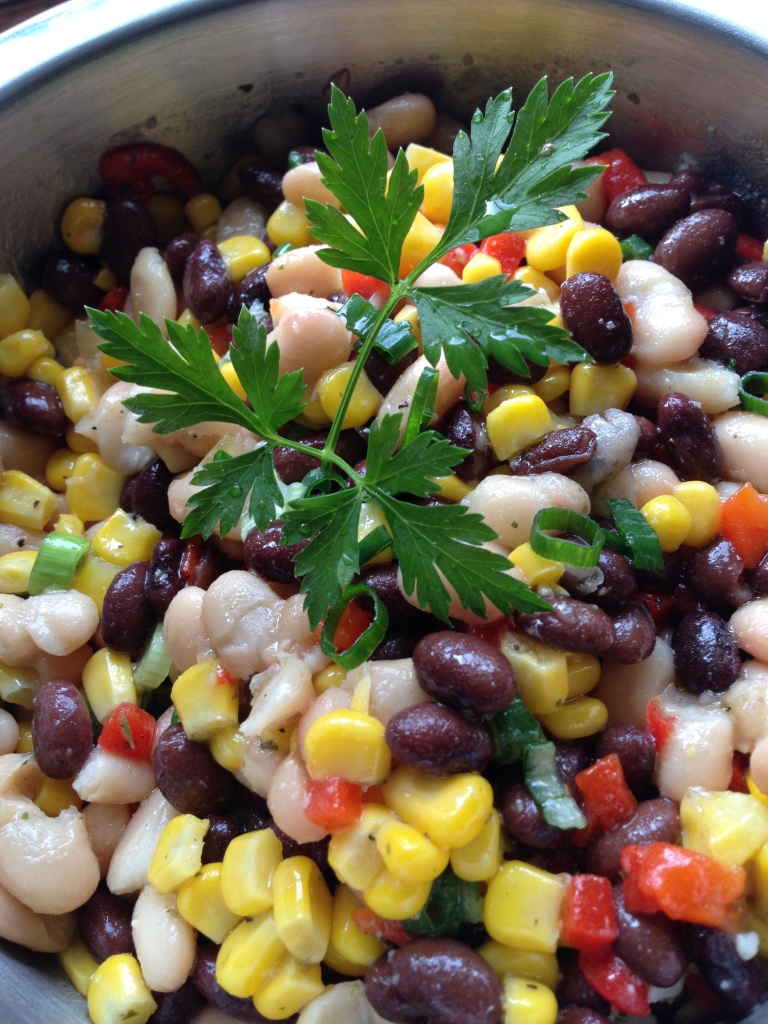
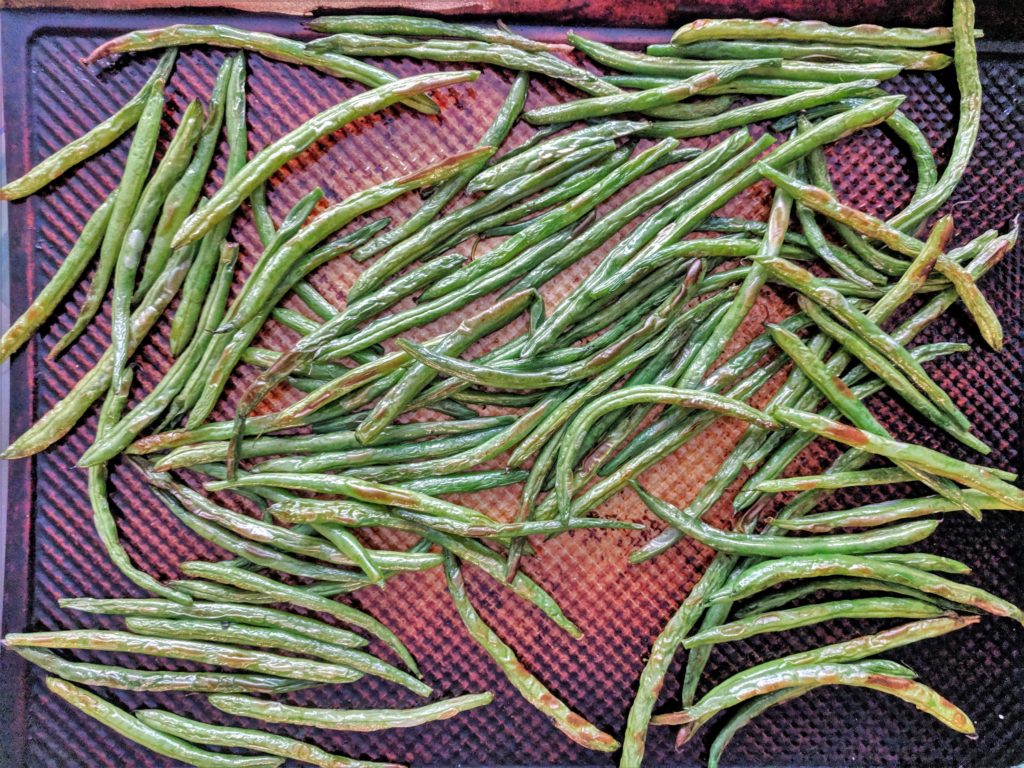
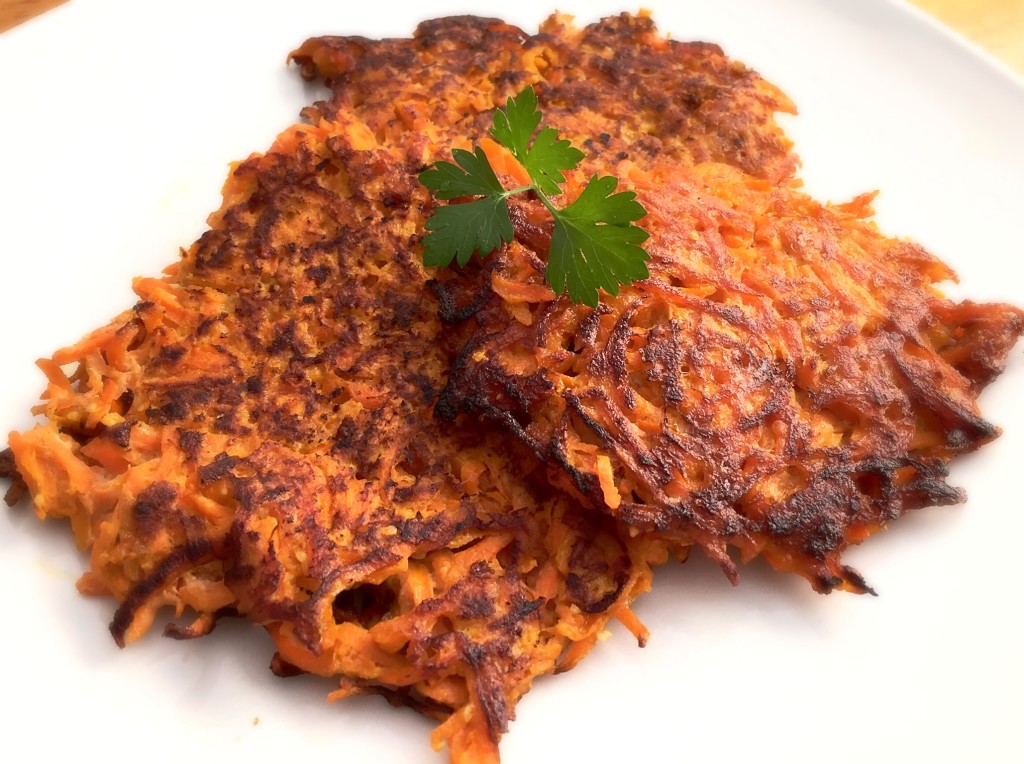
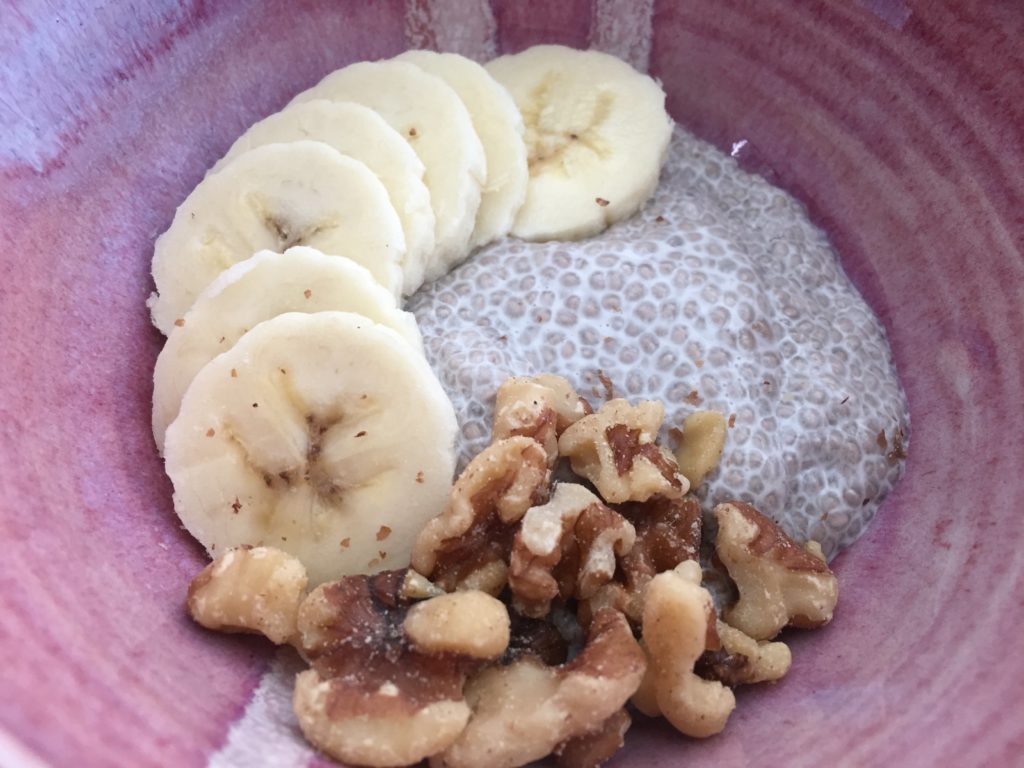
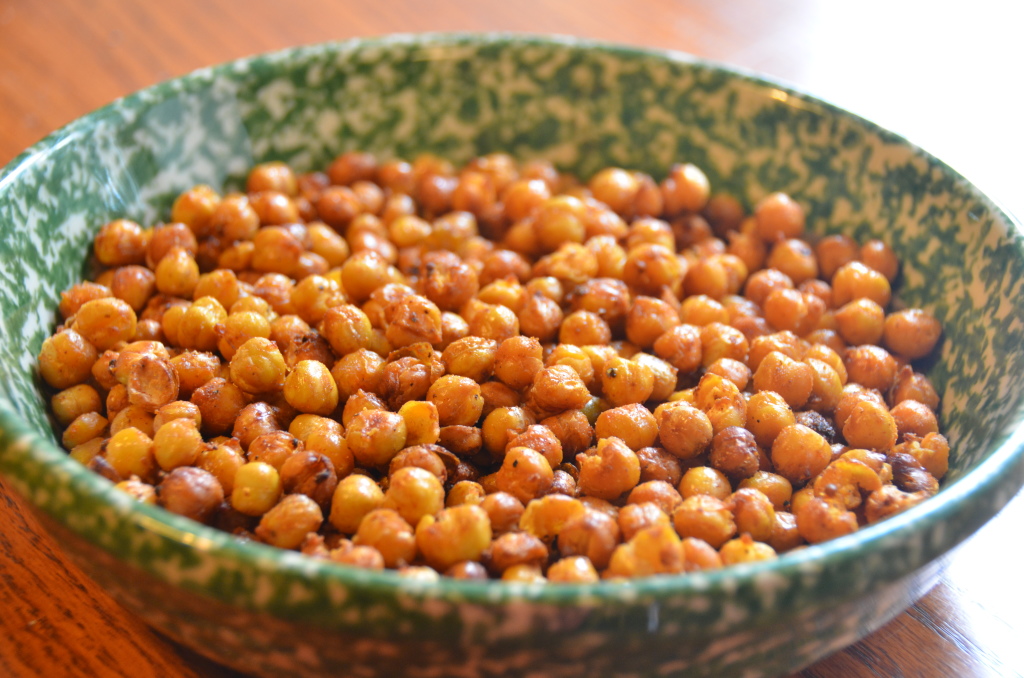
Bean and Corn Dip – Use up those cans of beans and corn. You can also just use bottled Italian dressingBerry Chia Jam – can use frozen or fresh berriesBreakfast Bites – just oats, banana, applesauce (maybe sub canned pumpkin?), and raisins. Sub other fruit or fillings like nuts.Broiled Green Beans – use fresh or frozen!Carrot Pancakes – Carrots last a long time in the fridge! Could sub other grated veggies.Roasted Carrots – can also use baby carrotsChia Pudding – start with milk (or alternative) + chia seeds, add whatever other flavors or toppings you’d likeSavory Roasted Chickpeas – try with whatever spices you have on handVegetarian Baked Beans – can sub brown sugar for molasses, sub other vinegar for apple cider vinegar
By no means did I come up with the idea of chia pudding, but tons of recipes exist. This is a common ratio of 1 part chia seeds to 4 parts liquid. Top it with whatever you’d like – fruit, chia jam, nuts, nut butter, maple syrup or honey, etc.
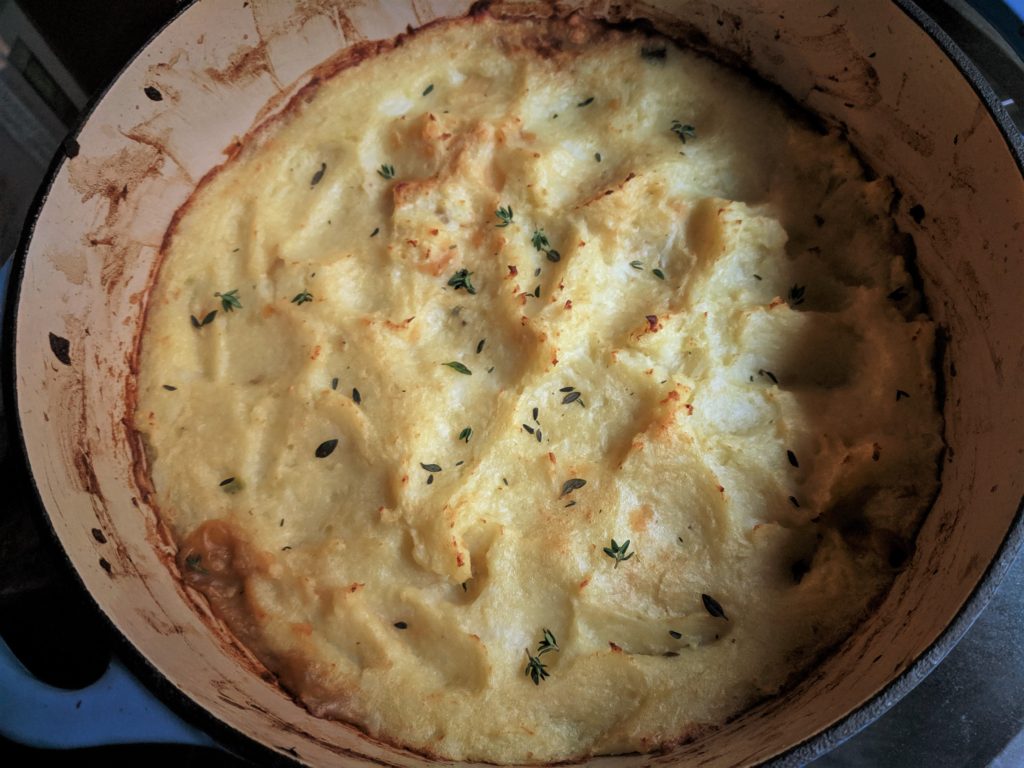
This hearty, rich and savory meal is made solely of plants! It is basically a vegan version of shepherd’s pie and cottage pie. Complex flavor is developed with delicious ingredients such as garlic, onion, thyme, tamari, Worcestershire sauce, and red wine (vinegar).
Heat oil in a Dutch oven or stock pot over medium-high heat.
Add onions and saute for 5 minutes or until they start to become translucent. Add garlic and cook for 30 seconds.
Add vinegar/juice to deglaze the pan, then add stock, mushrooms, mixed vegetables, lentils, tamari, thyme, and worcestershire sauce. Cook until lentils are tender, about 15 minutes.
Preheat broiler on high.
Mix corn starch with ¼ cup water to make a slurry. Add to pot and stir until liquid is thickened. Add 1-2 more tablespoons corn starch if necessary, or more stock or water if it's too thick. The sauce should be thicker than gravy. Add salt to taste.
If prepared in a stock pot, transfer the mixture to a large casserole dish. If using a Dutch oven, keep it in there. Place about ½ cup mashed cauli-tatoes at a time on top of the mixture with remaining cauli-tatoes. Use a spoon or spatula to smooth out the mash, covering the mixture below, and sealing off the edges.
Broil for 10-15 minutes or until lightly browned on top.
Red Wine: If using red wine instead of red wine vinegar, use 1/4 cup and decrease vegetable broth by 2 tablespoons.
Flour: If using flour instead of corn starch, there is no need to make a slurry. Add the flour directly to the pan and stir. Use twice as much flour as corn starch.
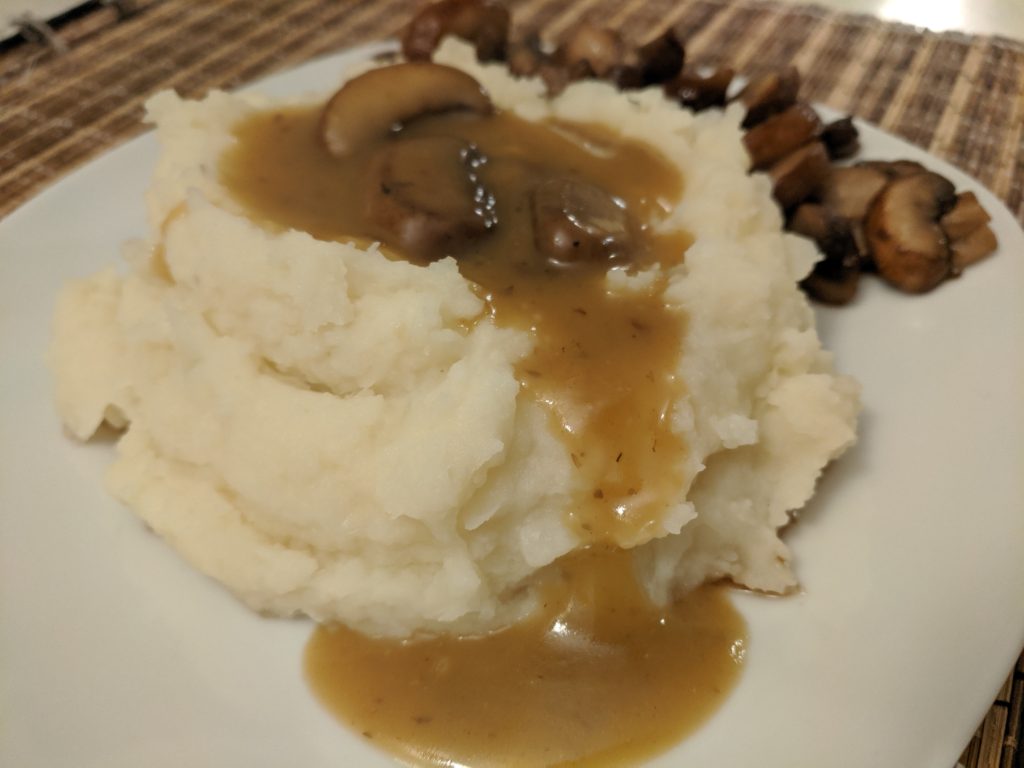
Simpler Version: Simply top the mashed cauli-tatoes with the vegetable mixture, sort of like mashed potatoes and gravy. This saves about 15 minutes or so.
Ingredients like Worcestershire sauce and tamari can be left out if you don't have them, but they help build a more complex flavor.
Vegan: make sure to use vegan Worcestershire sauce
Gluten-free: Use tamari (usually gluten-free but check the label) or gluten-free soy sauce. Use corn starch, not flour, to thicken.
This one pot recipe is so simple but so hearty. The 50/50 mixture of cauliflower and potatoes takes on the starchiness of the potatoes to create a rich and creamy consistency very similar to traditional mashed potatoes. There is no need to steam the cauliflower separately, simply place it on top of the potatoes while they boil and cover, essentially steaming it in the same pot! It is completely plant-based, simply replacing butter with olive oil and milk with a plant-based milk such as cashew.
5cupspotatoes, peeled and choppedideally organic, about 2 pounds
5cupscauliflower florets1 medium head
3tablespoonsolive oil or non-dairy butter
1/2cupplain and unsweetened cashew or other plant milk
1/2teaspoonsaltor to taste
1/2teaspoonblack pepper
Instructions
Place potatoes in a stockpot and cover with water and a lid. Bring to a boil over medium-high heat and cook until they begin to soften, about 5 minutes.
Add cauliflower to the pot on top of the potatoes and cover. Continue cooking until a knife slides easily into the cauliflower and potatoes, about 10 minutes more, adding more water if necessary.
Drain the cauliflower and potatoes, then mash with a potato masher or whisk. Add oil or butter and ¼ cup milk and continue mashing. Add salt and pepper to taste, and more milk if necessary to reach desired consistency.
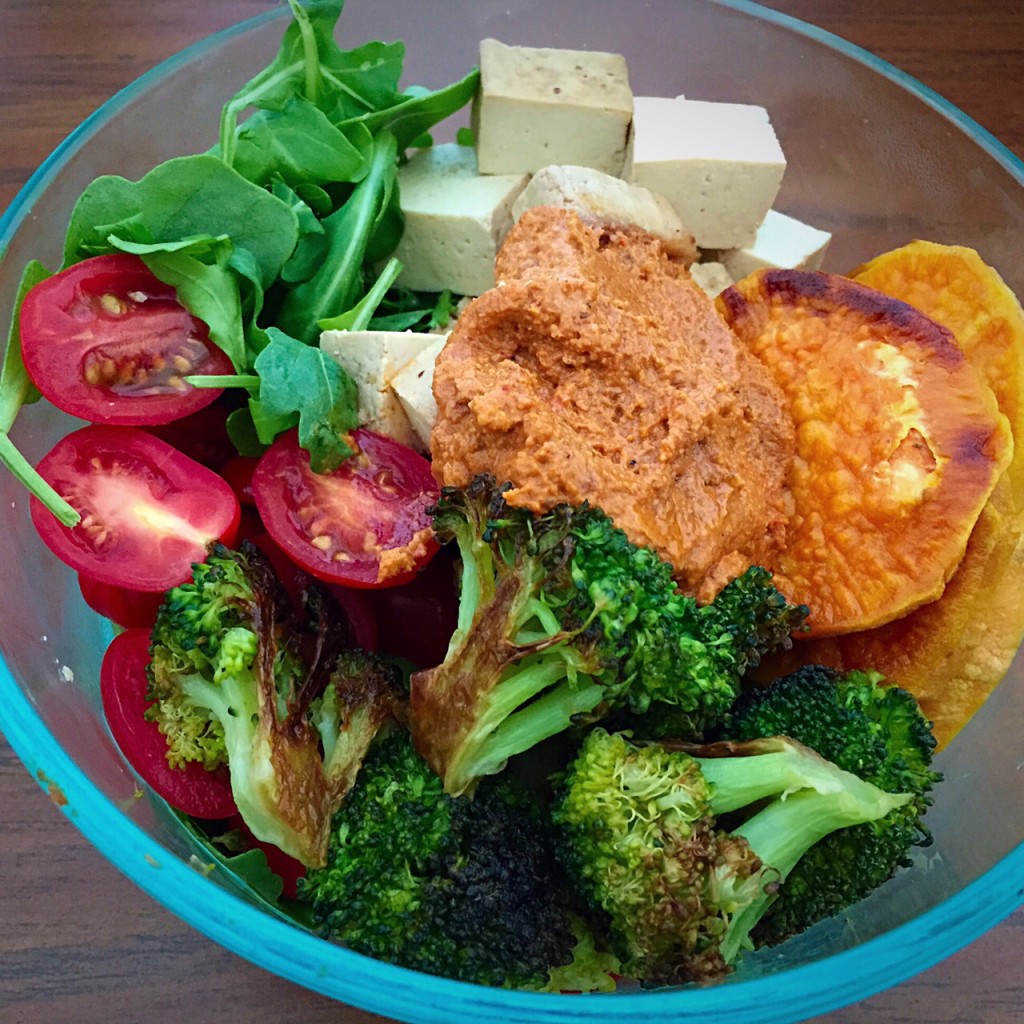
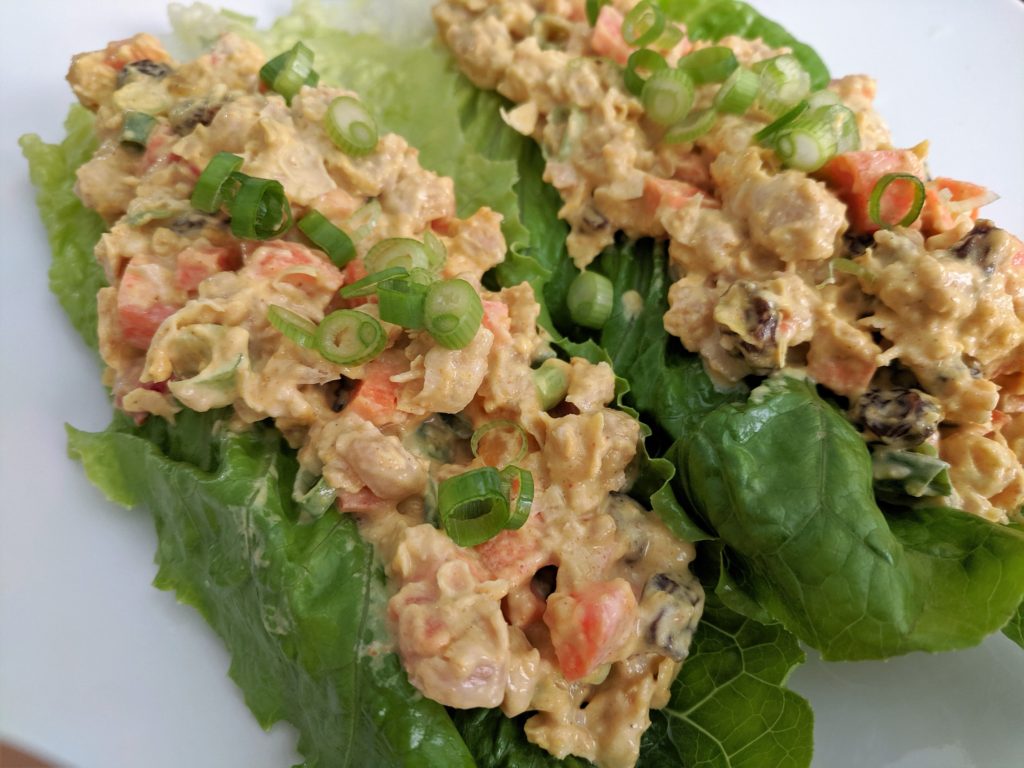
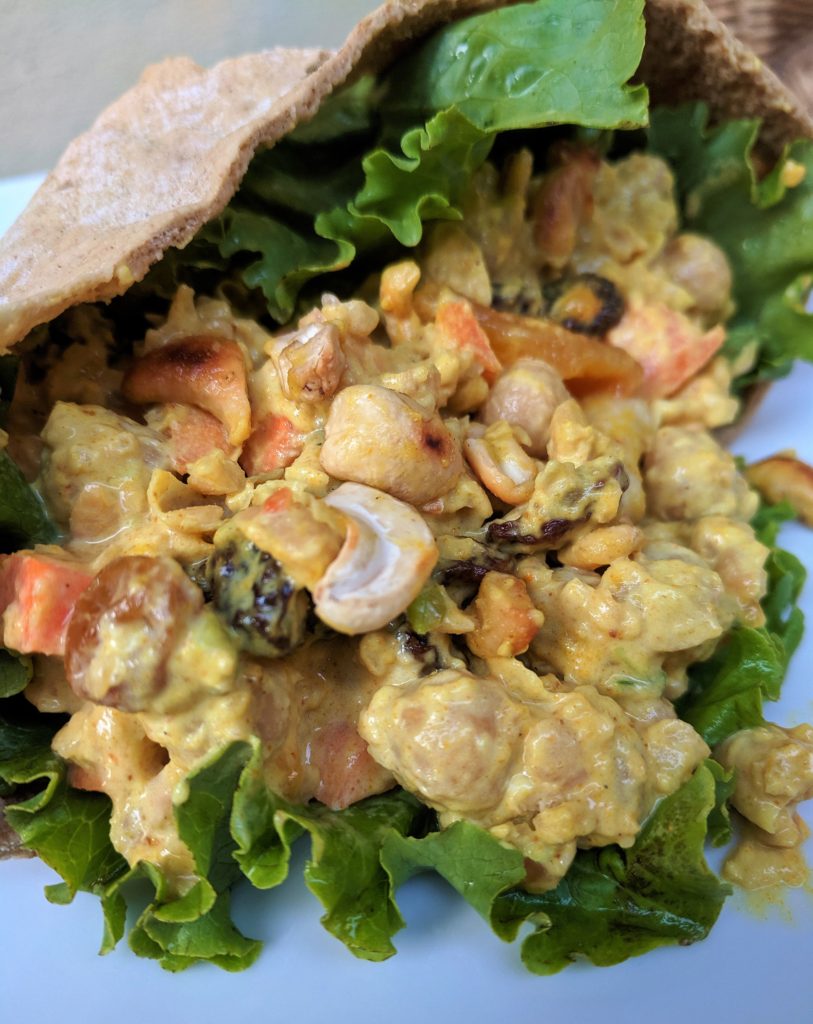
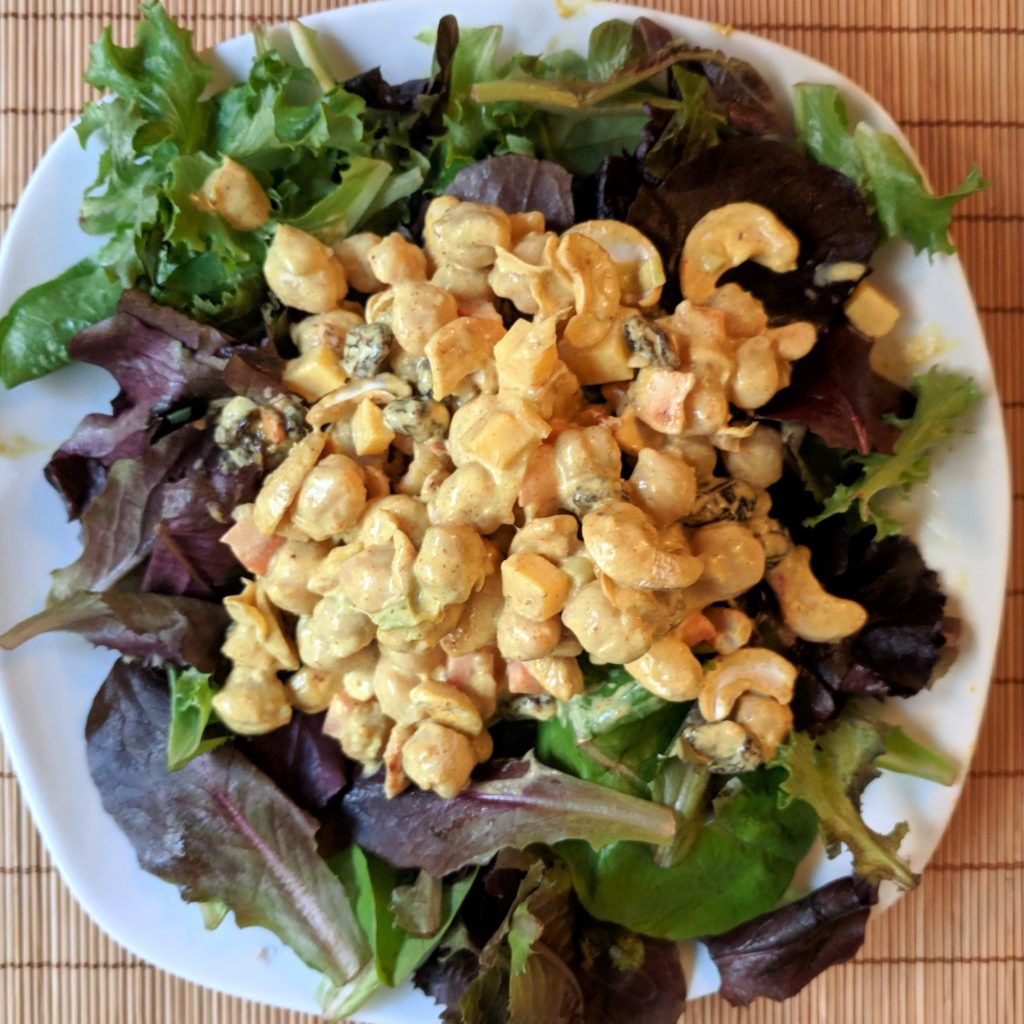
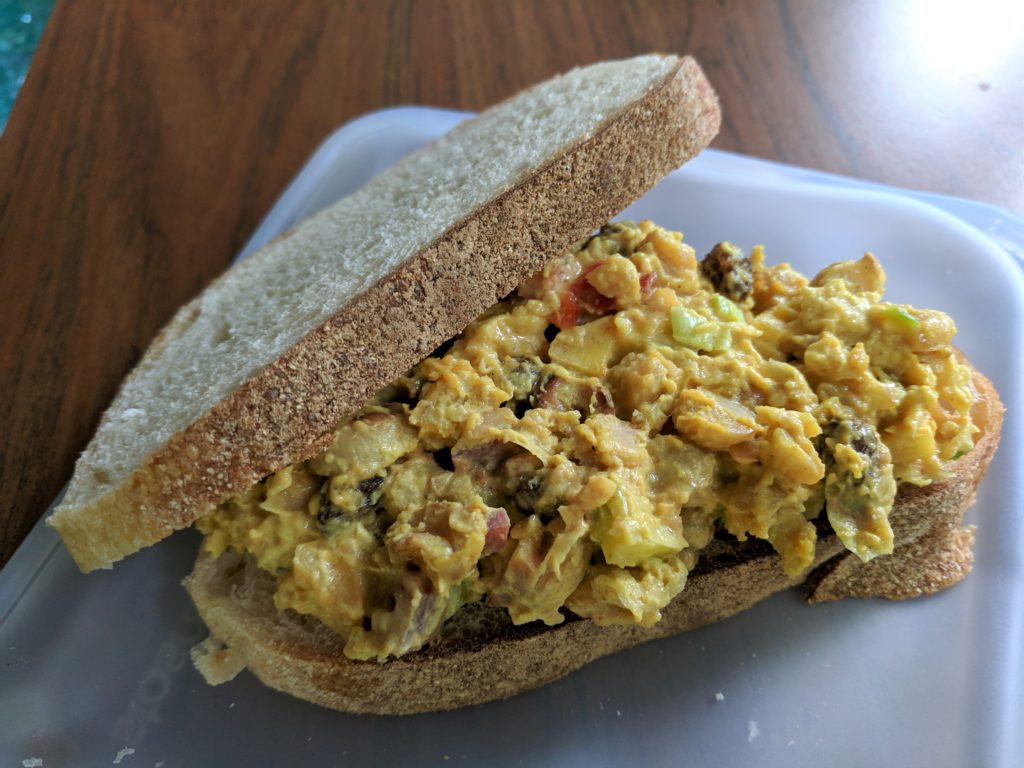
This plant-based salad is very easy and full of flavor – great for a quick make-ahead lunch. It’s cool, creamy, crunchy, chewy, sweet, savory, and rich. It’s easy to keep the ingredients on hand and throw this recipe together anytime. You can easily double the recipe and use it throughout the week, switching up how you serve it – on a romaine boat as pictured above (our favorite because it’s crisp and refreshing), on a salad, in a pita or wrap, or on a sandwich. It’s a great lunch to bring to work or school because it doesn’t need to be reheated, making the (delicious) smell much milder.
This plant-based salad is very easy and full of flavor - great for a quick make-ahead lunch. It's cool, creamy, crunchy, chewy, sweet, savory, and rich.
15ouncecan chickpeas, rinsed and drainedor 1 3/4 cup cooked chickpeas
1/2cuptoasted cashews
1/4cupvegan mayonnaisecould use regular mayo if it doesn't need to be vegan or egg-free
1-2carrots, finely diced
1/4cupraisinsideally organic
2tablespoonsmango chutney
1stalkgreen onion, slicedabout 2 tablespoons
2teaspoonscurry powder
1/2teaspoonsalt or to taste
1/2teaspoonblack pepper
Instructions
Optional: To achieve a softer texture and a mixture that sticks together more, mash about half of the chickpeas with a fork, picking out the loose skins afterwards. Alternatively, put the chickpeas in a towel and rub with the towel to loosen the skins first, then discard the skins and mash.
You can also skip this step and leave the chickpeas whole.
Combine all ingredients in a bowl and stir until well combined.
Serve on top of a salad, in a romaine lettuce boat, or in a sandwich or pita.
June 8 is World Ocean Day. Although it’s a day late, let’s talk about ways to reduce our use of plastic to help protect our oceans, but also to protect animals (land animals, sea animals, and humans)!
Here are some of the many issues with plastic:
It is not biodegradable. It may break down into smaller and smaller pieces, but it never goes away. Once they become “microplastics,” they are nearly impossible to collect.
We are in a recycling crisis. China no longer accepts most recyclables, so much of it ends up as trash. A small percentage of plastic is recycled anyway, about 8% in the US.
Even when plastics are recycled, it can usually only be done once as they are typically turned into another product that is not recyclable.
Plastics kill animals by causing entanglement, starvation, strangulation, and even pierced organs.
Production of plastic is increasing and is expected to double by 2050.
What can we do about it? We can start by reducing our use of single use plastics. For the next day or so, start taking note of the plastics around you. You will realize that they are everywhere, and there are many simple replacements that maybe you just haven’t considered before. The good news is that we’ll lay out a few easy swaps for your consideration!
Bathroom Plastic Swaps
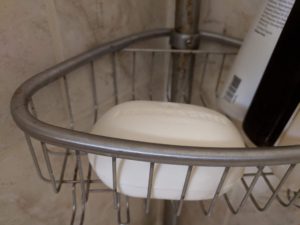
Bar soap (vs. liquid soap or shower gel)
Bar soap in the shower, but can also be used for handwashing
A study on personal hygiene products showed that people use about 6 times more liquid soap than bar soap by weight. On top of that, it takes about 5 times more energy to produce liquid soap. Additionally, liquid soap contains a lot of water, increasing the carbon footprint of shipping. Aim for bar soap that has minimal (if any) packaging. You can even find ratings of soaps at EWG, including ones that are EWB Verified, meeting their strictest health standards.
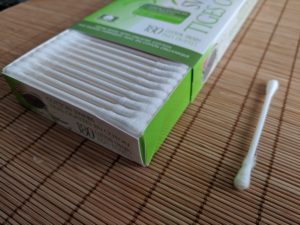
Cotton swabs with paper/cotton sticks (vs. cotton swabs with plastic sticks)
Organic cotton swabs vs. a swab with a plastic handle
Leave the wax in your ears! If you need to use cotton swabs for other purposes (makeup, cleaning, arts and crafts), aim for ones that don’t have a plastic handle. Better yet, buy ones made of organic cotton – not so much for your health, but for the environmental benefits of organic agriculture or just find a reusable alternative!
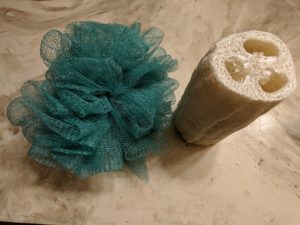
Natural loofah (vs. plastic loofah)
Natural loofah (right) vs. plastic loofah (left)
Traditional loofahs are made from plastic and must be thrown away, ideally after about 1 month. Natural loofahs are actually made from a vegetable! They can be composted at the end of their lifespan. You can even grow your own!
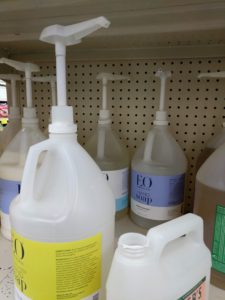
Refill soap containers (vs. buying new containers)
Liquid soap in bulk vs. liquid soap in individual containers
If you have a store that sells liquid soap in bulk, take advantage of it! Bring your own container, such as an empty soap refill container that you already used. This doesn’t completely eliminate plastic, but it does allow you to reuse it if you just can’t make the switch to bar soap.
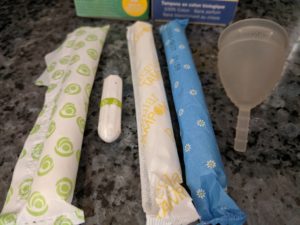
Menstrual cup or organic cotton tampon (vs. tampons with plastic applicator)
From the right: Menstrual cup, organic tampons without plastic applicator, organic tampon with plastic wrapper and no applicator, vs. a conventional tampon with plastic wrapper and plastic applicator.
Menstrual cups are a tampon alternative that can be reused for years. You can even leave it in for up to 12 hours! They are usually made of silicone or latex rubber, so be sure to buy a 100% silicone one if you have a latex allergy. There are also other reusable options such as period underwear and reusable pads.
Menstrual cups may not work for all people or all situations. If you use tampons, aim for ones that don’t use a plastic applicator. Take it a step further and choose one that is made of 100% organic cotton. Tampons are regulated as medical devices, which may make them sound safer. However, this actually means that manufacturers are not required to disclose all ingredients. Tampons and pads are typically made of cotton, rayon, or polyester, and can contain other chemicals, including dioxins, pesticide residues, and “fragrance.” Better tampon options include ones made of 100% organic cotton, ideally without the plastic wrapper.
This post will be updated with other plastic swaps, such as simple swaps in the kitchen. What plastic swaps do you recommend?
Carrot dogs are a plant-based alternative to hot dogs, but thanks to a spice-full marinade, just as flavorful! They may sound a little weird, but if you think about what a hot dog is, is a carrot really weirder? Like hot dogs, these carrot dogs can be grilled or cooked on the stove. This recipe can be gluten-free if you use gluten-free tamari and hold the bun or use a gluten-free bun.
They can be prepared ahead of time for camping – steam the carrots, put them in an airtight container in the marinade, and bring them to your campsite in a cooler with plenty of ice. Grill them ideally within 24 hours of putting them in the marinade, otherwise they may start to break down or get mushy. You can leave out the liquid smoke if you are going to be grilling them or cooking them over a fire.
A flavorful marinade helps make carrots take on that classic hot dog taste without the meat. Make this recipe at home on the stove or grill, or bring them on your next camping trip and roast them over a camp fire!
Course
Main Course
Cuisine
American
Keyword
grill, hot dog, plant-based, vegan, vegetarian
Prep Time10minutes
Cook Time10minutes
Total Time20minutes
Servings6
Ingredients
6large carrots
1cupvegetable broth
1/4cupapple cider vinegar
1/4cupreduced sodium tamarior soy sauce
1tablespoon brown or yellow mustard
4teaspoonssmoked paprika
2teaspoongarlic powder
2teaspoonblack pepper
1/2teaspoonliquid smokeoptional
6hot dog buns, ideally whole grain
Instructions
Cut ends off of carrots to be about the same length as hot dog bun. Peel carrots. Optional: round off ends with peeler to resemble hot dog.
Steam carrots until slightly tender, or when a sharp knife can pierce them, 12-15 minutes, depending on thickness.
Meanwhile, combine remaining ingredients except buns to make the marinade.
Place carrots into marinade and refrigerate overnight, up to one day (8-24 hours).
Heat grill or skillet with 1 tablespoon oil to medium high heat, remove from marinade, and cook until slightly charred, turning twice, about 5-8 minutes. Serve on a hot dog bun with any desired toppings, such as mustard or chili.
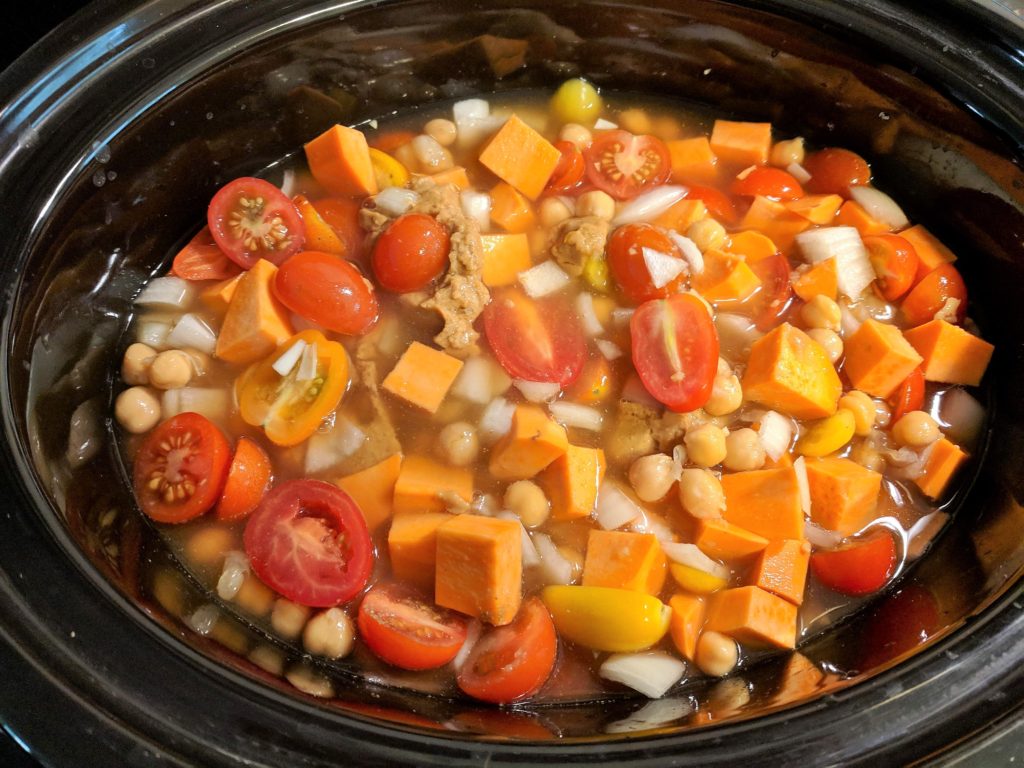
I wanted to share this delicious recipe from Sweet Peas and Saffron. Serve it on its own, or with crusty bread or cooked grains (millet, quinoa, brown rice, etc.). The original recipe is made in a slow cooker, but I experimented with it to cook it on the stovetop. Here are the changes I made:
Cooked it on the stovetop in a stock pot.
Heated 1 tablespoon canola oil over medium-high heat to saute the onions until light brown, about 5 minutes.
Added remaining ingredients (except peanuts) and cooked until sweet potatoes were tender and the stew was thickened, 20-30 minutes.
Used 8 chopped plum tomatoes (when in season) instead of canned tomatoes
Used 1 bunch chopped collard greens (or kale) instead of spinach and added along with remaining ingredients.
There are many variations of this recipe in various regions of African. Some are a thinner soup, but this one is a thicker stew. Other ingredients sometimes used include okra, chicken, or beef. This version is plant-based and can also be made in the slow cooker – just cook all ingredients except greens and peanuts, reducing broth to 3 cups, for 8 hours on low. After cooking, garnish with peanuts. It can also be frozen after cooking.
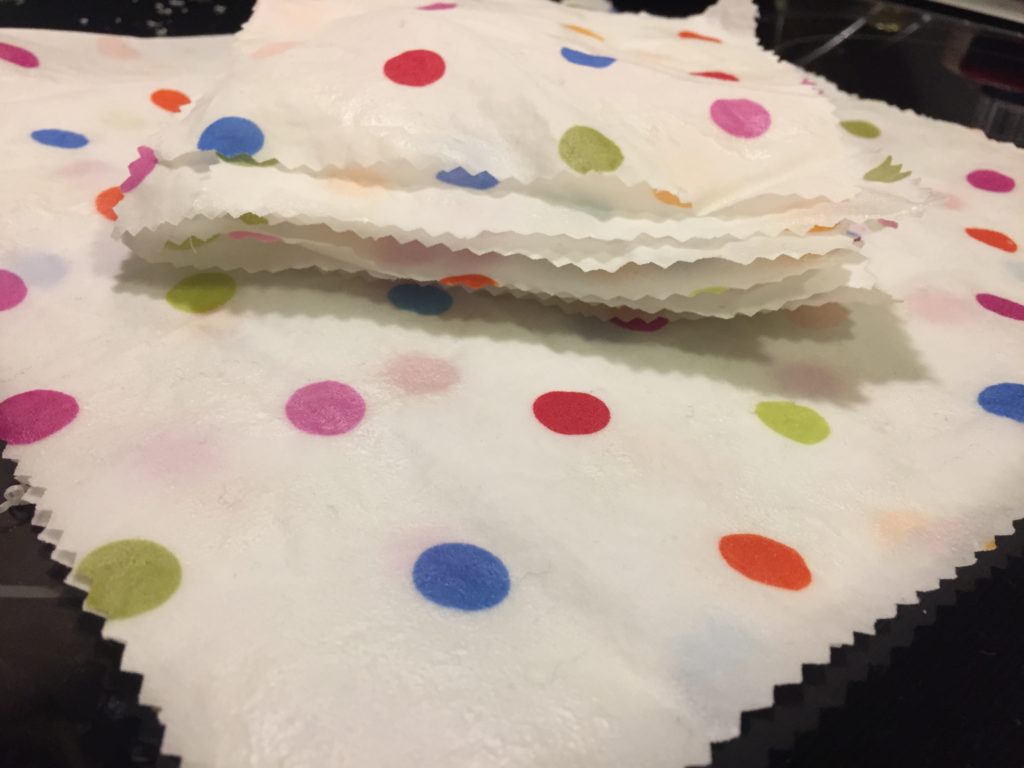
Beeswax wraps are not edible, but they are an eco-friendly alternative to plastic wrap. These wraps sell in some stores for around $18 for a 3-pack. You can make many more wraps for the same cost or less, plus you can choose other fabric designs and shapes. Use these wraps to cover bowls or cups, wrap up a sandwich, or store leftover cut produce (such as a cucumber) or cheese. Use a string or rubber band to hold it together, or sew a button and thread onto one end so that the string can wrap around the button to hold it closed.
When cared for properly, they can last up to a year. Once they are worn out, you can either re-wax them, or cut them up and compost them.
Care Instructions:
Only wash with cold water and mild soap (such as castile soap). Hot water will melt the wax.
Do not use for raw meat since they cannot be washed with hot water
Store rolled rather than folded – folding creates more cracks
Materials Tips:
Fabric – You can reuse old fabric such as a t-shirt, bed sheets, or curtains, but the fabric must be thin and natural, such as cotton or linen, rather than thick or synthetic, such as polyester or canvas. Just make sure you wash it with soap and very hot water first.
Beeswax – You may be able to find local beeswax in a block, or you may find it at a craft store in beads.
Alternative Method:
You can also use an iron instead of an oven, but you may have to designate the iron and ironing board for wax projects only. If the wax sticks to the iron or ironing board, it will stick to your clothes and will not come off!
To use this method – place the fabric and beeswax between two sheets of parchment paper. Iron over it on low heat, moving the iron constantly, until wax melts, or about 1 minute.
This recipe is NOT edible - it is a plastic wrap alternative that you can make at home and reuse countless times! It makes a great gift.
Ingredients
Beeswax
Clean fabric
Pine rosin(optional)
Jojoba oil(optional)
Instructions
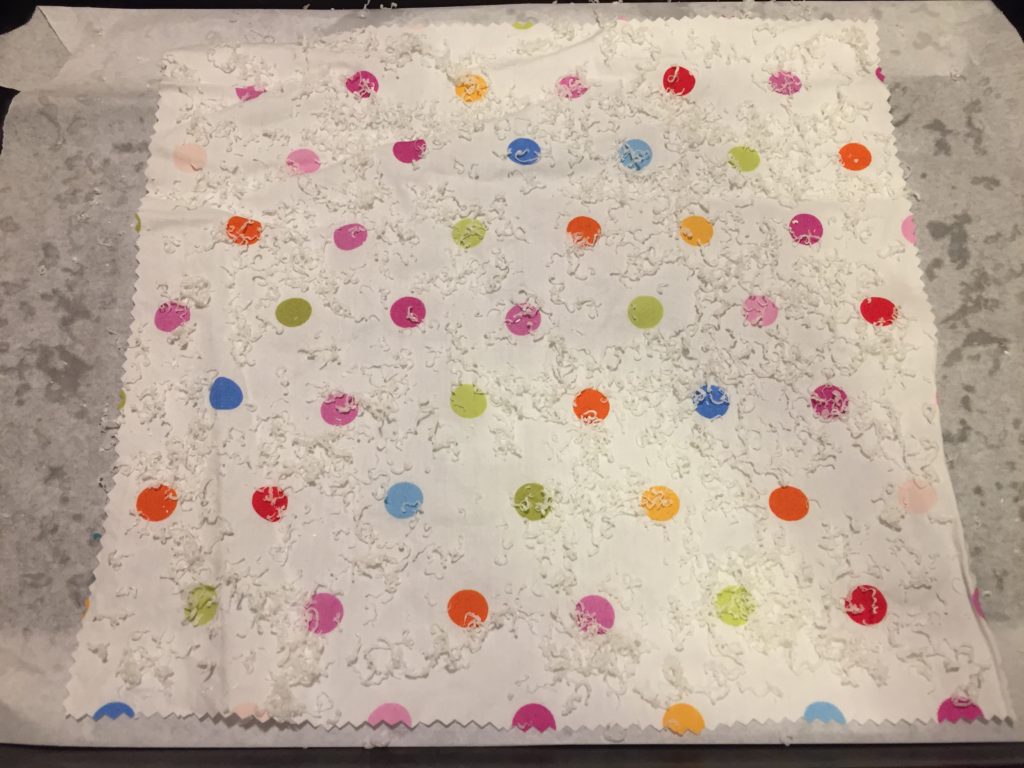
Preheat oven to its lowest setting, or 200°F. Optional: line a baking sheet with foil to ensure that no wax sticks to it.
Grate beeswax using grater unless you bought it in beads. A cheese grater with large holes works best.
Use pinking sheers to cut fabric into desired shape and size – this will reduce fraying. Try 8” or 11” squares that but make sure they fit on the baking sheet.
Cover the baking sheet with parchment paper. Place a piece of fabric on top and sprinkle with grated beeswax. Start with a light sprinkling, about 2 teaspoons – you can always add more. If using, add a very light sprinkling (1/4 teaspoon) pine rosin and a few drops of jojoba oil.
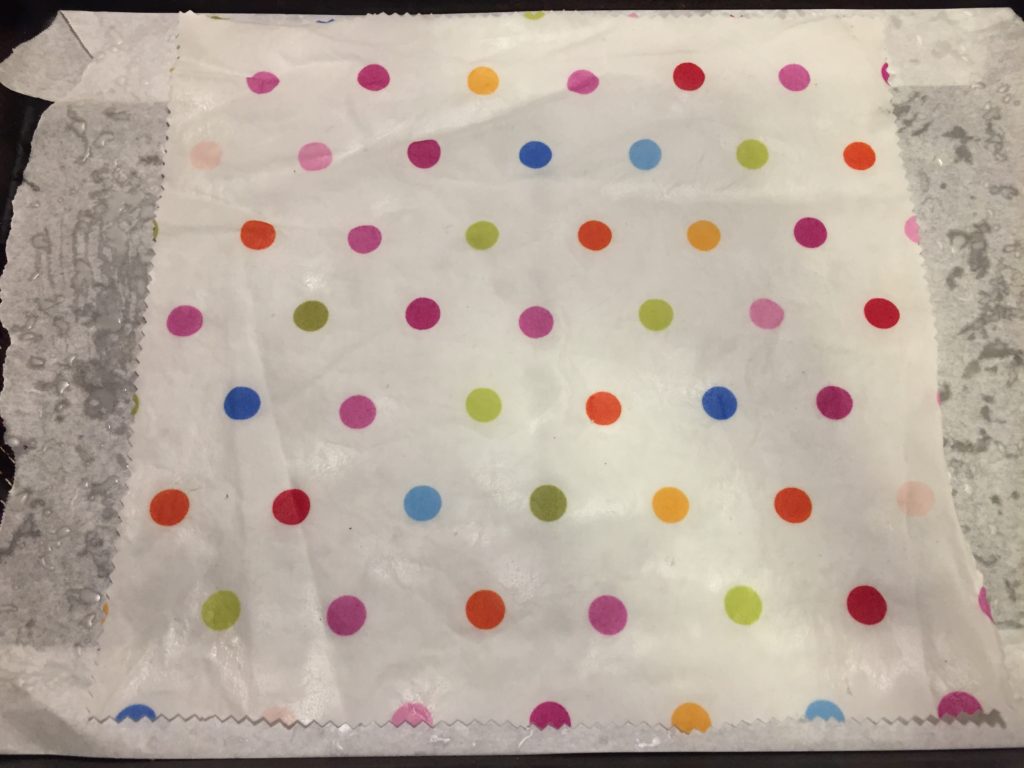
Place in the oven and let it melt for 5-10 minutes. One the wax has melted, use the brush to cover the fabric evenly. If there are any spots that aren't covered (the fabric will appear lighter in color), add more wax and repeat this step.
Let fabric cool for a minute, then peel it off the parchment paper. Wave it around for a few seconds and the wax will harden. Set aside to allow to fully dry.
Repeat with remaining fabric.
When finished, tear up parchment paper and compost it. Dip grater into a pot of boiling water to soften wax that is stuck to it, then wipe down.