June 8 is World Ocean Day. Although it’s a day late, let’s talk about ways to reduce our use of plastic to help protect our oceans, but also to protect animals (land animals, sea animals, and humans)!
Here are some of the many issues with plastic:
-
- It is not biodegradable. It may break down into smaller and smaller pieces, but it never goes away. Once they become “microplastics,” they are nearly impossible to collect.
- We are in a recycling crisis. China no longer accepts most recyclables, so much of it ends up as trash. A small percentage of plastic is recycled anyway, about 8% in the US.
- Even when plastics are recycled, it can usually only be done once as they are typically turned into another product that is not recyclable.
- Plastics kill animals by causing entanglement, starvation, strangulation, and even pierced organs.
- Production of plastic is increasing and is expected to double by 2050.
- Plastics are made from fossil fuels, a major source of pollution and contributor to climate change.
- Plastics contaminate our food chain. Even plankton consume microplastics, which then works its way up the food chain.
Video by New Scientist
What can we do about it? We can start by reducing our use of single use plastics. For the next day or so, start taking note of the plastics around you. You will realize that they are everywhere, and there are many simple replacements that maybe you just haven’t considered before. The good news is that we’ll lay out a few easy swaps for your consideration!
Bathroom Plastic Swaps
Bar soap (vs. liquid soap or shower gel)
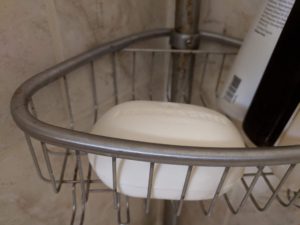
A study on personal hygiene products showed that people use about 6 times more liquid soap than bar soap by weight. On top of that, it takes about 5 times more energy to produce liquid soap. Additionally, liquid soap contains a lot of water, increasing the carbon footprint of shipping. Aim for bar soap that has minimal (if any) packaging. You can even find ratings of soaps at EWG, including ones that are EWB Verified, meeting their strictest health standards.
Cotton swabs with paper/cotton sticks (vs. cotton swabs with plastic sticks)
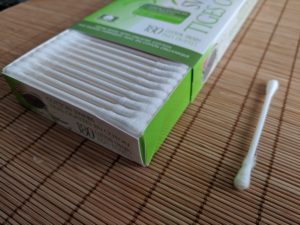
Leave the wax in your ears! If you need to use cotton swabs for other purposes (makeup, cleaning, arts and crafts), aim for ones that don’t have a plastic handle. Better yet, buy ones made of organic cotton – not so much for your health, but for the environmental benefits of organic agriculture or just find a reusable alternative!
Natural loofah (vs. plastic loofah)
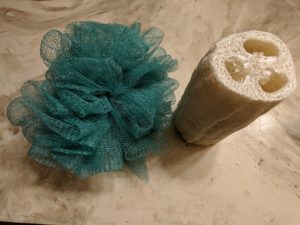
Traditional loofahs are made from plastic and must be thrown away, ideally after about 1 month. Natural loofahs are actually made from a vegetable! They can be composted at the end of their lifespan. You can even grow your own!
Refill soap containers (vs. buying new containers)
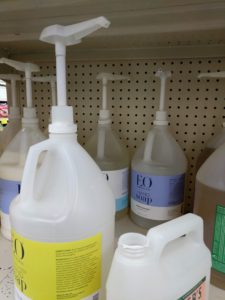
If you have a store that sells liquid soap in bulk, take advantage of it! Bring your own container, such as an empty soap refill container that you already used. This doesn’t completely eliminate plastic, but it does allow you to reuse it if you just can’t make the switch to bar soap.
Menstrual cup or organic cotton tampon (vs. tampons with plastic applicator)
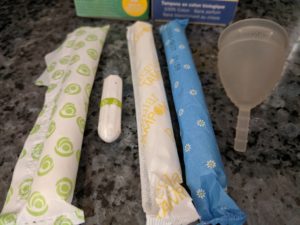
Menstrual cups are a tampon alternative that can be reused for years. You can even leave it in for up to 12 hours! They are usually made of silicone or latex rubber, so be sure to buy a 100% silicone one if you have a latex allergy. There are also other reusable options such as period underwear and reusable pads.
Menstrual cups may not work for all people or all situations. If you use tampons, aim for ones that don’t use a plastic applicator. Take it a step further and choose one that is made of 100% organic cotton. Tampons are regulated as medical devices, which may make them sound safer. However, this actually means that manufacturers are not required to disclose all ingredients. Tampons and pads are typically made of cotton, rayon, or polyester, and can contain other chemicals, including dioxins, pesticide residues, and “fragrance.” Better tampon options include ones made of 100% organic cotton, ideally without the plastic wrapper.
This post will be updated with other plastic swaps, such as simple swaps in the kitchen. What plastic swaps do you recommend?