Tag Archives: fall

Stuffing Stuffed Pumpkin

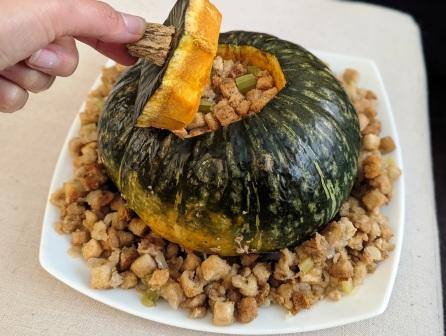
For a fun way to serve stuffing, stuff it into a pumpkin! Feel free to use another stuffing recipe of your choice. Serve with gravy.

Stuffing Stuffed Pumpkin

Course Side Dish
Cuisine American
Keyword Fall, holidays, pumpkin, Stuffing, Thanksgiving, vegan, vegetarian
Total Time 1 hour 30 minutes
Servings 8

Ingredients

  • 1 medium kabocha squash 3-4 pounds
  • 1/2 teaspoon salt
  • 12 ounces seasoned stuffing mix
  • 1/4 cup vegan butter or use regular butter if you prefer
  • 1 medium yellow onion, finely diced about 1 cup
  • 2 stalks celery, finely diced about 1 cup
  • 2 tablespoons corn starch
  • 2 1/2 cups vegetable broth
  • 1 tablespoon olive oil

Instructions

  1. Preheat the oven to 350°F.

  2. Wash the outside of the pumpkin. Cut a round opening in the top of the pumpkin by using a sharp knife to make incisions that eventually connect to create an opening. If necessary, use a butter knife to gently pry the top loose. Scoop the seeds and stringy parts of the pumpkin out. Sprinkle salt on the inside.

  3. Place the pumpkin and the lid on a baking sheet and bake for 30 minutes. Remove from oven and let cool. Reserve the baking sheet.

  4. In a Dutch oven or stock pot, heat butter over medium heat. Add onion and celery and cook for 5 minutes or until tender-crisp, stirring occasionally.

  5. Add the stuffing mix to the pot and stir.

  6. In a medium bowl, mix the broth and cornstarch well. Slowly drizzle over the stuffing mixture and toss. Continue adding more broth slowly until the bread is just barely soaked through.

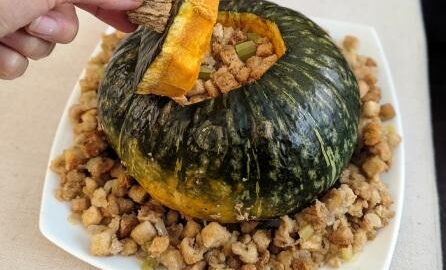
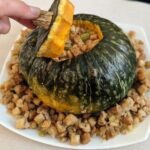
  7. With the pumpkin on the reserved baking sheet, fill it with stuffing, pressing down gently to fill the space. Place the pumpkin lid on the baking sheet. Grease a loaf pan with olive oil (or butter) and fill with any remaining stuffing. Cover loaf pan with foil.

  8. Bake the stuffed pumpkin, lid, and extra stuffing for 30 minutes. Remove foil and pumpkin lid, setting aside, then continue baking for 10 minutes or until top of stuffing is lightly crisp.

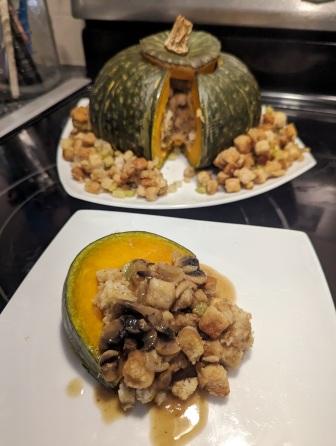
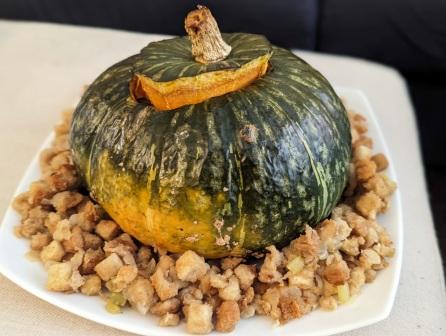
  9. Move pumpkin to serving plate and put lid on top. Serve extra stuffing on the side or surround the pumpkin with it on the serving plate. Place the pumpkin lid on top.

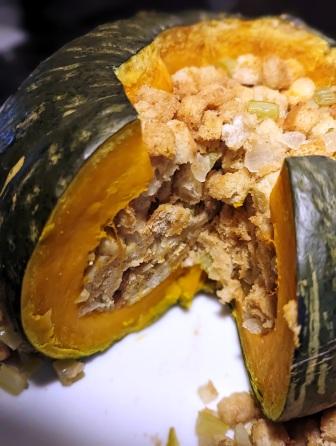
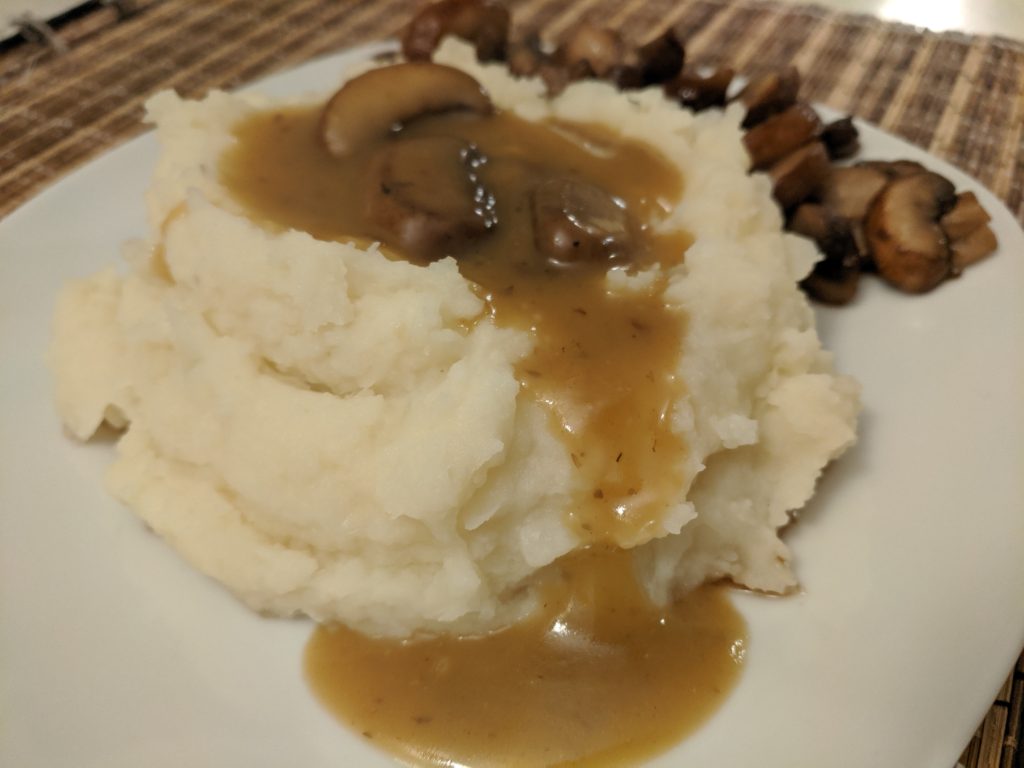
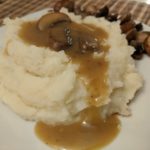
  10. Serve by cutting pumpkin into slices and serve with an extra scoop or two of stuffing. Serving suggestion: top with gravy once sliced.

Recipe Notes

  • Serve with gravy. 
  • Substitute another stuffing recipe if you’d like. 
  • You can fully cook the pumpkin and the stuffing separately if you prefer to have more control and make it a little easier to tell when the pumpkin is fully cooked. Spoon the stuffing into the pumpkin once cooked, gently pressing down to fill any gaps.

Skillet Lasagna

If you love the flavors of lasagna but don’t have the time or patience to assemble it, try skillet lasagna! The whole recipe is made in one pan in about 40 minutes. The tofu ricotta recipe is from Minimalist Baker. If you do not need this recipe to be vegan or dairy-free, you can replace the tofu ricotta (and steps to make it) with regular ricotta cheese. If you do need the recipe to be vegan, be sure to use pasta without egg (or other dairy products) rather than egg noodles. Fusilli is the closest shape to egg noodles. Substitute or add other veggies if you’d like, such as kale, roasted eggplant, or tomatoes.

Skillet Lasagna

Easy, nutritious, filling, and the flavors of lasagna but made in one pan! Vegetarian and can easily be made vegan.

Course Main Course
Cuisine Italian
Keyword dairy-free, dinner, easy, entree, mushrooms, one pan, pasta, vegan, vegetables, vegetarian, zucchini
Prep Time 10 minutes
Cook Time 30 minutes
Total Time 40 minutes
Servings 6

Ingredients

  • 12 ounce container extra firm tofu drained
  • juice of 2 lemons
  • 1/4 cup extra virgin olive oil
  • 3 tablespoons nutritional yeast
  • 1/2 cup fresh basil
  • 1 tablespoon dried oregano
  • 1/2 teaspoon salt or to taste
  • 1/2 teaspoon black pepper
  • 1/2 medium yellow onion, diced
  • 3 cloves garlic, minced
  • 4 cups mushrooms, sliced
  • 6 ounces egg noodles (or fusilli to make vegan) 3 cups dry
  • 1 jar marinara sauce (about 28 ounces)
  • 2 zucchini, chopped into 1/2 inch chunks about 2 cups
  • 1 cup baby spinach

Instructions

  1. To make tofu ricotta: In a food processor, puree tofu, lemon juice, 3 tablespoons olive oil, nutritional yeast, oregano, salt and pepper. Pulse basil until it is distributed but not completely pureed. Set aside.

  2. In a large skillet, heat remaining 1 tablespoon olive oil over medium high heat. Add onions and cook until they begin to brown, about 5 minutes. Add garlic and cook until fragrant, about 30-60 seconds. Add mushrooms and cook until they begin to cook down, about 3 minutes.

  3. Add marinara sauce, pasta, zucchini, spinach, and 1cup water. Stir together, then top with dollops of tofu ricotta. Cover, reducing heat to a simmer, until noodles are cooked, about 10 minutes. For whole wheat noodles, add an extra ½ cup water and 4-5minutes cooking time, or until noodles are al dente or cooked to your liking.

With spiralized zucchini and dairy-free mozzarella shreds
With dairy-free mozzarella shreds

Mashed Cauli-tatoes

This one pot recipe is so simple but so hearty. The 50/50 mixture of cauliflower and potatoes takes on the starchiness of the potatoes to create a rich and creamy consistency very similar to traditional mashed potatoes. There is no need to steam the cauliflower separately, simply place it on top of the potatoes while they boil and cover, essentially steaming it in the same pot! It is completely plant-based, simply replacing butter with olive oil and milk with a plant-based milk such as cashew.

Mashed Cauli-tatoes

A simple and hearty mixture of cauliflower and potatoes that rivals traditional mashed potatoes! 

Course Side Dish
Cuisine American
Keyword comfort food, plant-based, vegan, vegetables, vegetarian
Prep Time 15 minutes
Cook Time 15 minutes
Total Time 30 minutes

Ingredients

  • 5 cups potatoes, peeled and chopped ideally organic, about 2 pounds
  • 5 cups cauliflower florets 1 medium head
  • 3 tablespoons olive oil or non-dairy butter
  • 1/2 cup plain and unsweetened cashew or other plant milk
  • 1/2 teaspoon salt or to taste
  • 1/2 teaspoon black pepper

Instructions

  1. Place potatoes in a stockpot and cover with water and a lid. Bring to a boil over medium-high heat and cook until they begin to soften, about 5 minutes.

  2. Add cauliflower to the pot on top of the potatoes and cover. Continue cooking until a knife slides easily into the cauliflower and potatoes, about 10 minutes more, adding more water if necessary.

  3. Drain the cauliflower and potatoes, then mash with a potato masher or whisk. Add oil or butter and ¼ cup milk and continue mashing. Add salt and pepper to taste, and more milk if necessary to reach desired consistency. 


Curried Chickpea Salad

Curried Chickpea Salad - Guess Who's Cooking

This plant-based salad is very easy and full of flavor – great for a quick make-ahead lunch. It’s cool, creamy, crunchy, chewy, sweet, savory, and rich. It’s easy to keep the ingredients on hand and throw this recipe together anytime. You can easily double the recipe and use it throughout the week, switching up how you serve it – on a romaine boat as pictured above (our favorite because it’s crisp and refreshing), on a salad, in a pita or wrap, or on a sandwich. It’s a great lunch to bring to work or school because it doesn’t need to be reheated, making the (delicious) smell much milder.

Curried Chickpea Salad

This plant-based salad is very easy and full of flavor - great for a quick make-ahead lunch. It's cool, creamy, crunchy, chewy, sweet, savory, and rich.

Course Main Course
Cuisine American, Indian
Keyword Beans, Chickpeas, Curry, Lunch, pita, plant-based, Salad, sandwich, vegan, vegetarian
Prep Time 10 minutes
Total Time 10 minutes
Servings 4

Ingredients

  • 15 ounce can chickpeas, rinsed and drained or 1 3/4 cup cooked chickpeas
  • 1/2 cup toasted cashews
  • 1/4 cup vegan mayonnaise could use regular mayo if it doesn't need to be vegan or egg-free
  • 1-2 carrots, finely diced
  • 1/4 cup raisins ideally organic
  • 2 tablespoons mango chutney
  • 1 stalk green onion, sliced about 2 tablespoons
  • 2 teaspoons curry powder
  • 1/2 teaspoon salt or to taste
  • 1/2 teaspoon black pepper

Instructions

  1. Optional: To achieve a softer texture and a mixture that sticks together more, mash about half of the chickpeas with a fork, picking out the loose skins afterwards. Alternatively, put the chickpeas in a towel and rub with the towel to loosen the skins first, then discard the skins and mash. 

    You can also skip this step and leave the chickpeas whole.


  2. Combine all ingredients in a bowl and stir until well combined. 

  3. Serve on top of a salad, in a romaine lettuce boat, or in a sandwich or pita. 

Curried Chickpea Salad - Guess Who's Cooking
In a whole wheat pita with green leaf lettuce

Curried Chickpea Salad - Guess Who's Cooking
On a whole grain bread sandwich with spring mix

On a spring mix salad

Curried Chickpea Salad - Guess Who's Cooking
On a sandwich, stored in a reusable silicone bag


Chai Tea Mix

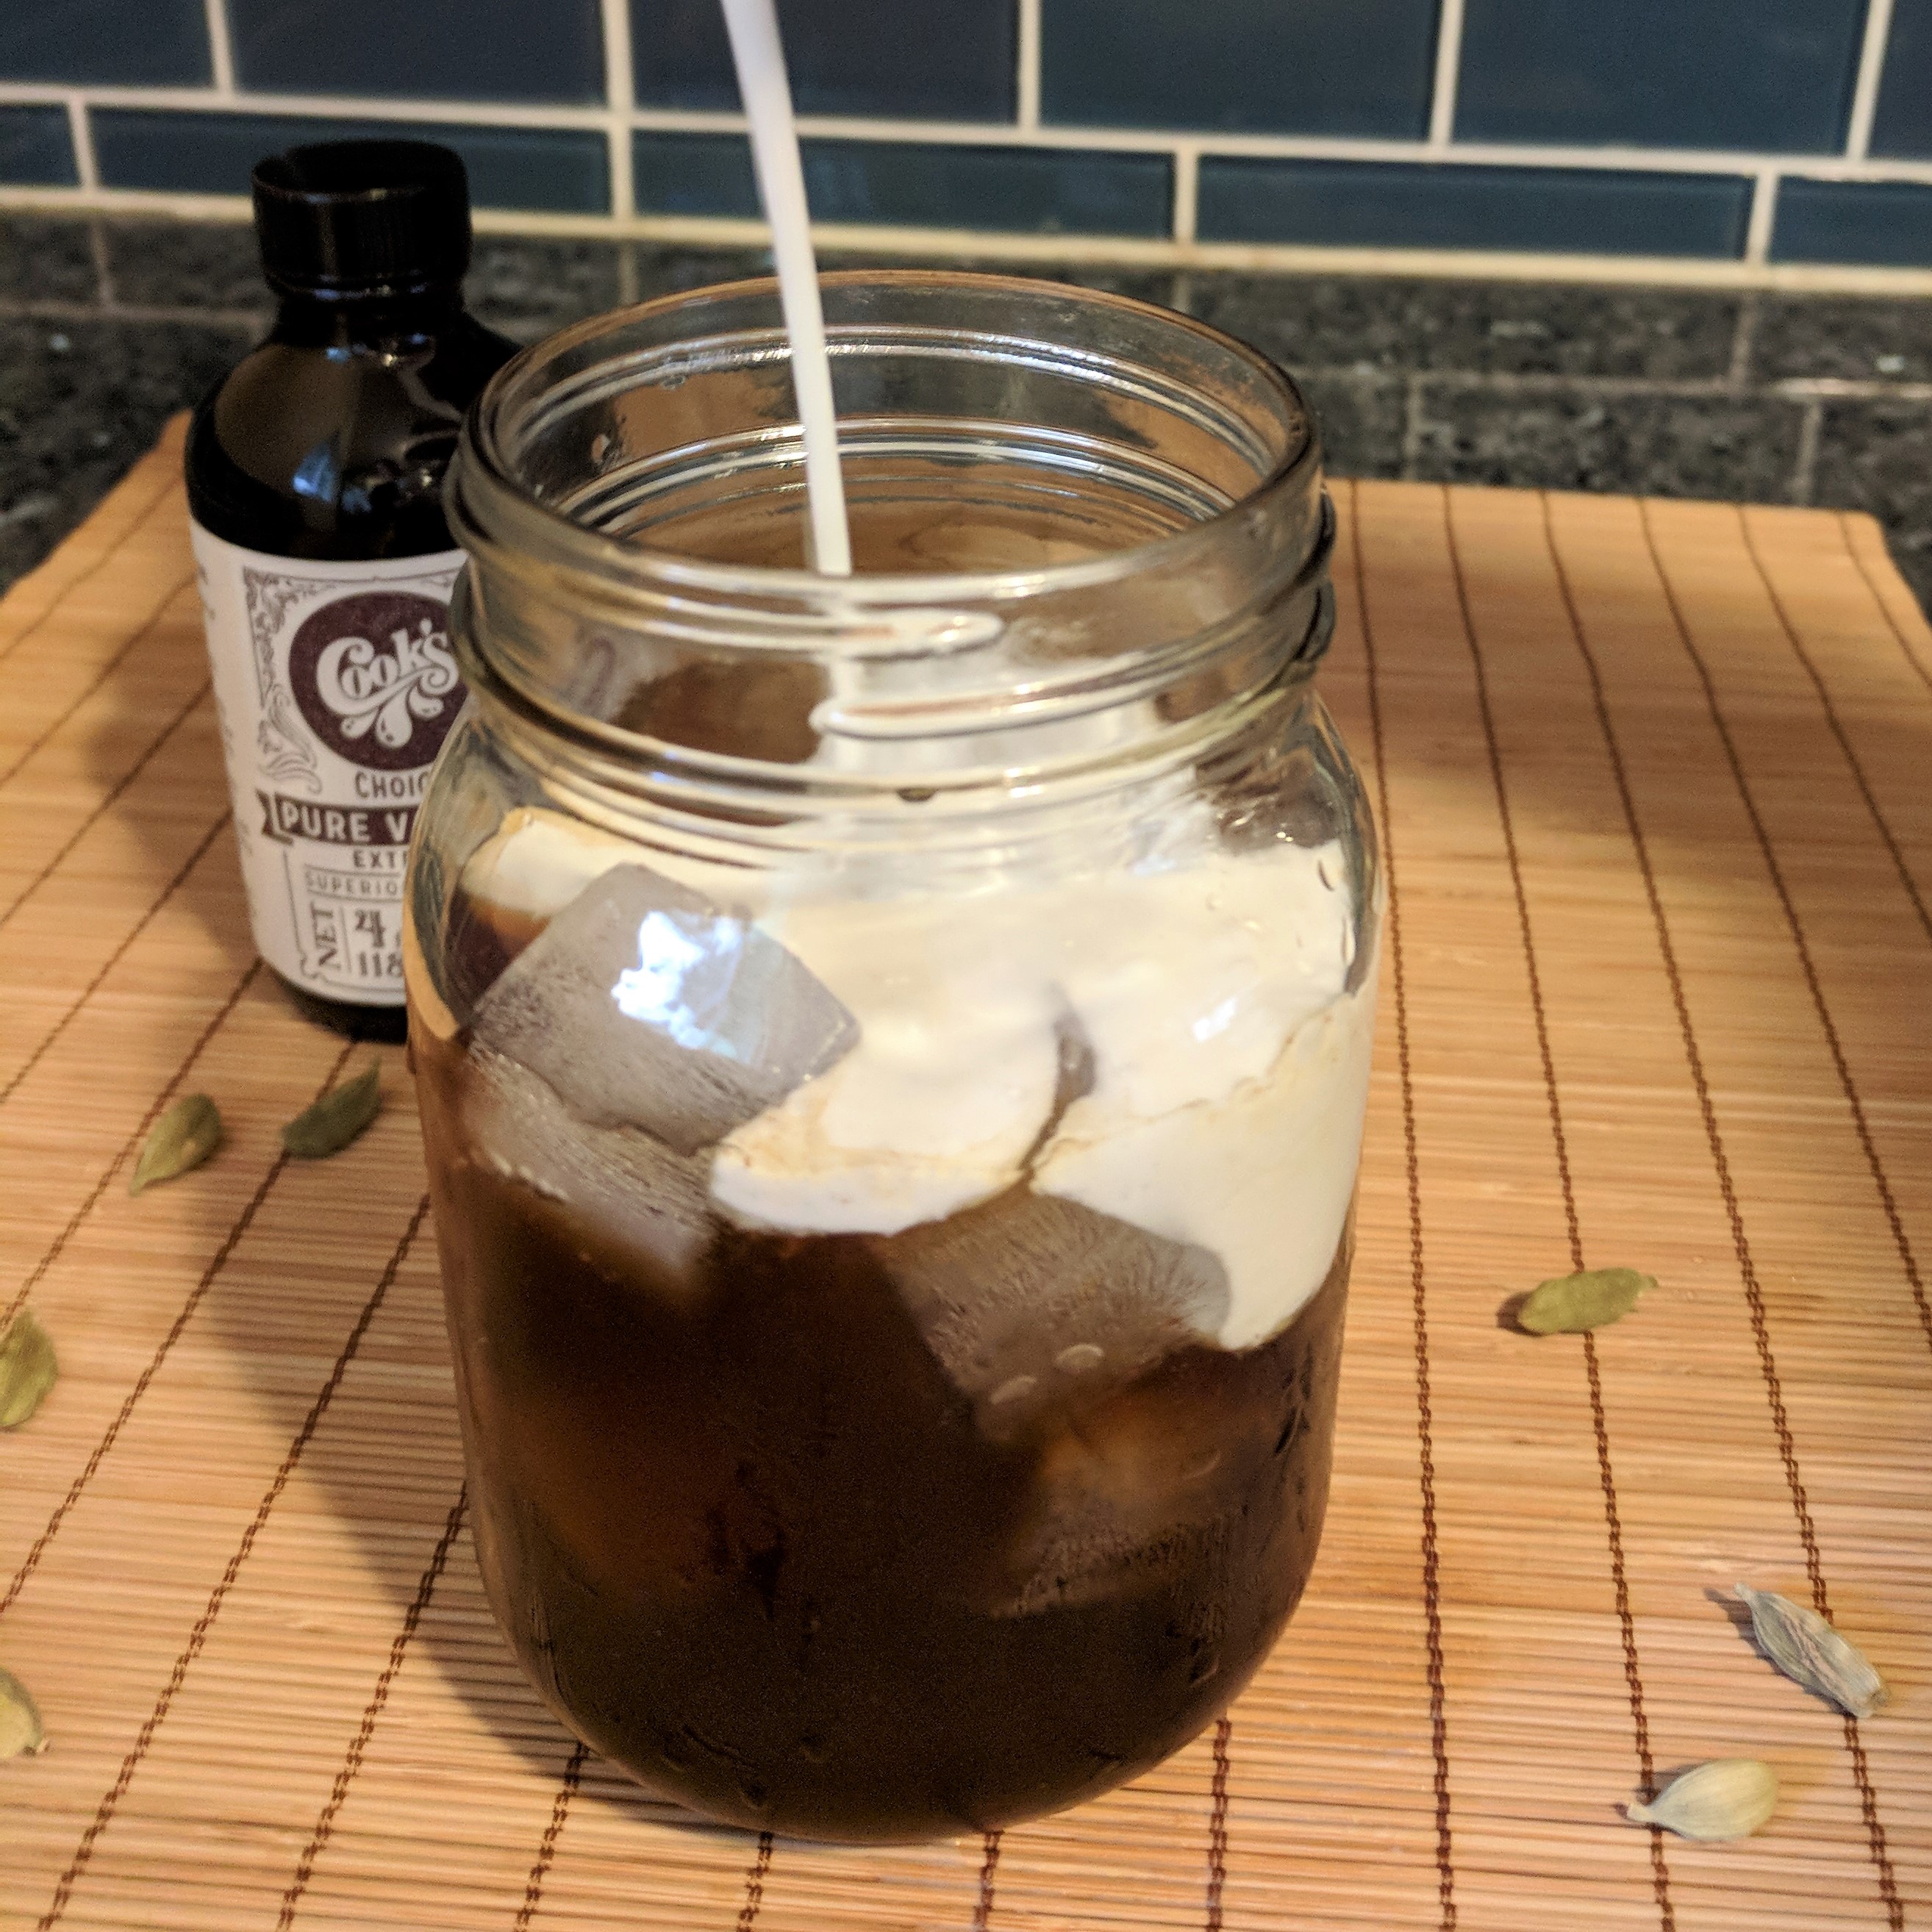
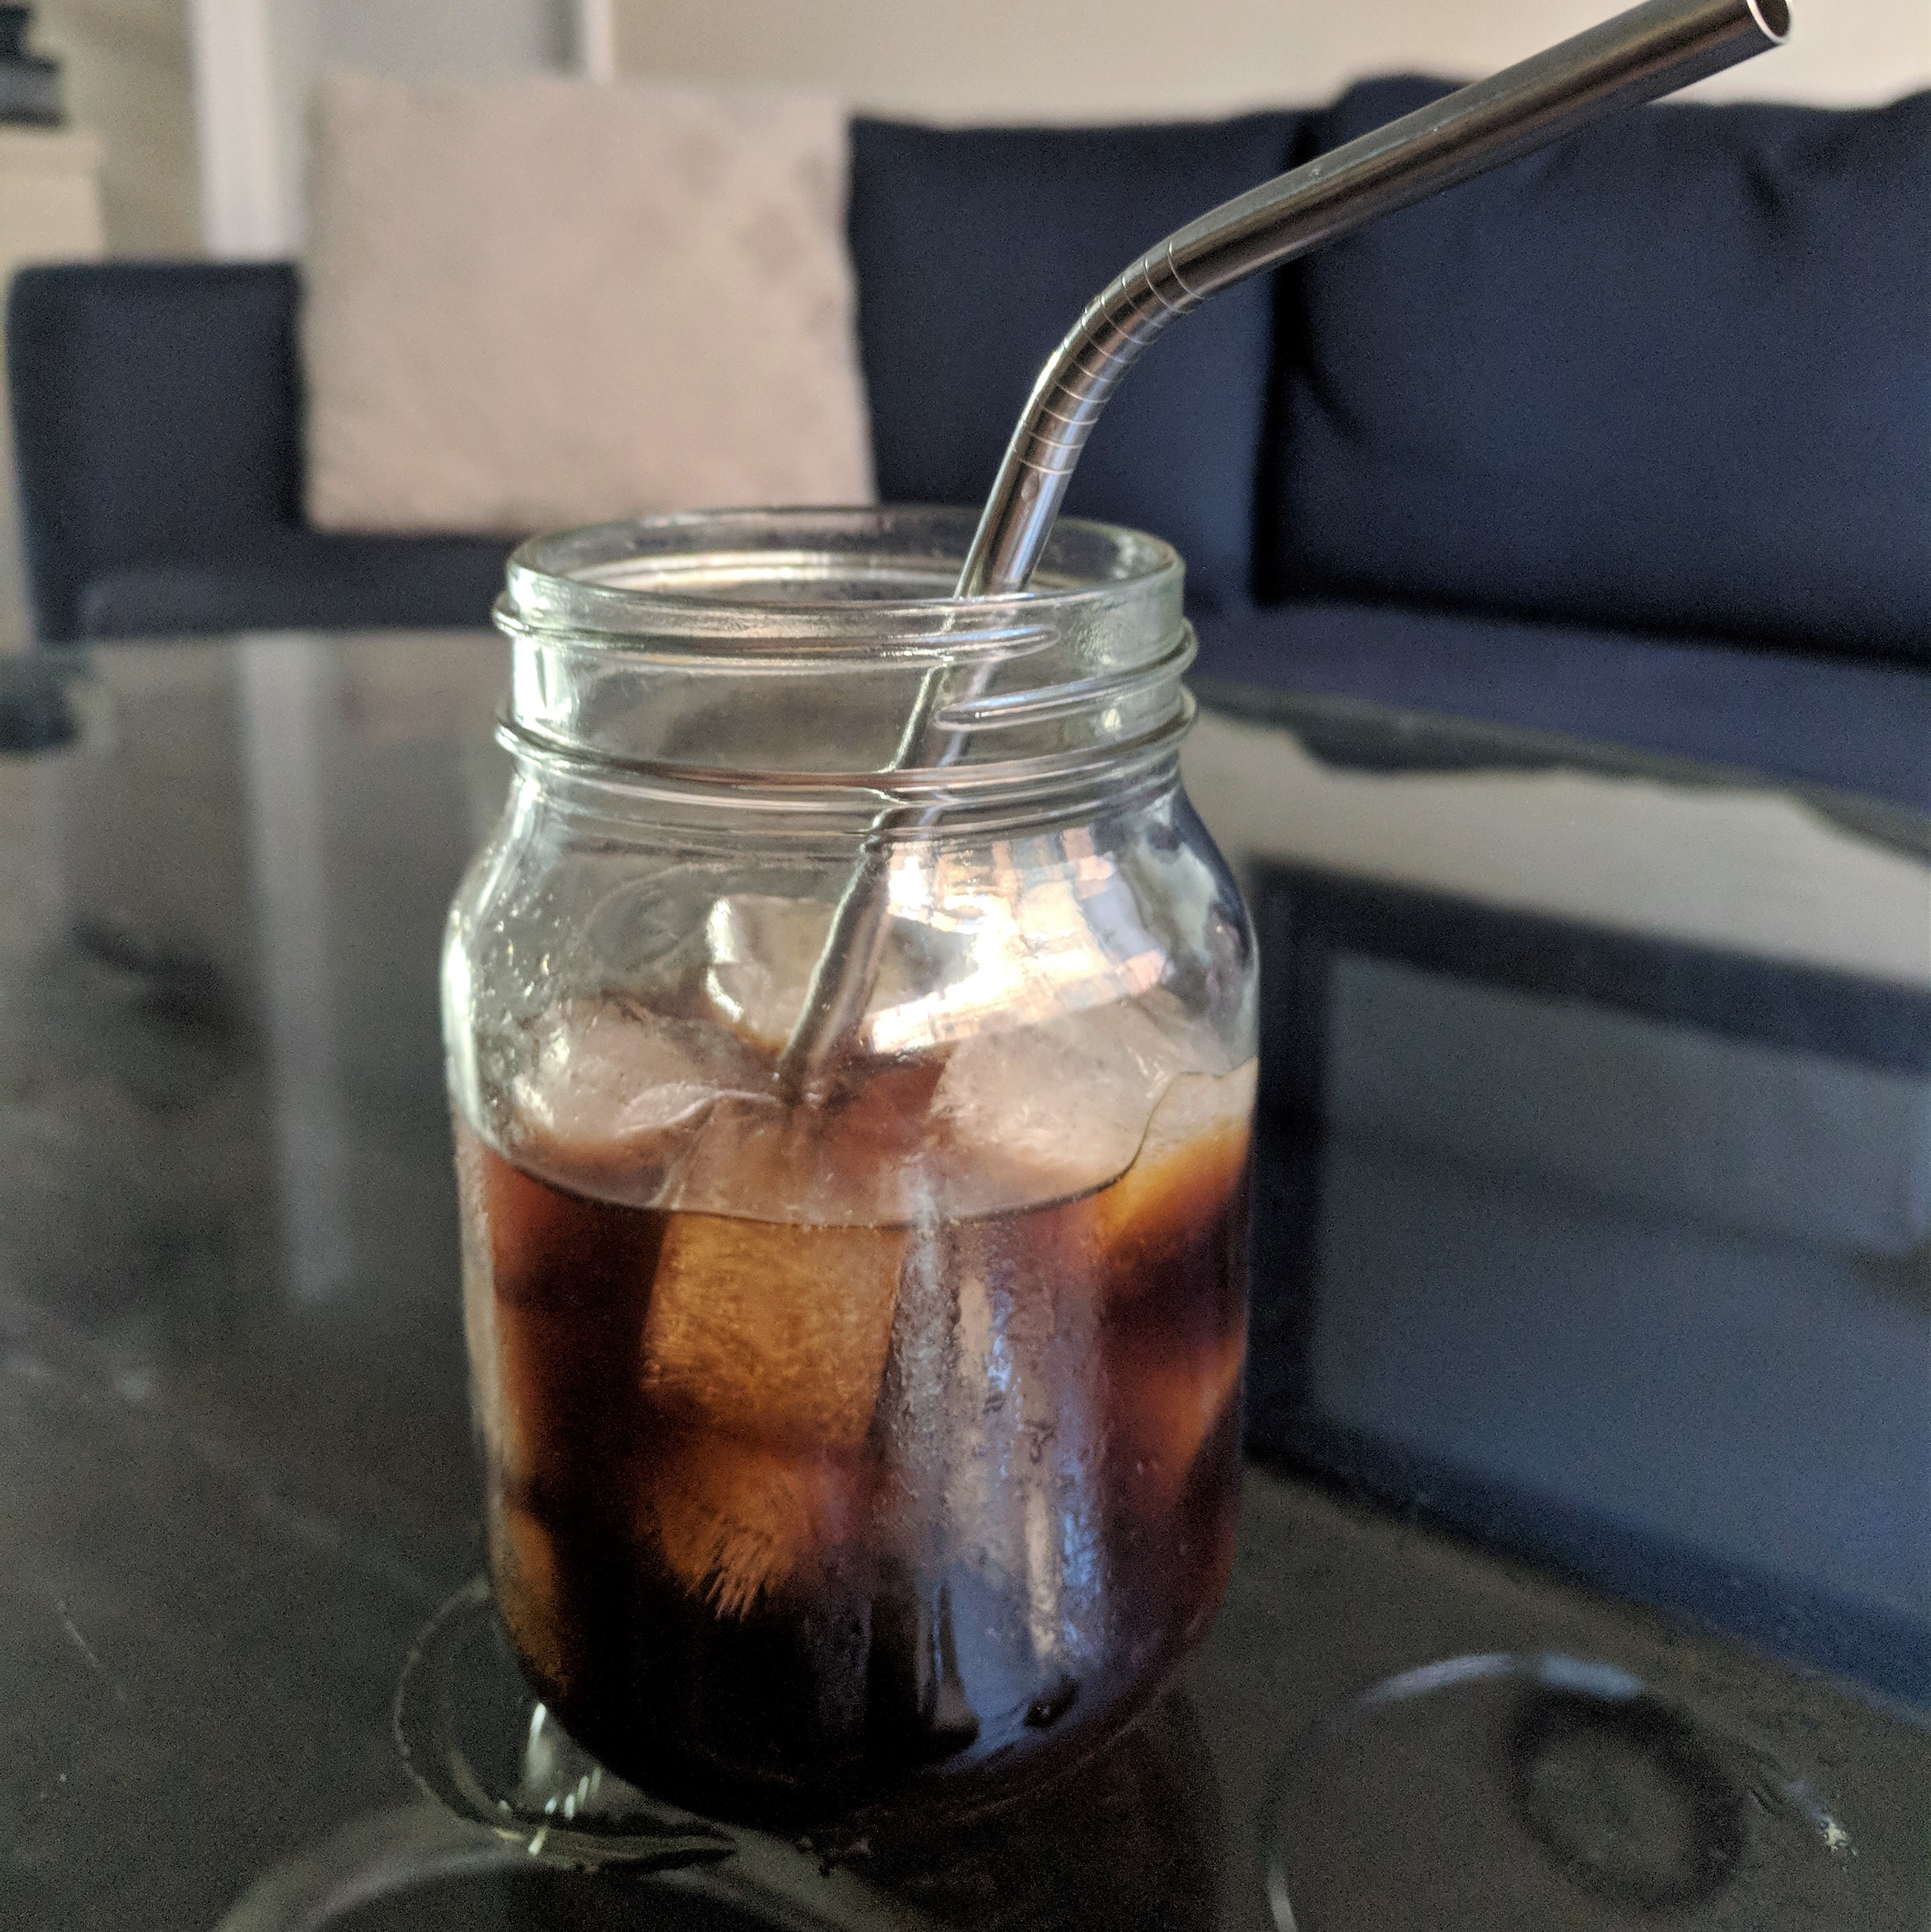
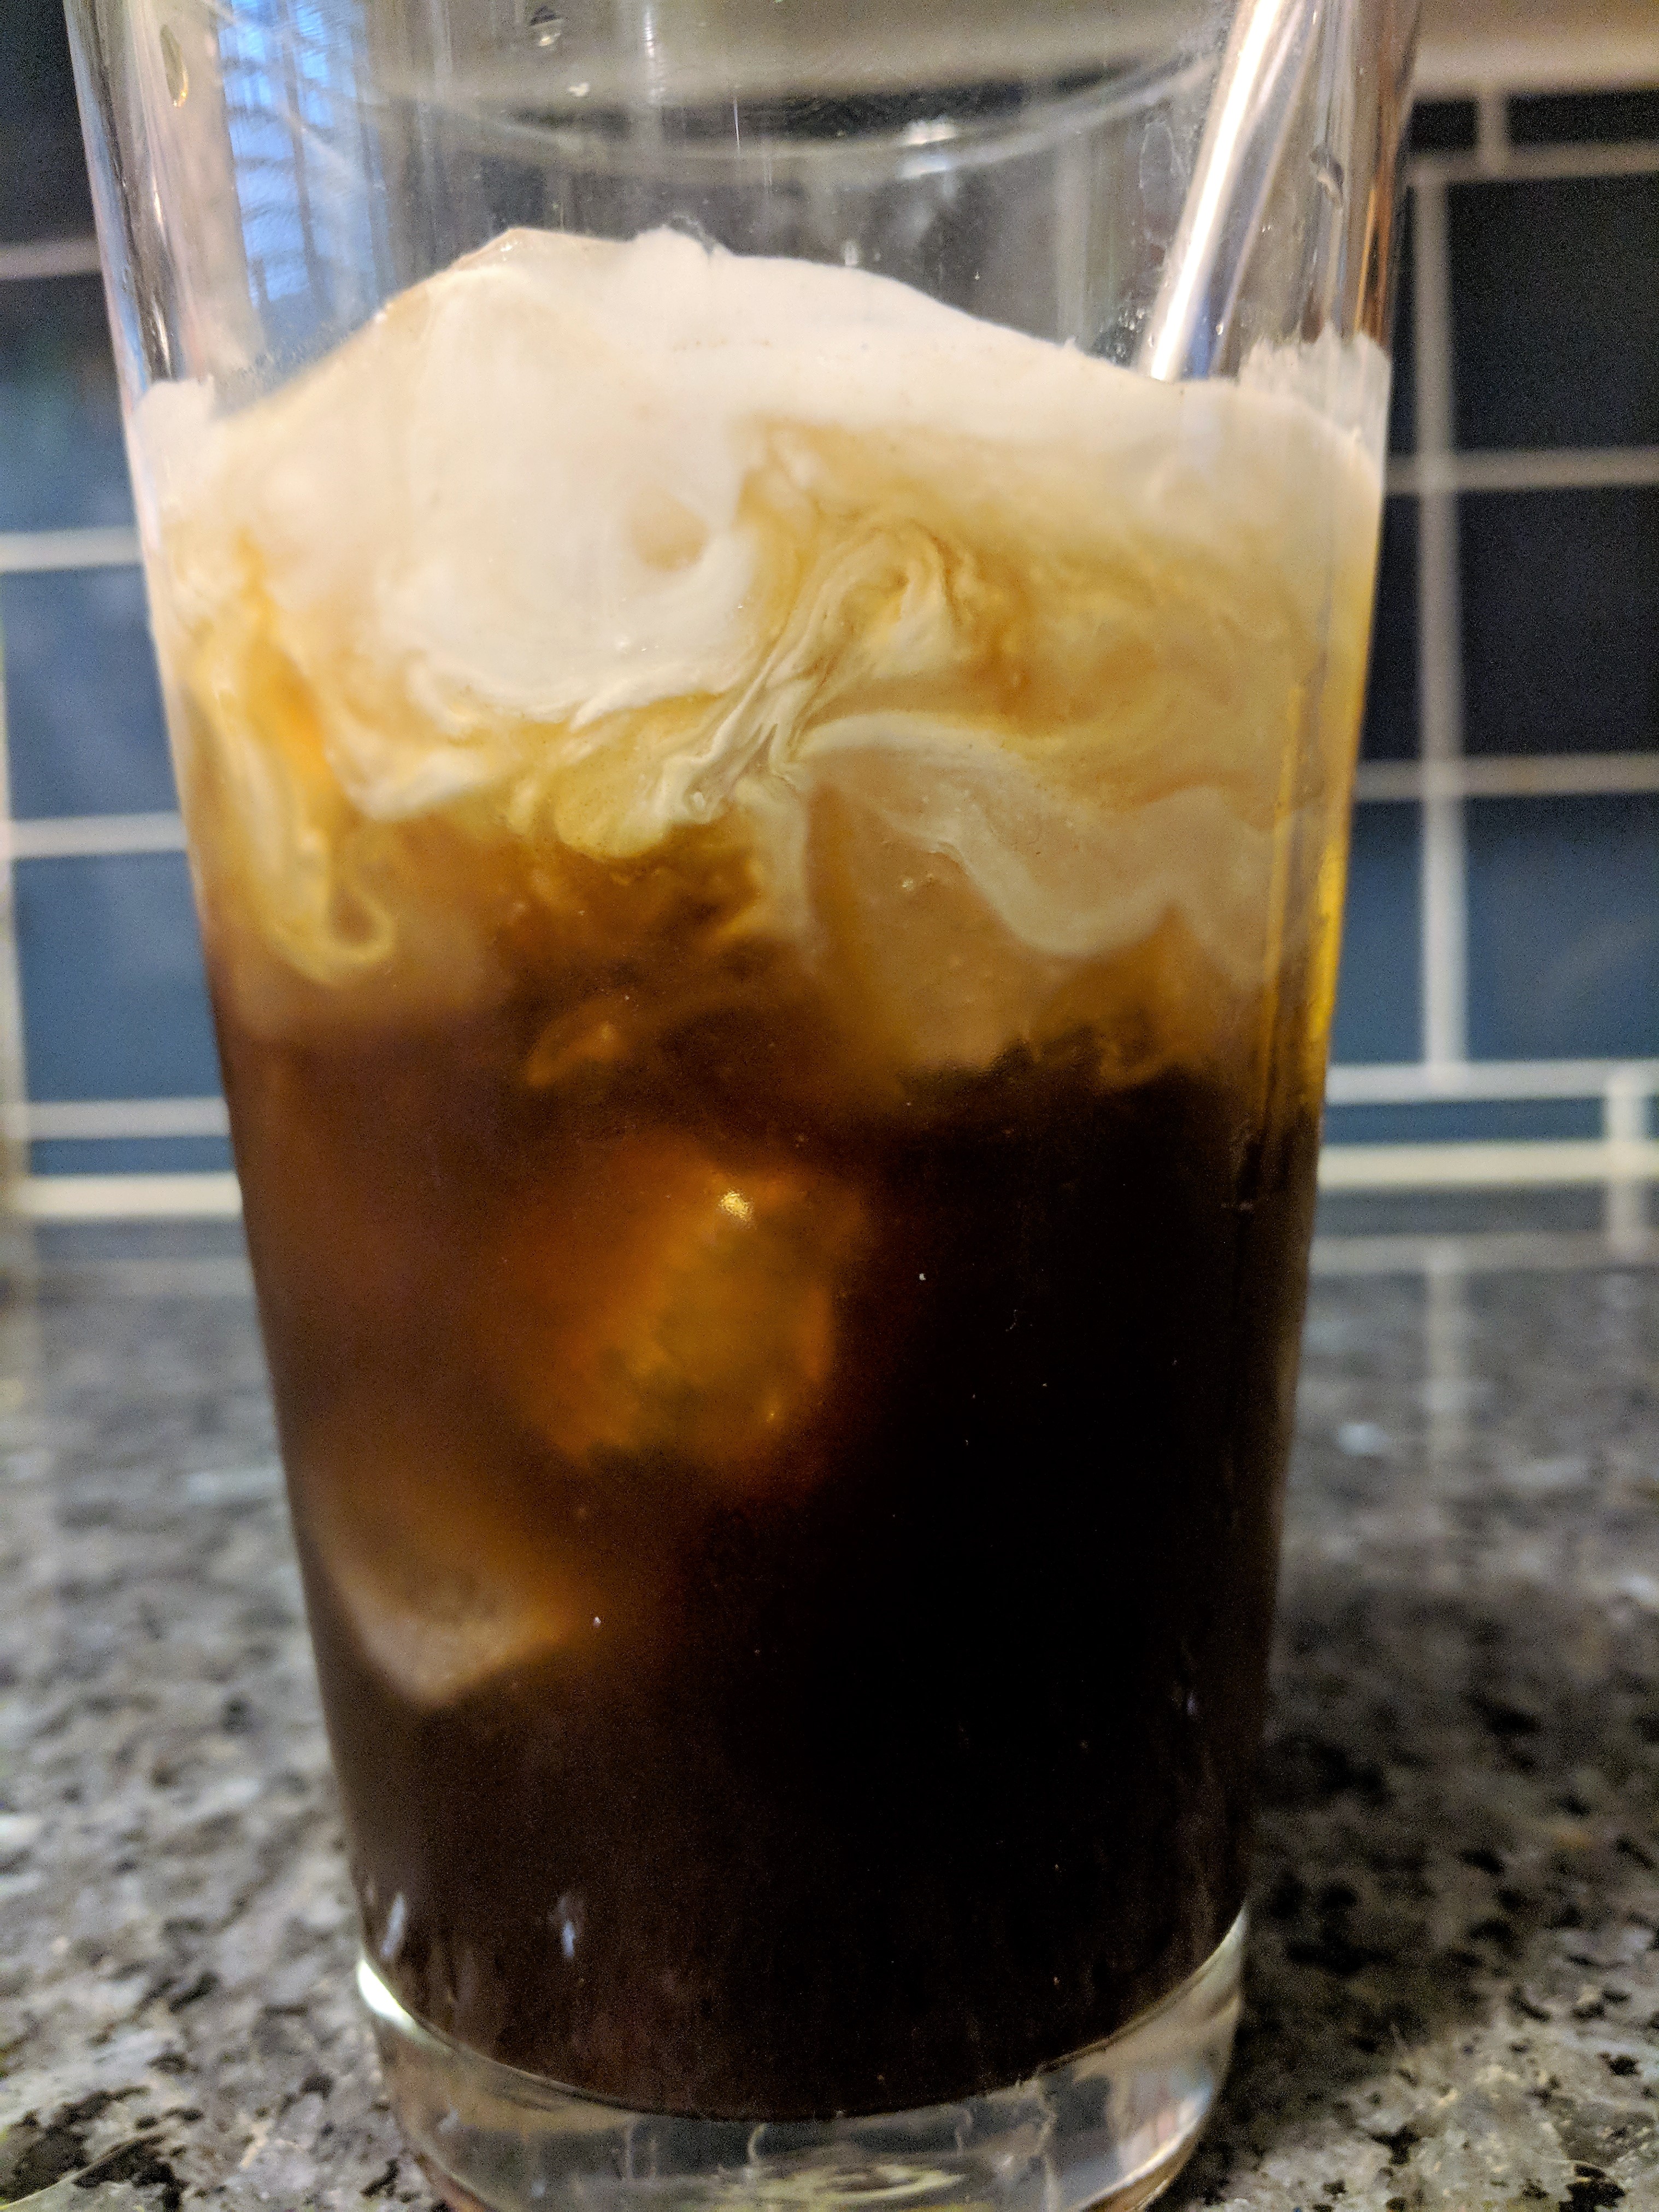
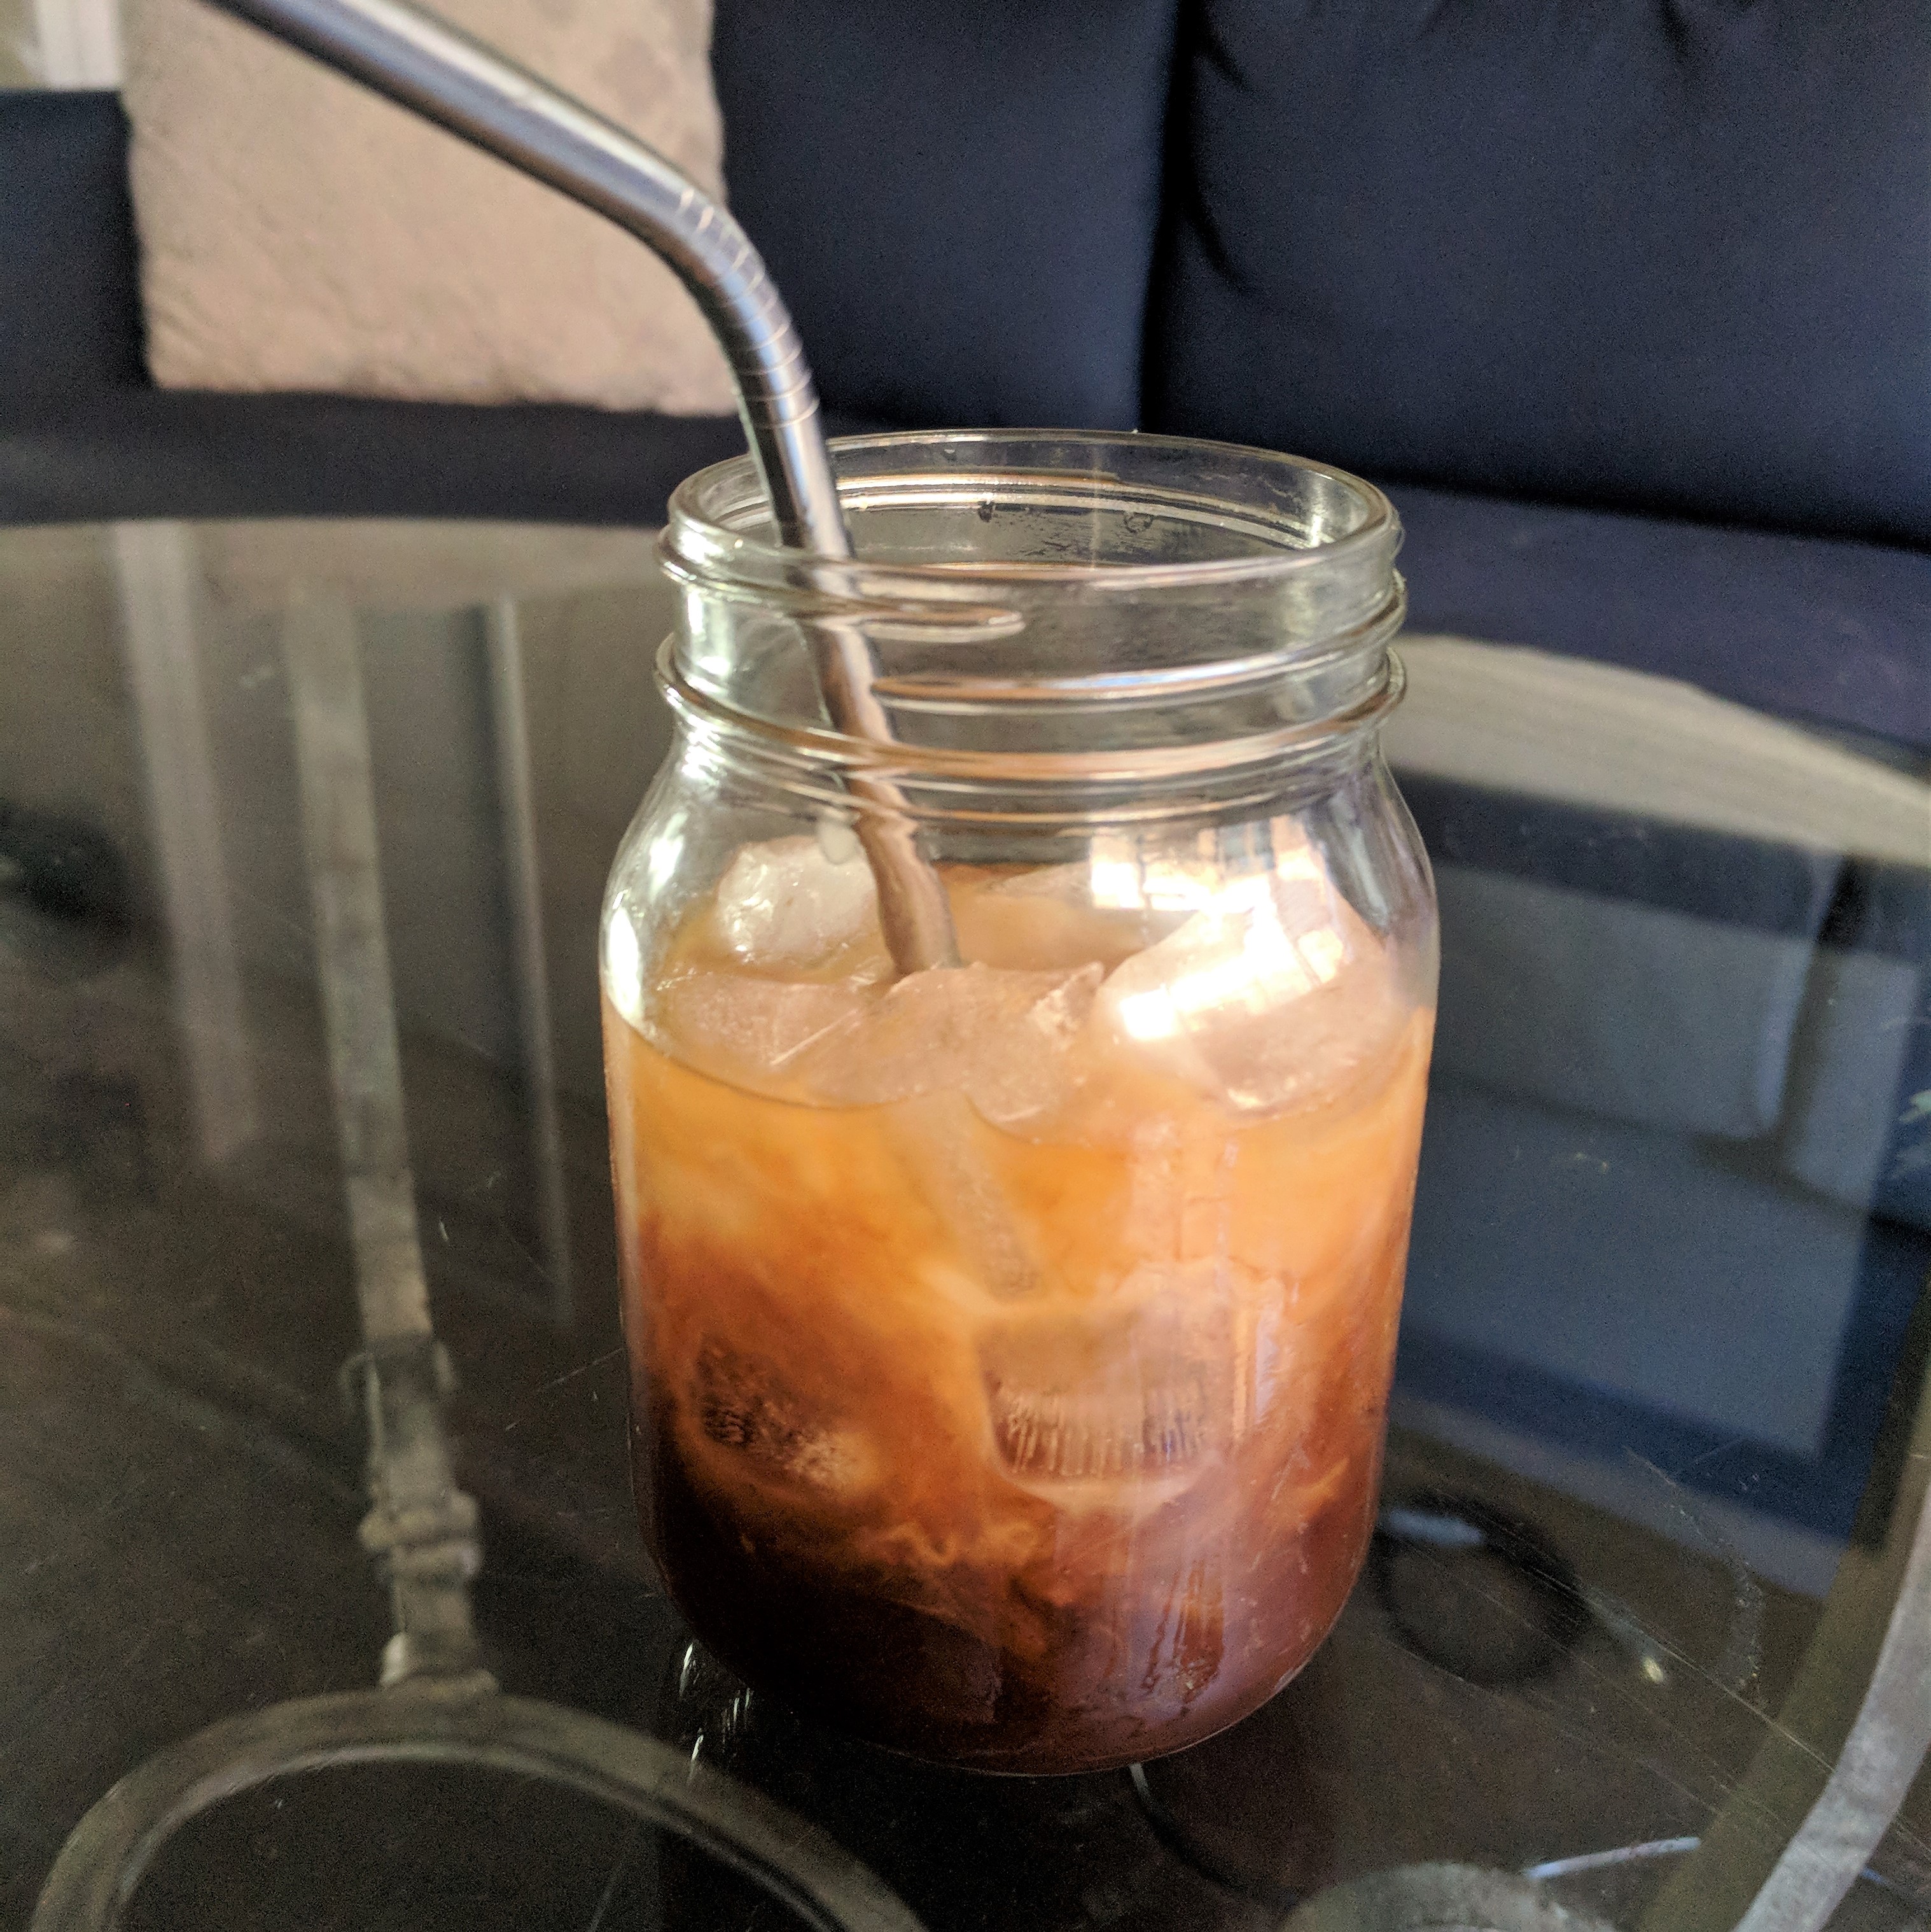
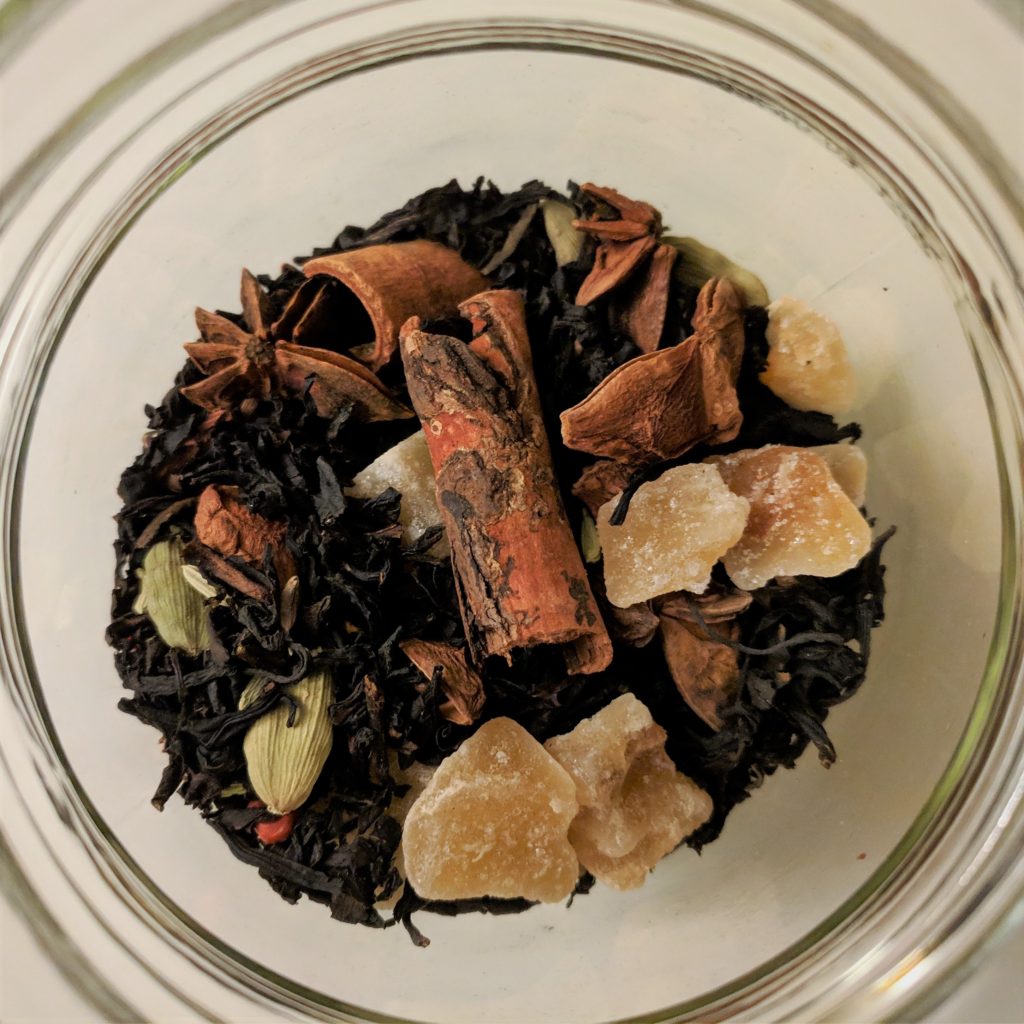
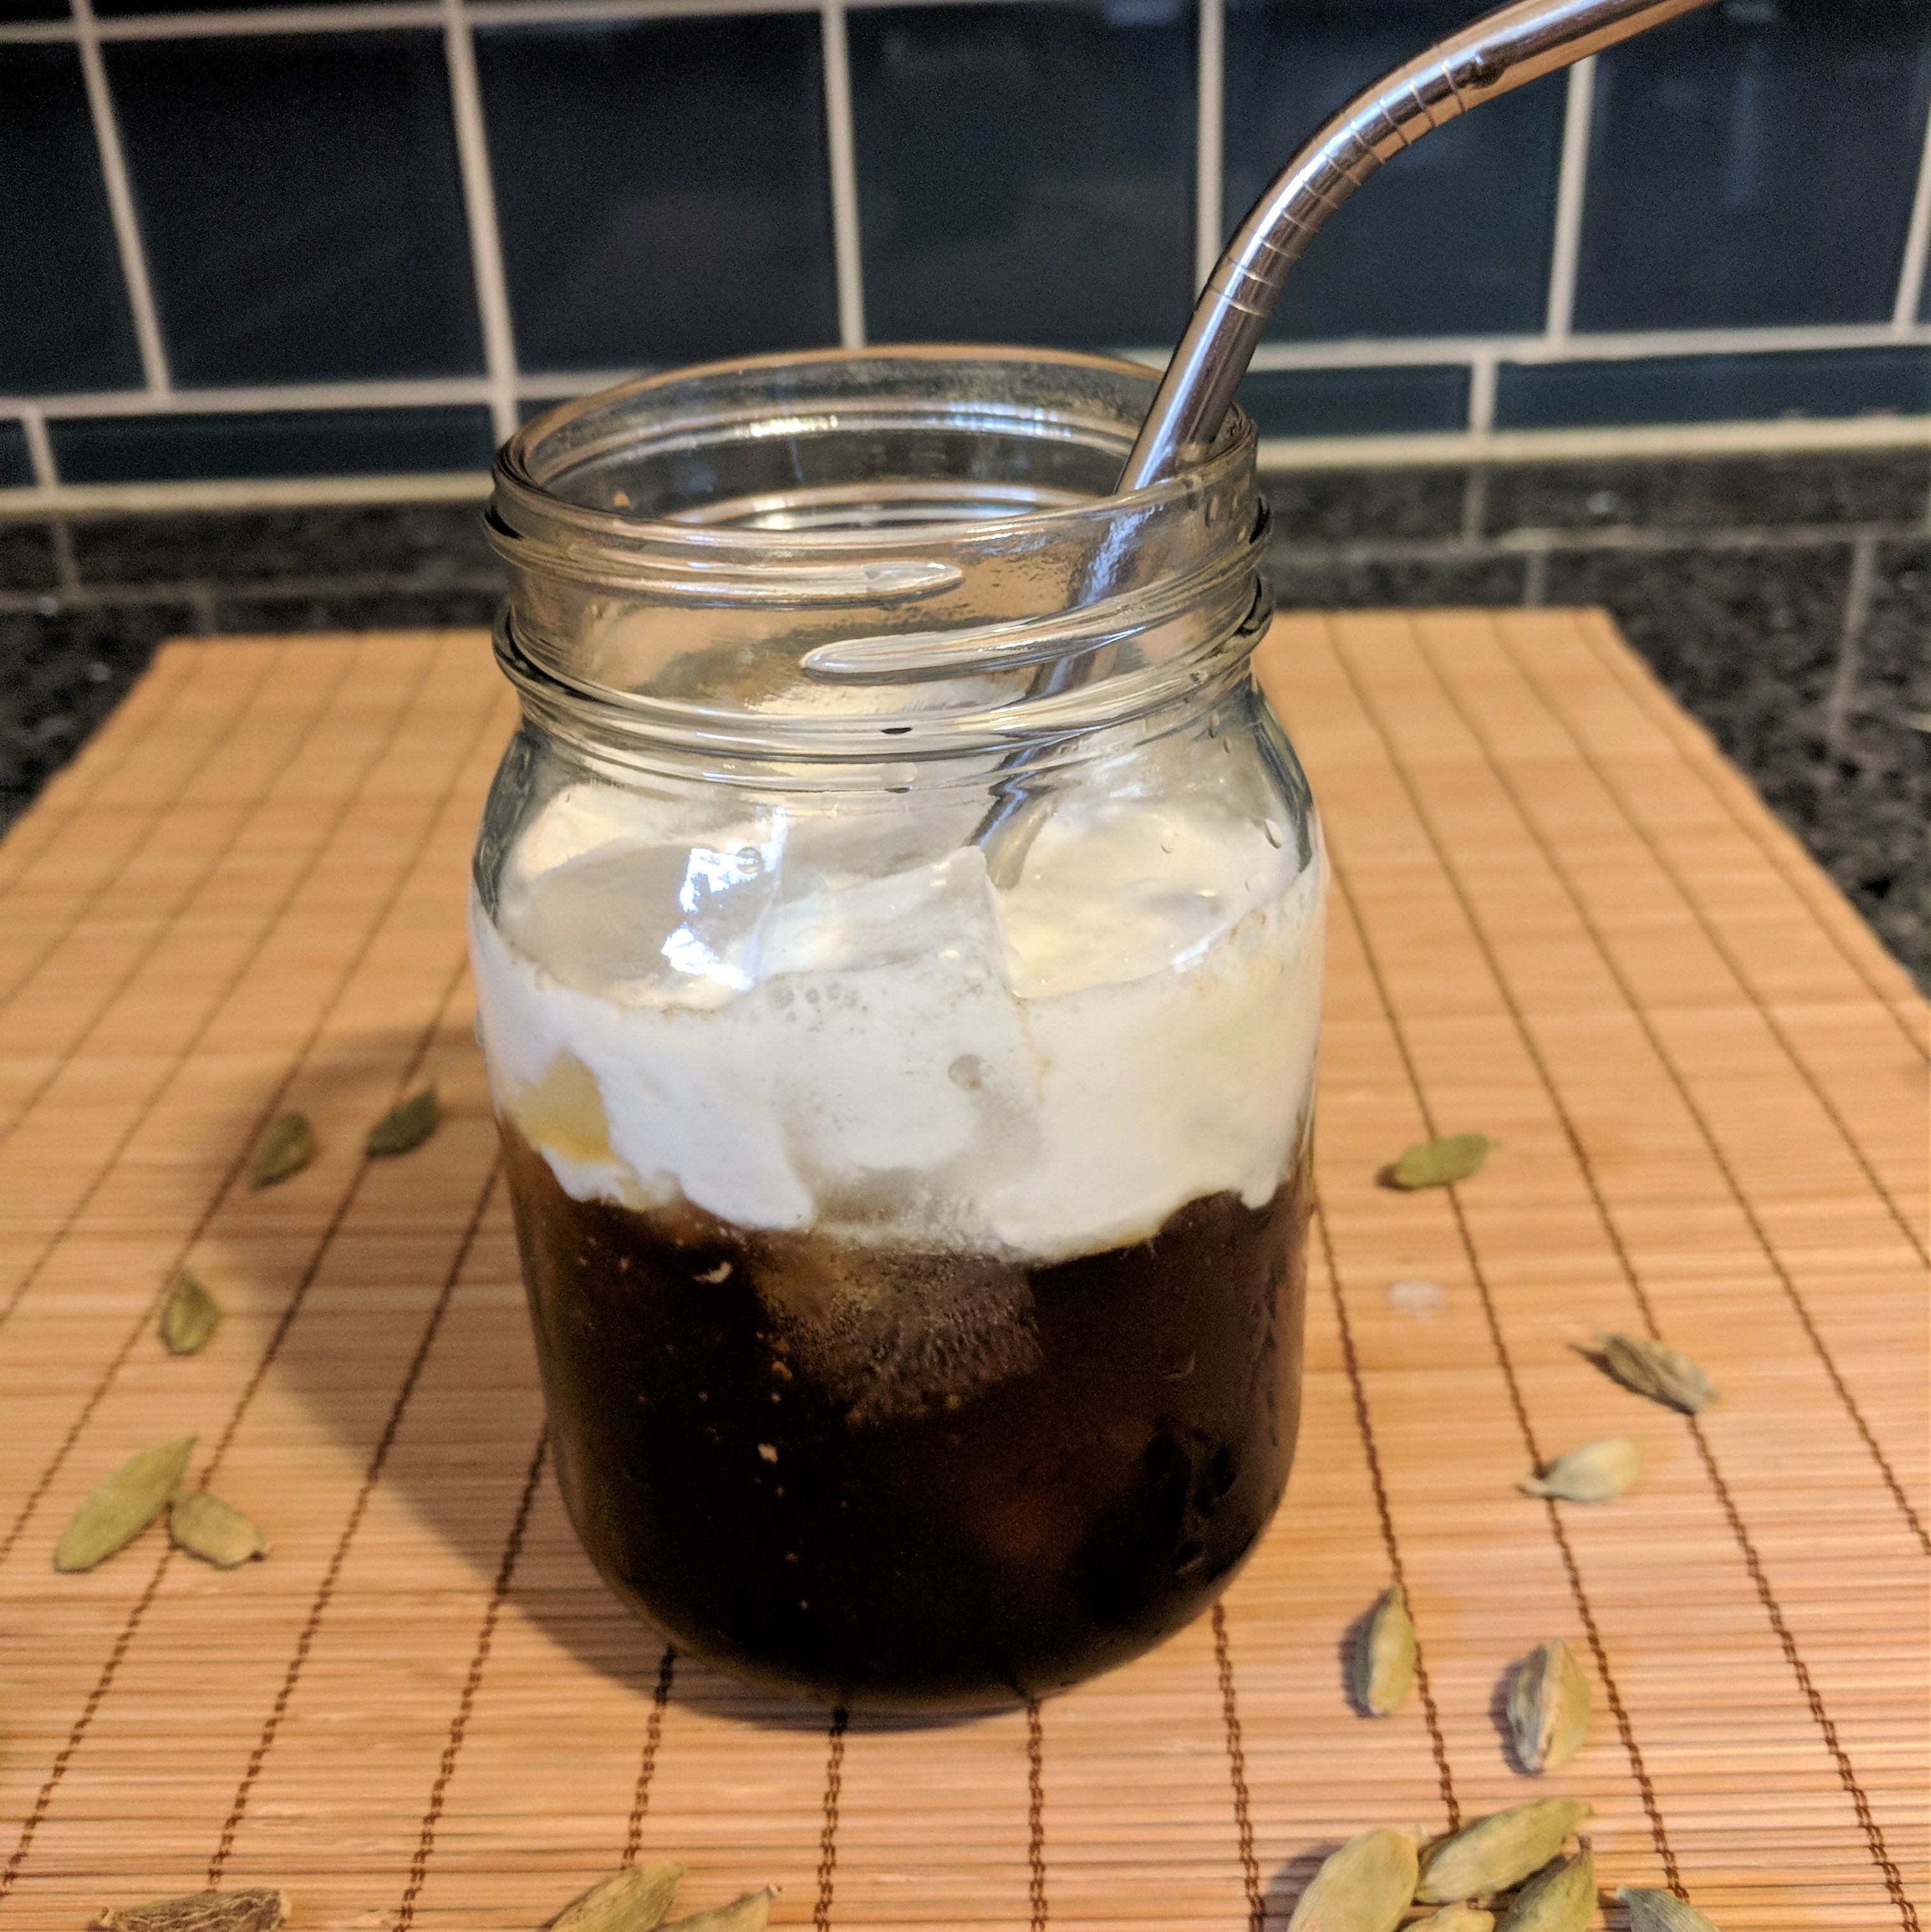
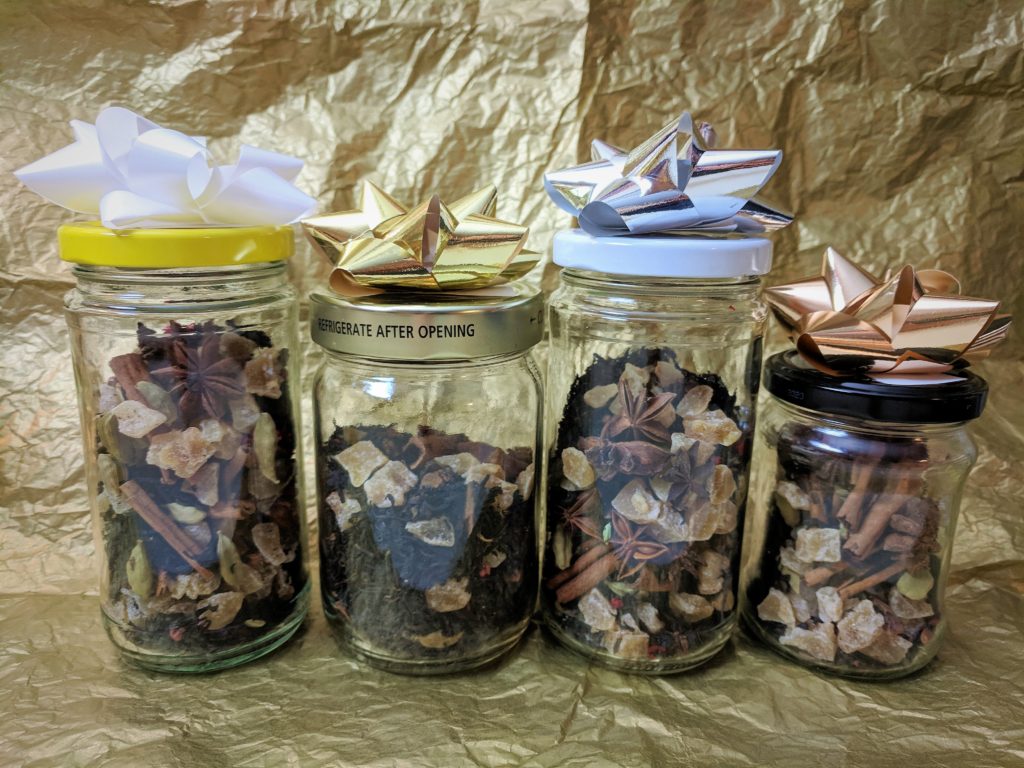
This chai tea mix makes a thoughtful homemade holiday gift. Just add the tea and spices to a jar and attach the simple brewing instructions! If available in a store near you, buy the spices in bulk to save some serious cash. For enhanced flavor, toast the spices in the oven at 350°F for about 5 minutes or until fragrant.

Chai Tea Mix

Each batch fills one small jar, about 4-8 ounces. Multiple this recipe to make as many jars as you'd like. 

Course Drinks
Prep Time 5 minutes
Servings 12 cups prepared

Ingredients

  • 1/2 cup loose black tea
  • 1/4 cup candied ginger cut into small pieces if large
  • 2 cinnamon sticks
  • 2 teaspoons cardamom pods about 20-25
  • 1 teaspoon red peppercorns
  • 1 teaspoon whole cloves
  • 8 star anise seeds optional
  • 2 teaspoons fennel seeds optional
  • 1 teaspoon black peppercorns optional
  • 1 teaspoon coriander seeds optional

Instructions

  1. If possible, lightly crush the spices – break the cinnamon stick into pieces, split the cardamom pods slightly, and lightly crush the other spices using a mortar and pestle.

    Alternatively, you can break the cinnamon stick and cardamom pods carefully using kitchen shears, a garlic press, or a nutcracker.

  2. In a small jar, combine tea, spices, and candied ginger. Close the jar and wrap.

  3. Include these instructions:

    Steep 1 tablespoon of tea mixture in 1 cup hot water for 5-10 minutes. Strain. Add ½ cup milk or milk alternative and optional sweetener to taste.


Green Bean Casserole (from scratch)

Green bean casserole photo

Green Bean Casserole is a classic Thanksgiving dish, invented in 1955 by Dorcas Reilly. Her recipe utilized canned green beans, canned cream of mushroom soup, and fried onions. This recipe is like 3-in-1, you can make the whole casserole, or just the onion rings, or just the soup. You can also make traditional green bean casserole and replace one or two of the components with those in this recipe – it’s really up to you! Sadly, Reilly passed away on October 15, 2018 at the age of 92. Why don’t you make this casserole this year in her honor?

Green Bean Casserole (from scratch)

Course Side Dish
Cuisine American
Keyword Thanksgiving
Cook Time 1 hour 15 minutes
Servings 6

Ingredients

  • 2 1/2 cups plain, unsweetened cashew or oat milk, divided or other neutral flavored plant milk
  • 1/2 cup whole wheat flour, divided
  • 1 cup whole grain bread crumbs
  • 1 yellow onion, thinly sliced
  • 2 tablespoons canola oil or other cooking oil
  • 1/4 cup shallot, minced
  • 2 cloves garlic, minced
  • 2 cups white and/or brown mushrooms, chopped
  • 1 vegetable bouillon cube or 1 teaspoon vegetable bouillon paste
  • 16 ounces frozen green beans, thawed
  • salt and pepper to taste

Instructions

  1. Preheat oven to 425°F. Line a baking sheet with parchment paper or a silicone baking mat. 

  2. In a medium bowl, combine ½ cup cashew milk, 1/4 cup flour, and a pinch of salt. Stir to combine. It should be the consistency of a batter that can coat the onion pieces. If it's too thin and runny, add a bit more flour. If it's too thick, add a bit more cashew milk or water. Place bread crumbs in a separate bowl.

  3. Separate the onion slices into individual rings. Dip onion rings into cashew milk batter, letting excess drip off, then dip into bread crumbs to coat. Place onto baking sheet, repeating until all of the onion is used. Bake for 25 minutes or until golden and crisp, flipping onions halfway. 

  4. Meanwhile, heat canola oil in a large skillet over medium-high heat. Add shallots and cook until they start becoming translucent, about 2-3 minutes. Add garlic and cook for 30 seconds or until fragrant, stirring often. 

  5. Add mushrooms and cook until tender, about 5-7 minutes, stirring occasionally. Sprinkle 1/4 cup flour over the mushrooms and cook for 1 minute, stirring occasionally. Carefully stir in remaining 2 cups of cashew milk, then add bouillon. Stir often for about 5 minutes until the mixture thickens to resemble a thick, creamy soup. Add water or more cashew milk as needed if it is too thick. Add salt and pepper to taste.

  6. Stir in green beans. Add ½ baked onions, then pour into a casserole dish. Bake for 20 minutes. Top with remaining onions and bake for another 5 minutes or until the top is golden brown.

Recipe Notes

This recipe has lots of room for substitutions. You can
top the casserole with just bread crumbs rather than
making the baked onions. You can also use traditional
green bean casserole ingredients in place of some of these
components made from scratch to save time


One Pot Creamy Mushroom Pasta

One Pot Creamy Mushroom Pasta PhotoThis recipe was adapted from Delicious Everyday. It is a nutritious and balanced meal that contains lots of vegetables, some protein, and whole grains. Despite its rich and creamy texture, it is completely plant-based and contains no dairy products. And to top it off, it can all be made in one pot! Cooking time varies by pasta type with thinner pasta (spaghetti) of course cooking faster than other types such as linguine.

One Pot Creamy Mushroom Pasta

This hearty one pot meal is rich, creamy, and super savory, but still full of vegetables, whole grains, and protein. It also is completely plant-based!

Course Main Course
Prep Time 10 minutes
Cook Time 20 minutes
Total Time 30 minutes
Servings 4

Ingredients

  • 3 tablespoons olive oil divided
  • 2 pounds mushrooms, mix of white and brown sliced
  • 2 shallots finely diced
  • 4 cloves garlic minced
  • 1 tablespoon fresh rosemary minced
  • 4 cups plain, unsweetened milk alternative cashew recommended
  • 1 can white beans rinsed and drained
  • 2 cubes vegetable bouillon
  • 2 tablespoons nutritional yeast
  • 2 teaspoons white miso
  • 8 ounces whole wheat spaghetti or linguine
  • 1 teaspoon salt or to taste

Instructions

  1. Heat a stock pot over medium high heat and add 2 tablespoons olive oil. Add half the mushrooms and cook for about 2 minutes, until they start to cook down. Add remaining olive oil and mushrooms and cook until they start to brown, about 3 minutes. Pour off any excess water that has accumulated.

  2. Add shallots, garlic, and rosemary. Cook until shallots start to brown, stirring frequently to prevent burning, about 2 minutes. 

  3. Add milk alternative, beans, nutritional yeast, miso, and salt. Stir to combine. 

  4. Once it reaches a simmer, add the pasta and stir. Reduce heat to a low boil and cook according to pasta instructions, plus about 20% more time. This should be about 14 minutes for whole wheat spaghetti. If necessary, continue cooking until pasta is cooked, adding a little more water (no more than 1 cup) if necessary to prevent it from sticking to the bottom of the pan. By the time the pasta is done cooking, you want to have a thickened creamy sauce, not as thick as a gravy or alfredo sauce, but not so thin that it doesn't stick to the noodles. Serve warm. 

One Pot Creamy Mushroom Pasta Photo One Pot Creamy Mushroom Pasta Photo


Cold Brew Thai Iced Coffee

Cold Brew Thai Coffee | Smooth, creamy and sweet without milk and little added sugar. Easy, vegan, and lightly sweetened. Guess Who's Cooking

Cold brew coffee is all the rage these days. This method brings out the delicious coffee flavor while leaving behind most of the acidity and bitterness. This recipe takes advantage of certain properties of cold brew to make a deliciously non-traditional version of Thai iced coffee that is smooth, rich, dairy-free, and sweet while using much less sugar.

If you’re making this for yourself, make one batch, drink one serving, then save the other serving in a jar for the next day. Or you can scale up the recipe and make several day’s worth! Cold brew will keep in the fridge for 1-2 weeks. Simply brew the coffee as directed, strain into a large container, keep refrigerated, and use the coffee as needed!

Cold Brew Thai Iced Coffee

Serves 2
Prep time 10 minutes
Dietary Diabetic, Gluten Free, Vegan, Vegetarian
Meal type Beverage
Misc Serve Cold
Traditional Thai iced coffee is often very sweet - this recipe uses only 1/2 teaspoon sugar per serving because the cold brew process brings out the natural sweetness of the coffee, and makes it less bitter so less sugar is needed to counteract the bitterness. You can also leave out the sugar completely! Coconut milk is used in place of sweetened condensed milk to make this recipe lower in sugar, dairy-free, and vegan.

Ingredients

  • 1/2 cup coarsely ground coffee
  • 1 teaspoon brown sugar or to taste
  • 1 teaspoon vanilla extract
  • 1/2 cup coconut milk
  • 1/2 teaspoon ground cardamom (optional)

Note

Cold brew coffee can have a lot of caffeine. Try using 1/4 cup regular coffee and 1/4 cup decaf to reduce the caffeine.

Use light or regular coconut milk, not the thinner coconut beverage found in the milk alternative section of the refrigerated case. Light coconut milk works just fine, but use regular coconut milk to make it extra creamy. You can also make this drink more traditional and use sweetened condensed milk.

Directions

Step 1
Combine all ingredients except coconut milk in a French press or other container with a lid. Add 2 cups water and stir.
Step 2
Refrigerate for 12-24 hours.
Step 3
If using a French press, push down the filter. If using any other container, lay a cheesecloth, thin cloth towel, or a coffee filter over a bowl or large (2 cups or more) liquid measuring cup. Pour the coffee mixture over the cloth to strain.
Step 4
Pour the strained coffee into 2 glasses with ice. Top with about 1/4 cup coconut milk, give or take a little bit to reach desired creaminess.

Cold Brew Thai Coffee | Smooth, creamy and sweet without milk and little added sugar. Easy, vegan, and lightly sweetened. Guess Who's Cooking

Cold Brew Thai Coffee | Smooth, creamy and sweet without milk and little added sugar. Easy, vegan, and lightly sweetened. Guess Who's Cooking


Cold Brew Thai Coffee | Smooth, creamy and sweet without milk and little added sugar. Easy, vegan, and lightly sweetened. Guess Who's Cooking

Cold Brew Thai Coffee | Smooth, creamy and sweet without milk and little added sugar. Easy, vegan, and lightly sweetened. Guess Who's Cooking

Cold Brew Thai Coffee | Smooth, creamy and sweet without milk and little added sugar. Easy, vegan, and lightly sweetened. Guess Who's Cooking

Cold Brew Thai Coffee | Smooth, creamy and sweet without milk and little added sugar. Easy, vegan, and lightly sweetened. Guess Who's Cooking
Smooth, sweet and low in acidity, even without the coconut milk!

Cold Brew Thai Coffee | Smooth, creamy and sweet without milk and little added sugar. Easy, vegan, and lightly sweetened. Guess Who's Cooking Cold Brew Thai Coffee | Smooth, creamy and sweet without milk and little added sugar. Easy, vegan, and lightly sweetened. Guess Who's Cooking


2-Ingredient Sweet Potato Pancakes

2 Ingredient Sweet Potato Pancakes

2-Ingredient Sweet Potato Pancakes

Serves 2
Prep time 20 minutes
Allergy Egg
Dietary Gluten Free, Vegetarian
Meal type Breakfast
Misc Child Friendly, Serve Hot
These pancakes take just two ingredients. They are not exactly the same texture as traditional pancakes, but still tasty considering they only require two ingredients!

Ingredients

  • 1 cup sweet potato, cooked
  • 4 large eggs
  • cooking oil such as canola, coconut or grapeseed

Directions

Step 1
Mash sweet potato with a fork. Whisk eggs in a separate bowl, then add to mashed sweet potato.
Step 2
Heat a nonstick skillet such as a cast iron skillet over medium low heat. Add a little oil.
Step 3
Add sweet potato mixture to pan 1 tablespoon at a time. Flip pancakes once edges lighten in color and turn more opaque and small bubbles start to form on top, about 3 minutes. They are done when both sides are golden brown. Repeat until all mixture is used, adding more oil as needed.
Step 4
Serve with toppings of choice - maple syrup, nut butter, butter (or non-dairy butter) or fruit.

2 Ingredient Sweet Potato Pancakes

2 Ingredient Sweet Potato Pancakes


Spaghetti Squash Pad Thai

Spaghetti Squash Pad Thai

Pad Thai is a very popular Thai dish traditionally made with rice noodles. This recipe replaces the rice noodles with spaghetti squash, replacing refined grains with a nutritious vegetable. Spaghetti squash also has about 5 times less calories than most noodles or pasta! This recipe is based off of an authentic Pad Thai recipe from Basil Cookery School in Chiang Mai, Thailand.


Here are some possible substitutions. You can use more authentic ingredients if you can find them – check international markets:

  • Use rice noodles instead of spaghetti squash – but it won’t be as healthy! Or replace 1/2 of the spaghetti squash with rice noodles
  • Use oyster sauce instead of tamari/soy sauce
  • Use 2 tablespoons of tamarind paste instead of lime juice and brown sugar. This is a very unique flavor that is critical to authentic pad Thai.
  • To make this dish vegetarian, substitute the fish sauce for tamari/soy sauce or another fish sauce alternative and do not substitute oyster sauce for tamari/soy sauce.
  • To make this dish vegan, make it vegetarian (above) and omit the eggs.

Spaghetti Squash Pad Thai

Serves 4
Prep time 10 minutes
Cook time 50 minutes
Total time 1 hour
Dietary Diabetic
Meal type Main Dish
Adapted from an authentic Pad Thai recipe from Thailand, this recipe replaces rice noodles with spaghetti squash, which has about 5 times less calories!

Ingredients

  • 1 spaghetti squash
  • 14oz firm or extra firm tofu
  • 2 tablespoons canola oil, divided
  • 2 tablespoons shallots, minced
  • 1 tablespoon garlic, minced
  • 2 eggs
  • 1 cup carrots, shredded
  • 1 cup bean sprouts
  • 1/4 cup reduced sodium tamari or soy sauce
  • 2 tablespoons fish sauce
  • 1 tablespoon lime juice
  • 1 tablespoon brown sugar

Optional

  • 1/4 cup green onions, sliced
  • crushed peanuts
  • lime wedges

Directions

Step 1
Preheat oven to 400°F. Cut spaghetti squash in half and scoop out the seeds with a spoon. Brush with 1 tablespoon oil and roast on a baking sheet, cut side down, for 35-45 minutes, or until tender. Set aside to cool.
Step 2
Meanwhile, drain tofu and cut in half lengthwise. Place slices between towels and place a heavy item such as a cast iron pan on top to press out excess moisture. Let sit for 10-15 minutes.
Step 3
Once spaghetti squash has cooled, use a fork to shred the flesh into strands. Set aside.
Step 4
Heat a wok or large skillet over medium heat. Add remaining oil, then shallots and garlic. Cook until fragrant, 30-60 seconds.
Step 5
Add tofu to pan and cook, stirring occasionally, until most sides are browned, about 8 minutes.
Step 6
Push tofu to one side of the pan and crack eggs into the open space. Stir until cooked, then add spaghetti squash, carrots, and bean sprouts. Stir and cook for 1-2 minutes or until sprouts start to wilt.
Step 7
Mix tamari or soy sauce, fish sauce, lime juice, and brown sugar. Add to pan and stir to coat everything. Remove from heat and add optional garnishes.

Spaghetti Squash Pad Thai