Tag Archives: vegan

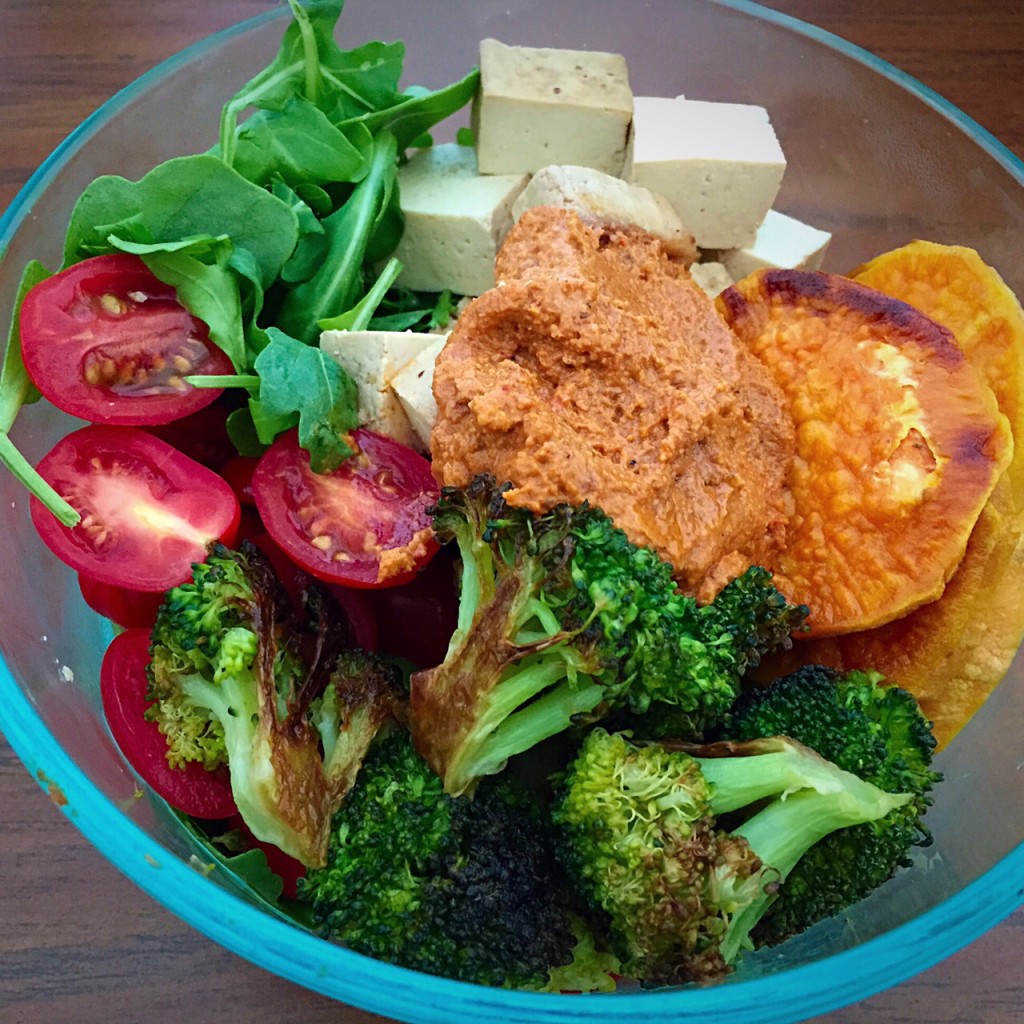
Roasted Veggie Lunch Bowl

Take 30 minutes on Sunday to prepare and assemble these lunch bowls for the week. Grab and go on your way out the door and enjoy a satisfying lunch that doesn’t require reheating. You can change up any of the components – beans or grilled chicken instead of tofu, roasted cauliflower instead of broccoli, spinach or kale instead of arugula, etc. Get creative!
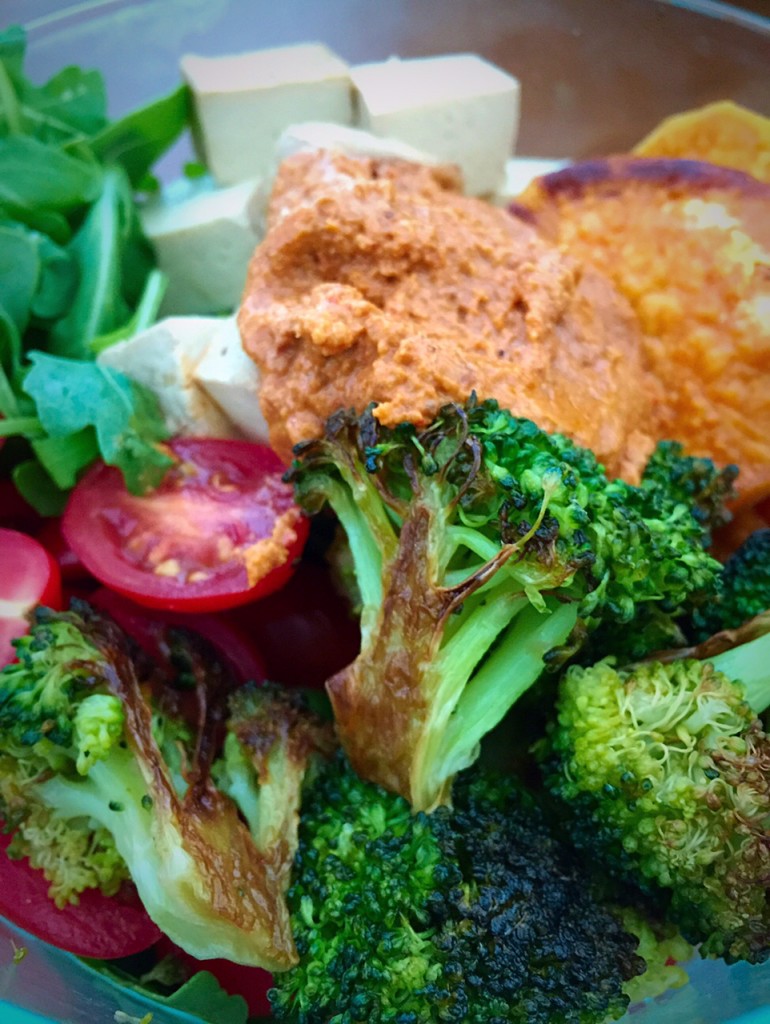
Roasted Veggie Lunch Bowl | GuessWhosCooking.com | Healthy, quick, easy, simple, gluten free, dairy free, vegetarian, vegan

Roasted Veggie Lunch Bowl

Serves 4
Prep time 10 minutes
Cook time 20 minutes
Total time 30 minutes

Ingredients

  • 1 sweet potato (peeled or unpeeled, sliced into 1/4 inch slices)
  • 2-3 cups broccoli (cut into florets)
  • 4 cups baby arugula
  • 2 cups grape tomatoes (halved)
  • baked tofu (cubed)
  • 2 tablespoons olive oil
  • 1/2 cup hummus
  • salt to taste

Directions

Step 1
Preheat oven to 400˚F. Toss sweet potato and broccoli with olive oil and spread in an even layer on a baking sheet. Bake for about 20 minutes, flipping sweet potato and stirring broccoli halfway, until vegetables are tender and golden brown. Add salt to taste.
Step 2
Assemble 1/4 of the arugula, tofu, tomatoes, sweet potato, and broccoli into a bowl or reusable container. Top each serving with 2 tablespoons hummus. Serve warm or portion into 4 containers, refrigerate, and bring one to lunch each day.

Roasted Veggie Lunch Bowl | GuessWhosCooking.com | Healthy, quick, easy, simple, gluten free, dairy free, vegetarian, vegan

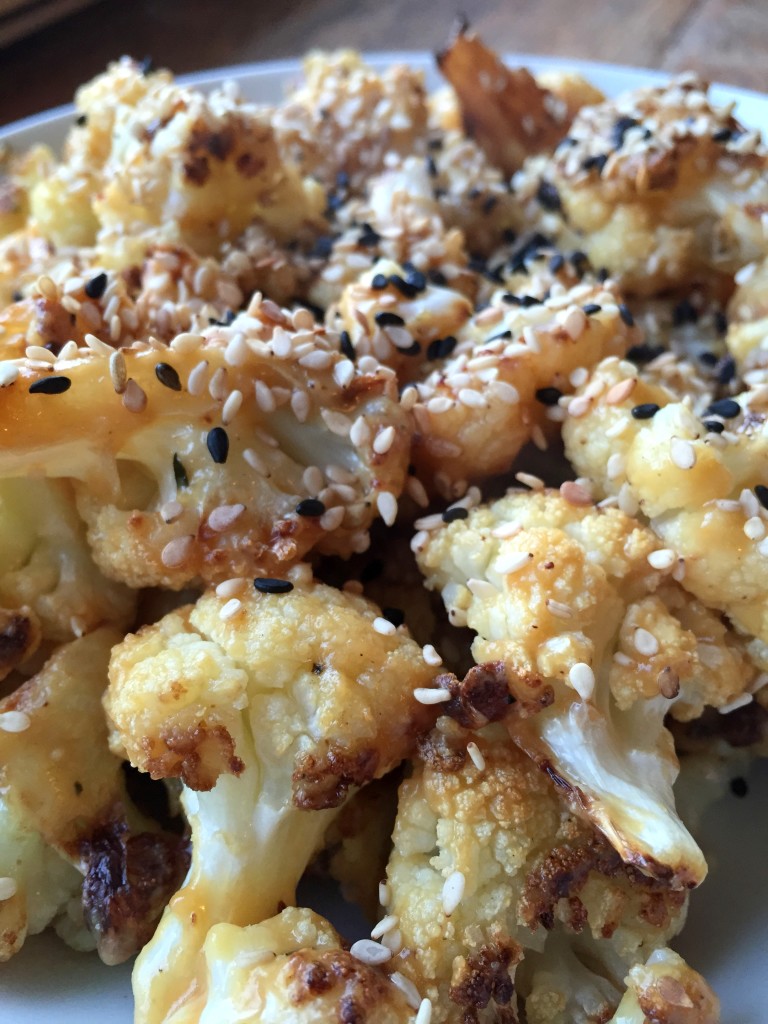
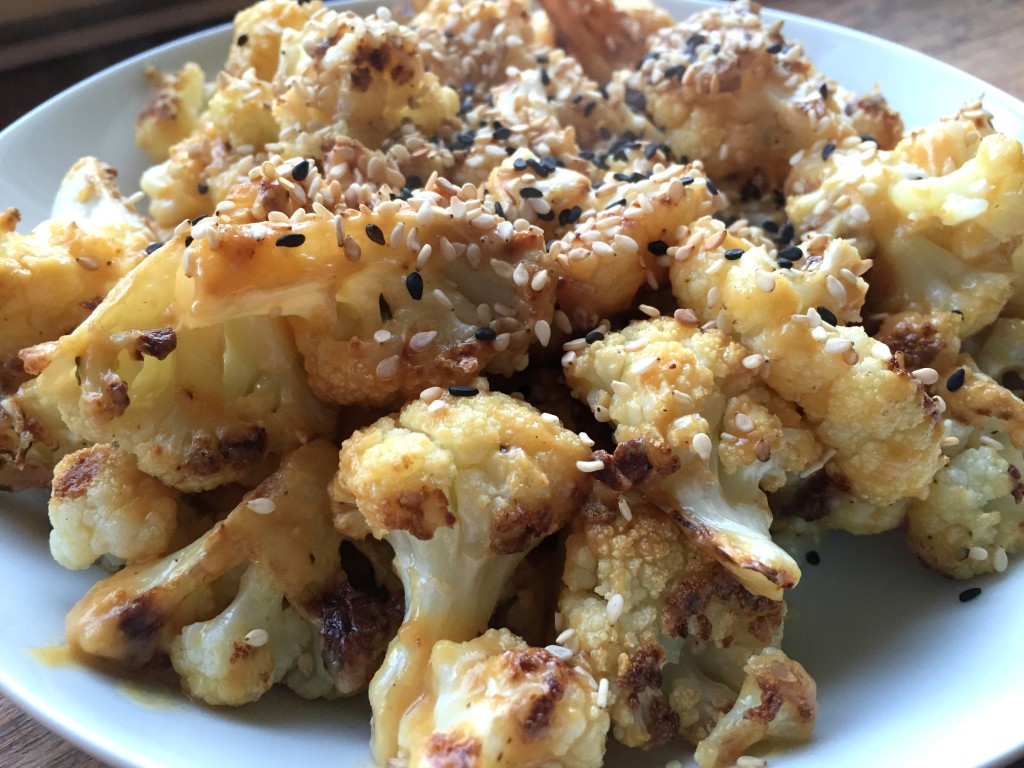
Roasted Cauliflower with Miso Sauce

Roasted Cauliflower with Miso Sauce | GuessWhosCooking.com | Healthy, quick, easy, simple, gluten free, dairy free, vegetarian, vegan
If you’re not a fan of cauliflower, you probably haven’t tried it roasted yet. Caramelized cauliflower combined with a simple miso sauce makes this an incredibly flavorful appetizer or side dish.

Roasted Cauliflower with Miso Sauce

Serves 6
Prep time 5 minutes
Cook time 25 minutes
Total time 30 minutes
This flavorful recipe is easy, healthy, gluten-free, dairy-free, low-carb, and vegan.

Ingredients

  • 1 head cauliflower (cut into florets)
  • 2 tablespoons olive oil
  • 1/4 cup miso (low sodium preferred)
  • 1 tablespoon rice wine vinegar or white vinegar
  • 1 tablespoon water
  • 1 teaspoon lemon juice
  • 1 tablespoon sesame seeds

Directions

Step 1
Preheat oven to 400˚F. Toss cauliflower florets with olive oil and place in a single layer on a baking sheet. Bake for 20-25 minutes, tossing 2-3 times, until cauliflower is well browned.
Step 2
Meanwhile, combine miso, vinegar, water, and lemon juice.
Step 3
Toss cauliflower with miso sauce, then garnish with sesame seeds and serve.

Roasted Cauliflower with Miso Sauce | GuessWhosCooking.com | Healthy, quick, easy, simple, gluten free, dairy free, vegetarian, vegan

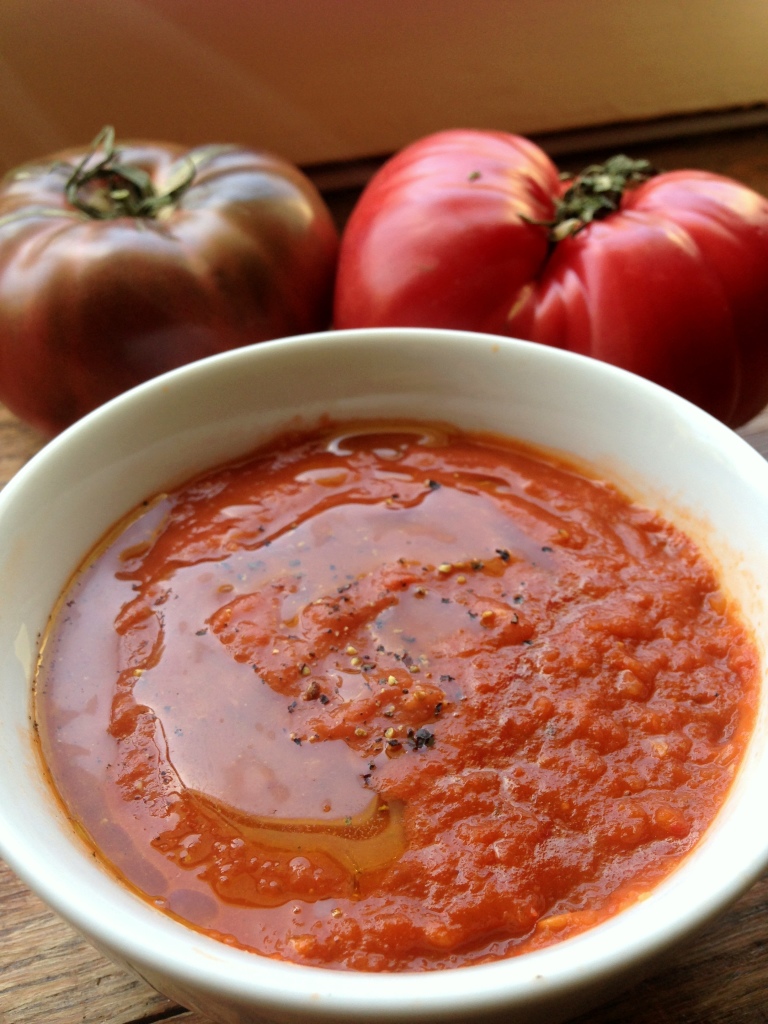
Roasted Tomato Soup

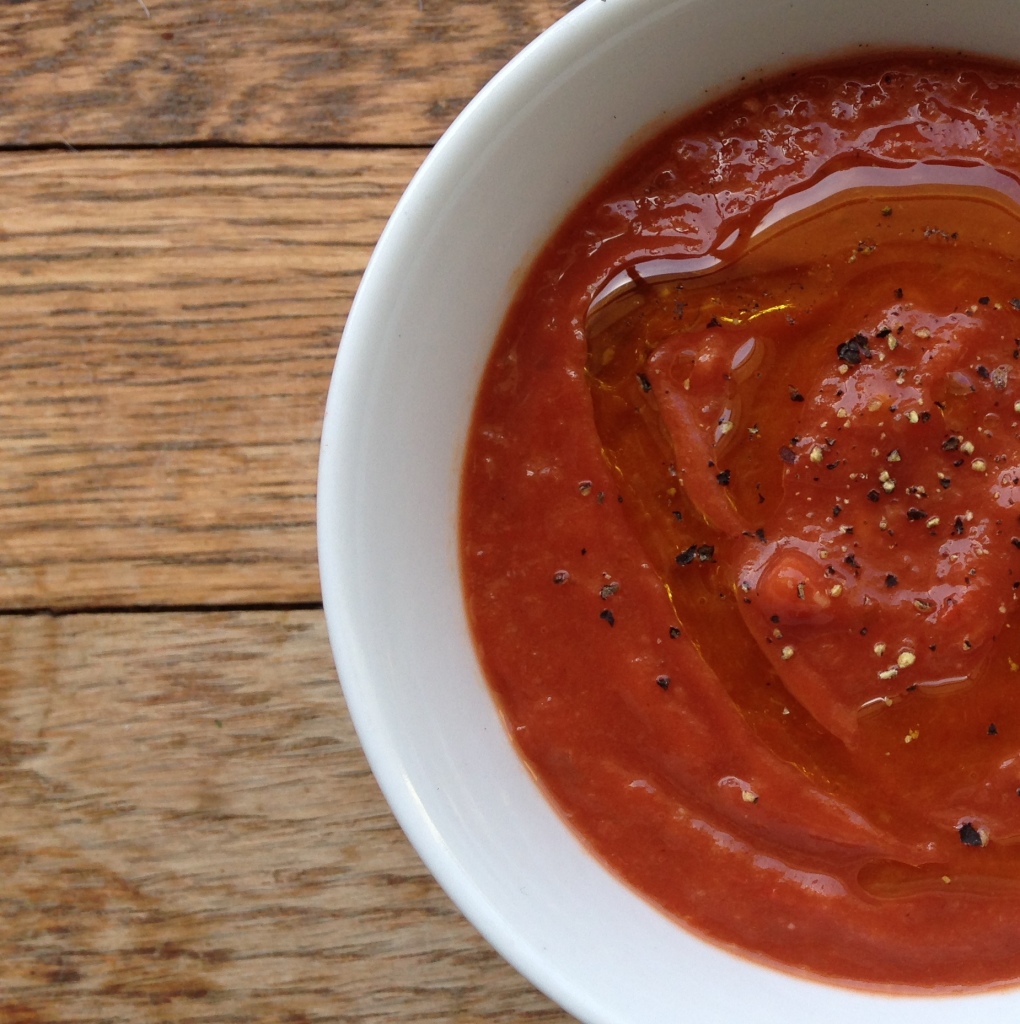
Roasted Tomato Soup | GuessWhosCooking.com | simple, healthy, plant based, dairy free, gluten free, vegan, nut free, soy free.

This recipe is very simple with only 5 required ingredients. Avoid the guilt with this soup because it is almost nothing but vegetables with a little healthy fat, yet is full of flavor and much more appetizing than canned tomato soup. In these pictures, I used heirloom tomatoes. Use any tomatoes you’d like, but make sure they are ripe. That means purchasing tomatoes during the summer, when they are actually in season. If possible, buy them from your local farmers market. If you’re looking to start growing your own vegetables, try growing tomatoes – they are easy and so much tastier when you grow them yourself!

Roasted Tomato Soup

Serves 4 - 6
Prep time 10 minutes
Cook time 45 minutes
Total time 55 minutes
This simple soup recipe is vegan and contains only 5 ingredients.

Ingredients

  • 3lb tomatoes (halved)
  • 1 medium onion (quartered)
  • 4 cloves garlic
  • 2 tablespoons olive oil (plus a little to drizzle, if desired)
  • 1/2 teaspoon salt

Optional

  • fresh basil (garnish)

Directions

Step 1
Preheat oven to 400˚F. In a large bowl, toss tomatoes, onion, and garlic with olive oil. Spread in an even layer on a baking sheet.
Step 2
Place in the oven and bake for 30 minutes, turning the vegetables halfway through. Let cool.
Step 3
Place roasted vegetables in blender or food processor and blend in small batches as needed. Add salt. Blend until completely smooth, adding a little water or broth to thin if necessary. Warm in a saucepan over medium heat until heated through and serve. Garnish with fresh basil and a drizzle of olive oil (optional).

Roasted Tomato Soup | GuessWhosCooking.com | simple, healthy, plant based, dairy free, gluten free, vegan, nut free, soy free.

Springtime Buckwheat Salad

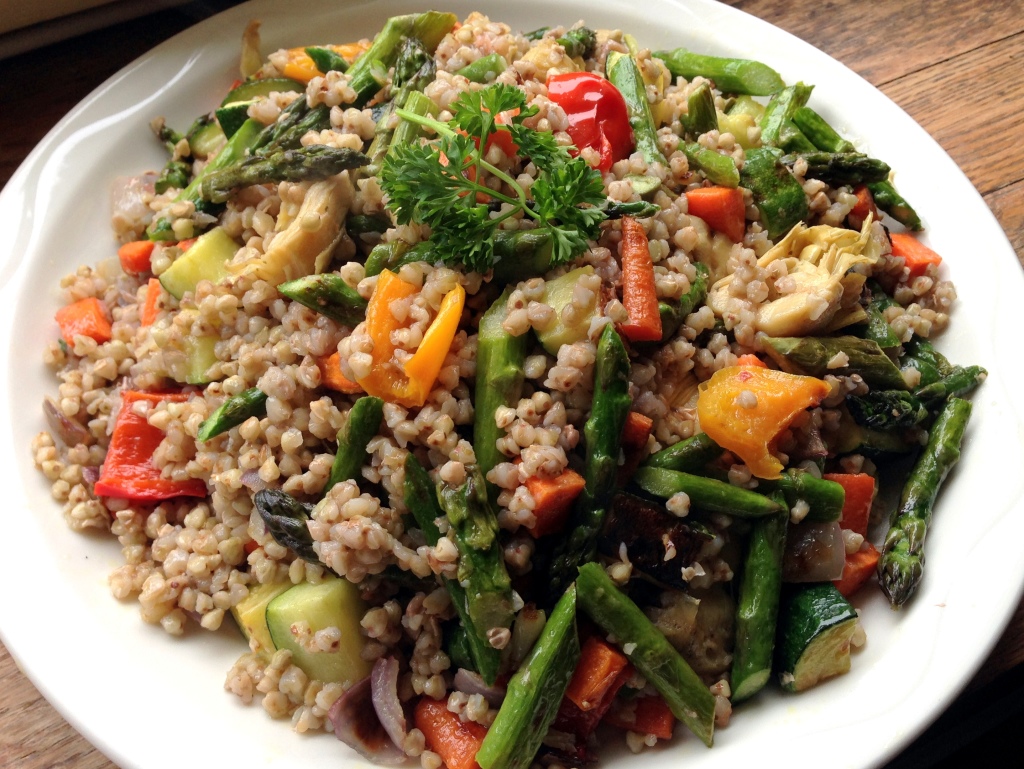
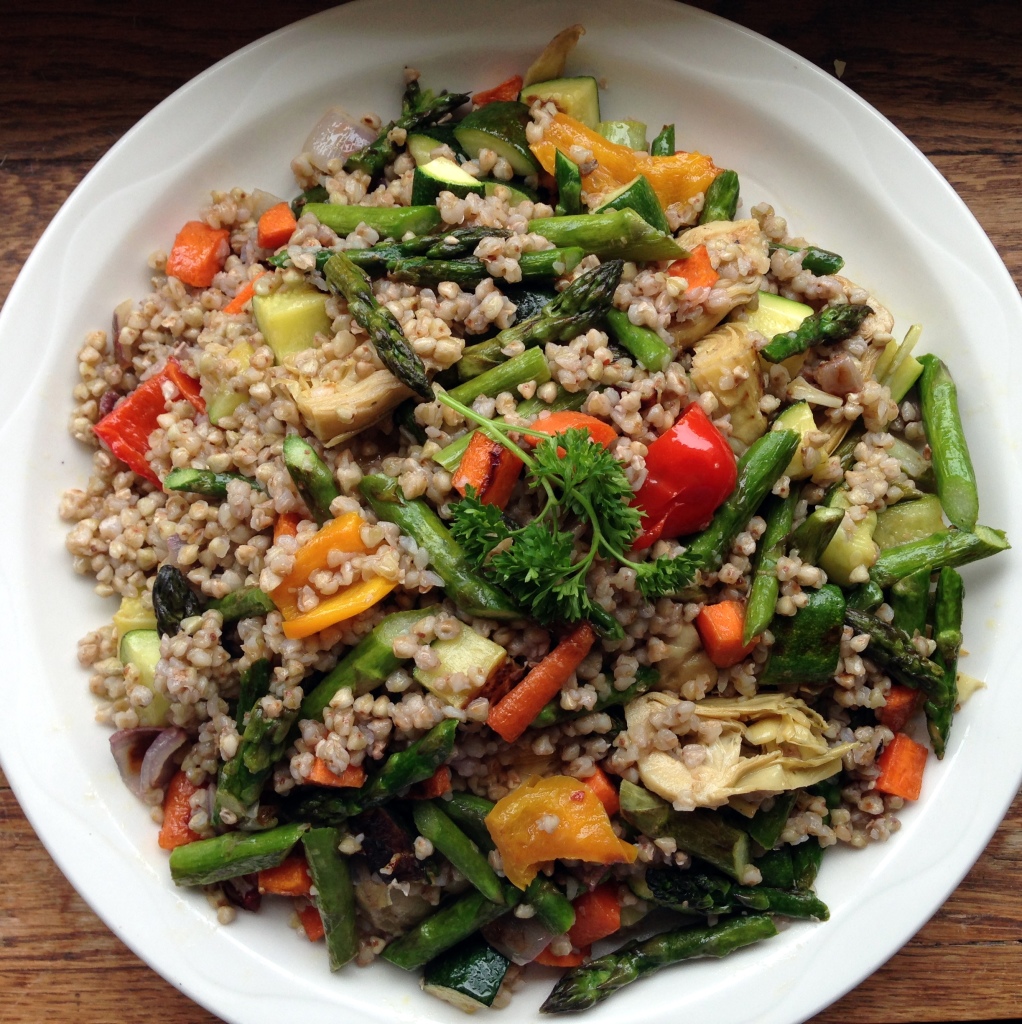
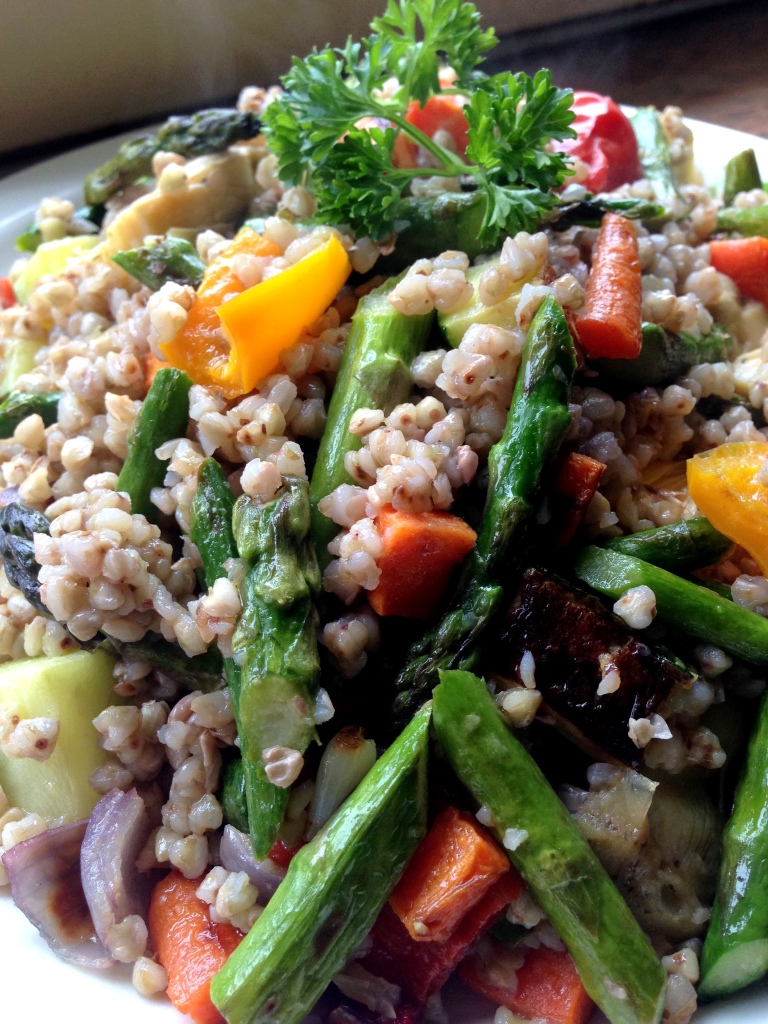
Springtime Buckwheat Salad  | GuessWhosCooking.com | Healthy, plant based, vegan, dairy free, gluten free

Whole grains don’t have to be boring! Buckwheat, which happens to be gluten-free, despite the word “wheat” in its name, is accompanied by colorful veggies and simple yet flavorful dressing. This salad is great side dish for a potluck, picnic, lunch, or dinner! Or add some protein such as chicken or beans and make it your entree.

Springtime Buckwheat Salad

Serves 8-12
Prep time 15 minutes
Cook time 30 minutes
Total time 45 minutes
This colorful salad can be made with either roasted or grilled vegetables, which are combined with a tender whole grain and simple lemony dressing for a fresh-tasting and very satisfying salad!

Ingredients

  • 1 cup buckwheat groats (toasted for 4-5 minutes in a dry pan, or buy pre-toasted)
  • 2 cups water
  • 1 green zucchini, organic preferred (chopped)
  • 2 carrots (diced)
  • 1/2 red onion (diced)
  • 1 red bell pepper, organic preferred (chopped)
  • 1 bunch asparagus (cut into 1-inch pieces)
  • 1/2 cup artichoke hearts (quartered, thawed from frozen or marinated in jar and drained)
  • 6 tablespoons extra virgin olive oil (divided)
  • 2 tablespoons lemon juice (about 1 medium lemon)
  • 1 teaspoon salt
  • 1 tablespoon fresh parsley (minced)

Directions

Step 1
Preheat oven to 425˚F. Combine buckwheat and 2 cups water in a saucepan and bring to a boil. Reduce heat and cook on low 10-12 minutes, then let stand for 5 minutes. Let cool. Grains should be tender but not mushy. Toasted buckwheat or kasha may take less time to cook.
Step 2
Toss vegetables with 1/4 cup (4 Tbsp) olive oil and spread into a single layer on 2 baking sheets. Do not crowd the vegetables on the pan. Roast for 10-12 minutes, stirring once or twice, until vegetables are light golden brown on one or more sides. Let cool.
Step 3
In a small bowl, combine 2 Tbsp olive oil, lemon juice, and 1 tsp salt. In a large bowl, combine cooked buckwheat, roasted vegetables, and olive oil mixture. Toss and garnish with parsley. Serve warm or refrigerate and serve cold.

Springtime Buckwheat Salad  | GuessWhosCooking.com | Healthy, plant based, vegan, dairy free, gluten free

Springtime Buckwheat Salad  | GuessWhosCooking.com | Healthy, plant based, vegan, dairy free, gluten free

Red Lentil Patties

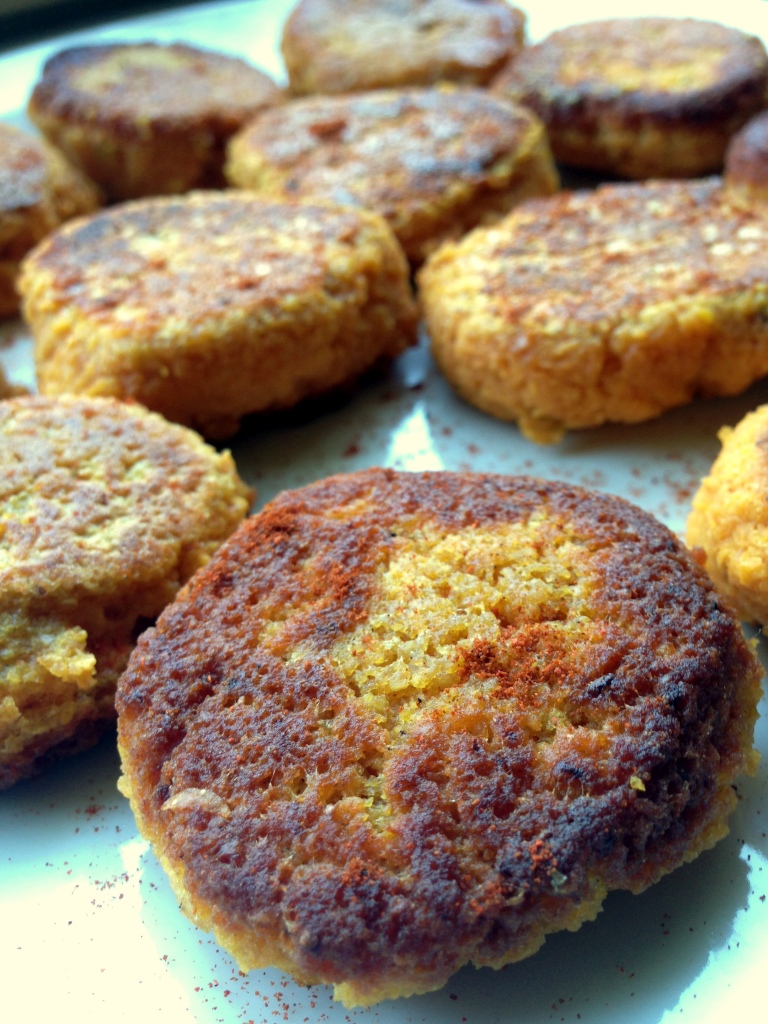
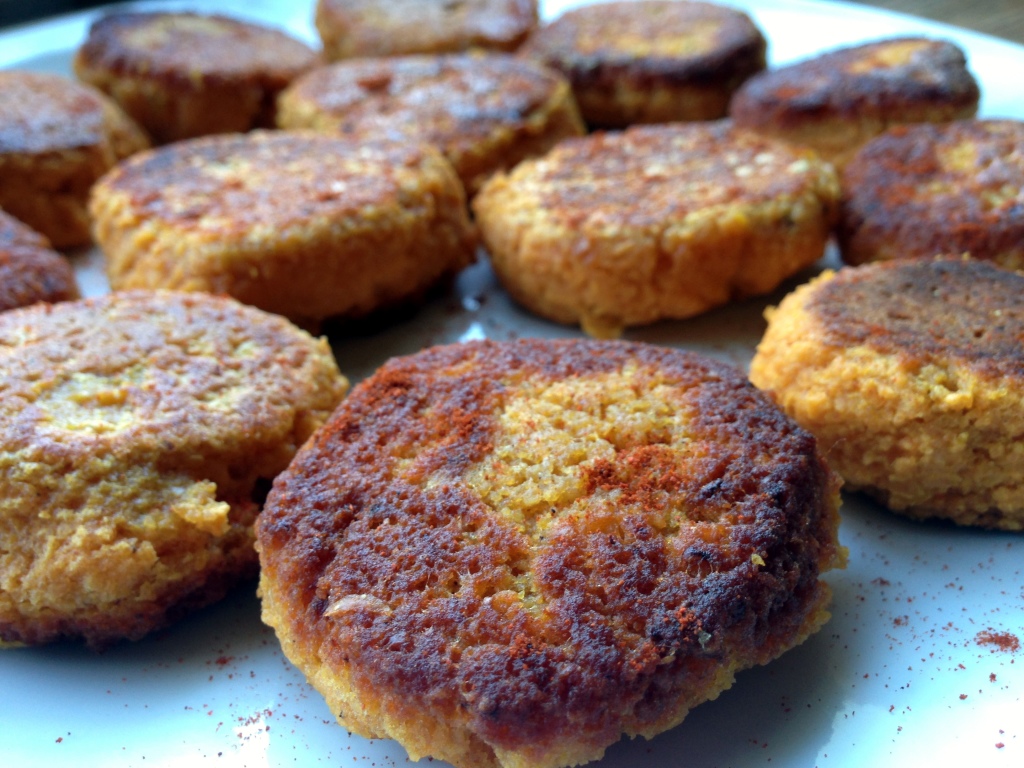
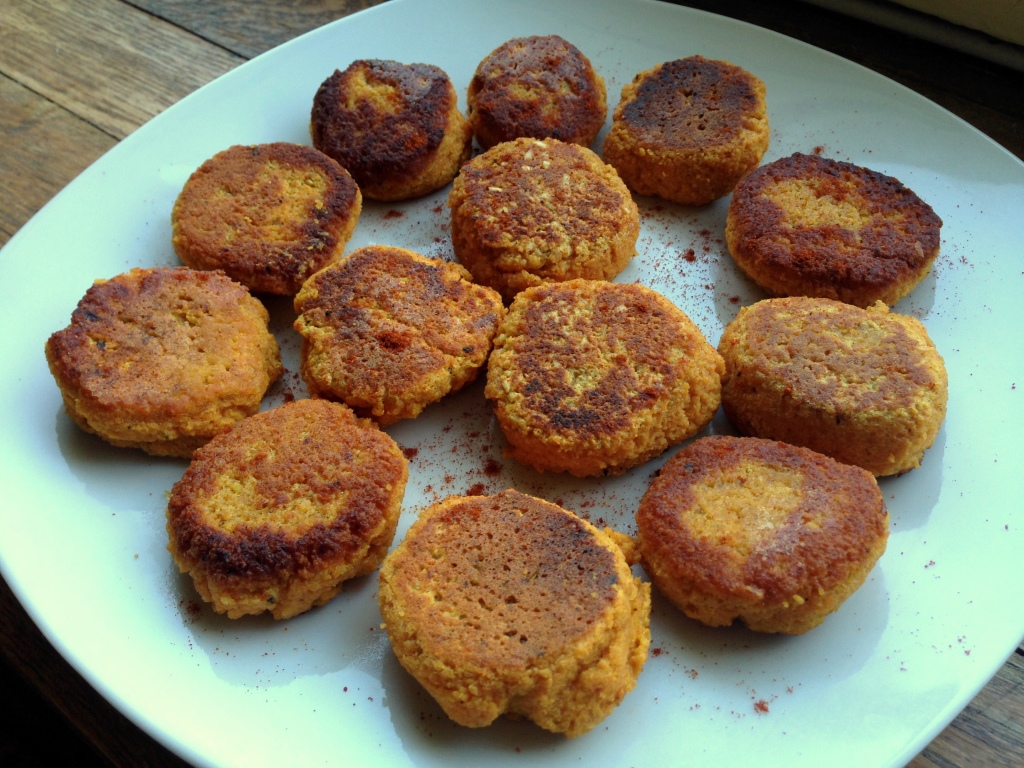
Red Lentil Patties | GuessWhosCooking.com | Healthy, plant based, vegan, dairy free, gluten free

These patties are a fun and flavorful snack, appetizer, or side dish. They are a healthier alternative to a chicken nugget or other deep-fried patties.

Red Lentil Patties

Meal type Appetizer, Side Dish, Snack
These lentil patties are a fun and flavorful snack or appetizer and can be paired with a tasty dip such as lemon tahini sauce.

Ingredients

  • 1 1/2 cup dried red lentils
  • 1/2 yellow onion
  • 4 tablespoons olive oil
  • 2 cloves garlic
  • 1/2 teaspoon cumin
  • 1/2 teaspoon paprika
  • 1 teaspoon salt
  • 1/4 teaspoon pepper
  • 1 tablespoon lemon juice
  • 1 teaspoon turmeric

Optional

  • tahini
  • lemon juice

Directions

Step 1
Rinse and sort lentils. Soak in plenty of cold water overnight or for at least 8 hours. Lentils will end up about double in size.
Step 2
Heat a skillet to medium high and add 1 Tbsp olive oil. Add onion and cook until it becomes caramelized and translucent. Add garlic, turmeric and cumin and cook for 30 seconds, stirring often. Remove from heat.
Step 3
Drain lentils and place in a food processor. Add remaining ingredients except for cooked onion mixture. Puree until fairly smooth, scraping down sides as needed. Add cooked onion mixture and pulse until just combined.
Step 4
Heat skillet over medium high and add 1 Tbsp olive oil. Form lentil mixture into flattened balls, about the size of golf balls, then place into pan. Turn over when the bottom is golden brown and cook other side until golden brown. Place onto plate lined with a paper towel. Repeat with remaining oil and lentil mixture. Serve with lemon tahini sauce or other dipping sauce.
Step 5
To make optional lemon tahini sauce: Mix together tahini and lemon juice to taste, then thin with water to reach desired consistency. Add salt to taste. Optional: add minced garlic and parsley.

Red Lentil Patties | GuessWhosCooking.com | Healthy, plant based, vegan, dairy free, gluten free

Red Lentil Patties | GuessWhosCooking.com | Healthy, plant based, vegan, dairy free, gluten free

Layered Mediterranean Dip

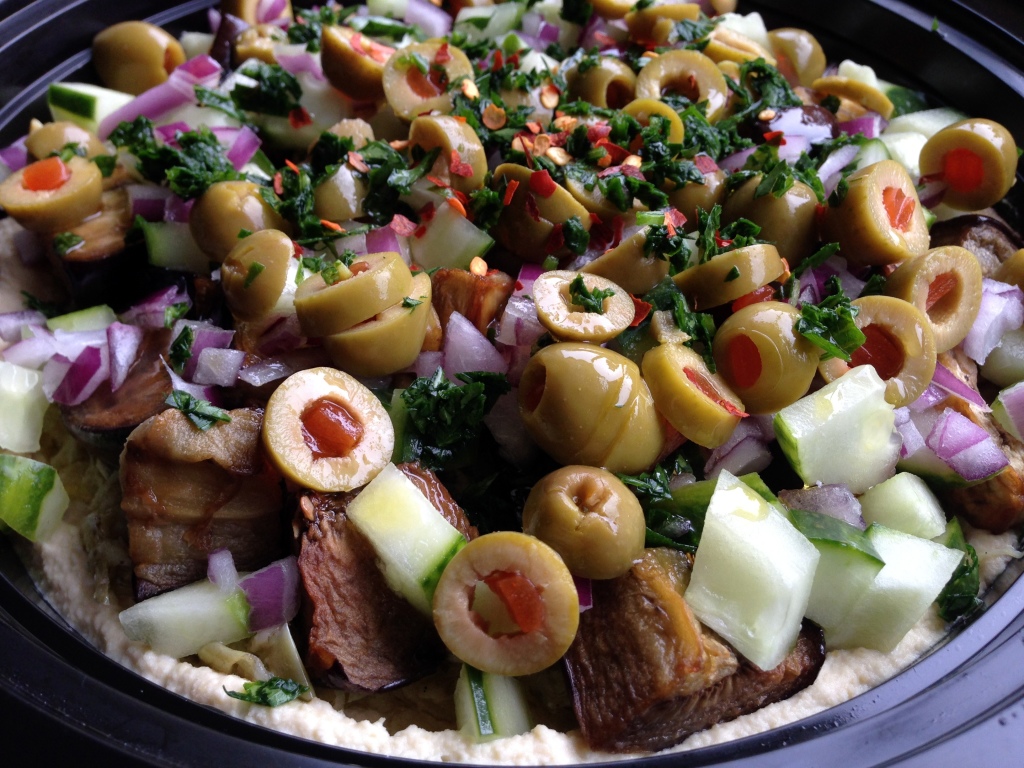
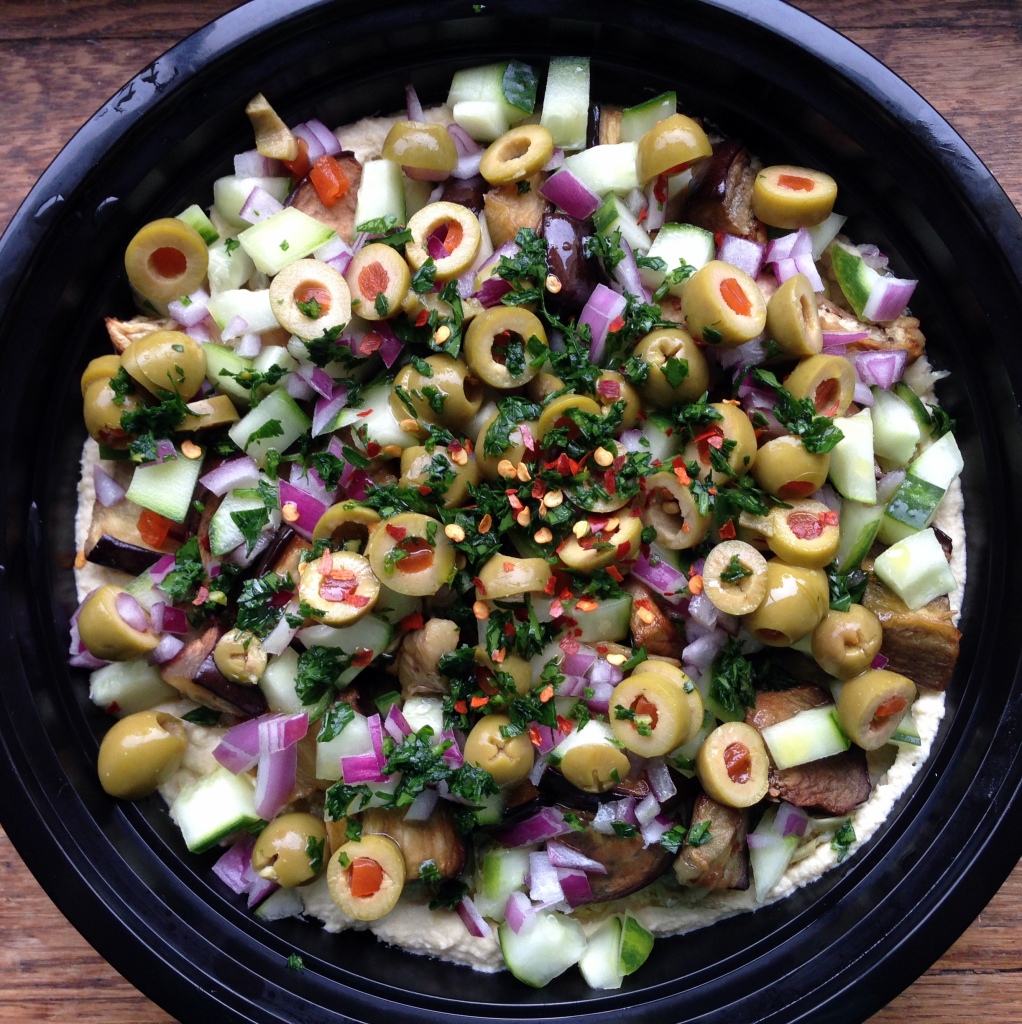
Layered Mediterranean Dip | GuessWhosCooking.com | Healthy, plant based, vegan, dairy free, low carb, gluten free

This layered dip is full of flavor and a much healthier alternative to layered Mexican dip. You can add or omit any ingredients according to personal preference.

To make roasted eggplant – cut into small cubes, toss with olive oil and salt, and roast at 350°F for 25-30 minutes, or until tender and light golden brown. Let cool before adding to dip.

For the hummus, either make your own or use a packaged hummus. It doesn’t necessarily
have to be 2 cups, it can be less.

Layered Mediterranean Dip

Serves 8 - 10
Prep time 10 minutes
Meal type Appetizer
This healthy layered dip is a perfect appetizer for a party or potluck, and happens to be entirely plant-based.

Ingredients

  • 2 cups hummus
  • 1 cup roasted eggplant (chopped)
  • 1 cup cucumber (diced)
  • 1/2 cup marinated artichoke hearts
  • 1/4 cup sun dried tomatoes (julienned)
  • 1/4 cup olives (any kind) (sliced)
  • 1/4 cup red onion (minced)
  • 1-2 tablespoon extra virgin olive oil
  • 2 tablespoons pine nuts (toasted)
  • 2 tablespoons fresh parsley (minced)

Optional

  • 1/2 teaspoon red pepper flakes

Directions

Step 1
Layer all ingredients in a shallow dish, starting with the hummus, then roasted eggplant. The other ingredients except olive oil and pine nuts can be layered in any order, but the order listed is recommended. Drizzle the olive oil on top when finished layering. Any ingredients can be omitted to suit personal preference. Add pine nuts just prior to serving.
Step 2
Refrigerate until ready to serve. Add pine nuts. Serve with raw veggies such as bell pepper strips, halved and seeded mini sweet peppers, or cucumber slices, or whole grain baked pita chips.

Layered Mediterranean Dip | GuessWhosCooking.com | Healthy, plant based, vegan, dairy free, low carb, gluten free

Pear Sauce, Unsweetened

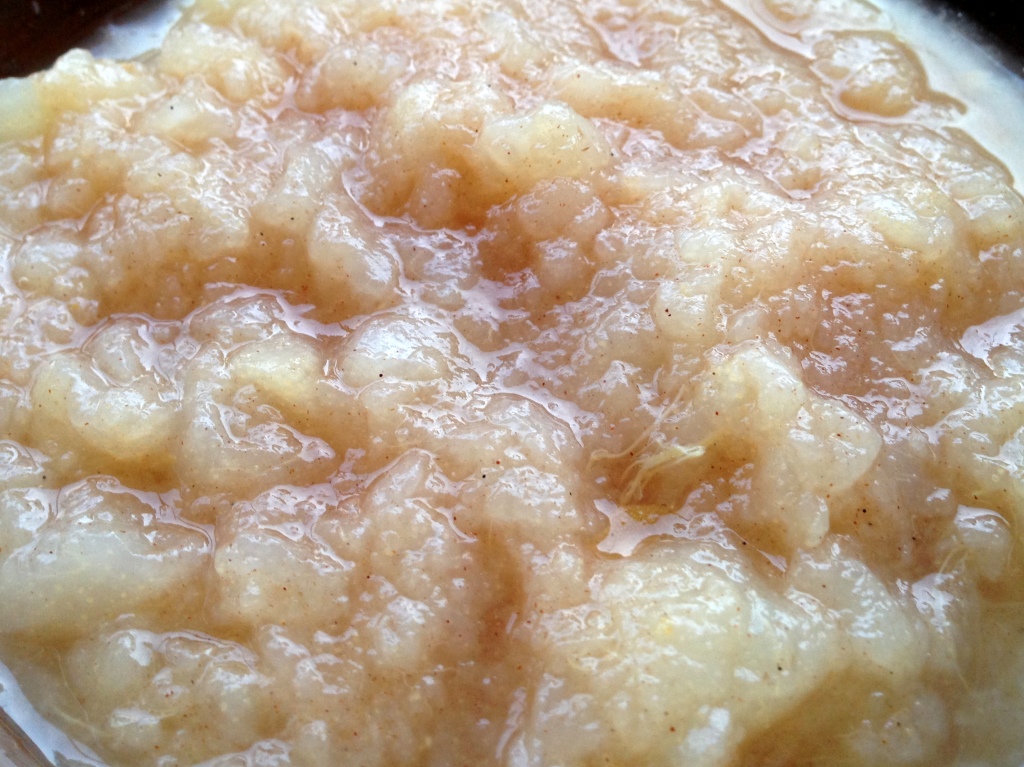
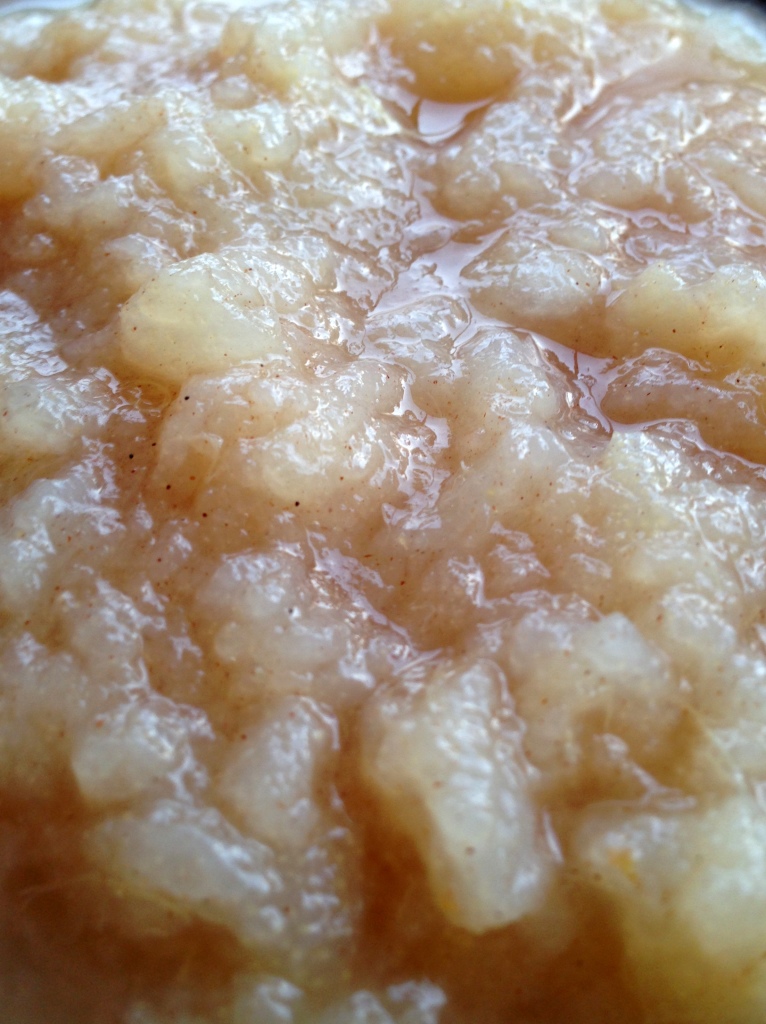
Pear Sauce, Unsweetened | GuessWhosCooking.com | Healthy, no sugar added, plant based, vegan, dairy free, gluten free

It’s like applesauce, but with pears! No added sugar necessary, especially if you use ripe to overly ripe pears. The ground ginger gives this recipe a little kick. You can mash/puree the pears using a variety of tools, including a whisk, potato masher, blender, food processor, or immersion blender. I used a whisk to make the chunky sauce pictured.

Pear Sauce

It's like applesauce, but with pears!

Ingredients

  • 6 ripe pears (peeled, chopped into 1-inch pieces)
  • 2 tablespoons water
  • 1 tablespoon lemon juice
  • 1/2 teaspoon cinnamon
  • 1/4 teaspoon ground ginger
  • 1/4 teaspoon vanilla extract

Directions

Step 1
Combine all ingredients in a saucepan. Bring to a boil, then reduce heat to a simmer for 20-25 minutes. Let cool.
Step 2
Once cool, mash with a potato masher or whisk or puree with an immersion blender or food processor. Pour off excess liquid if necessary. Refrigerate until served.

Pear Sauce, Unsweetened | GuessWhosCooking.com | Healthy, no sugar added, plant based, vegan, dairy free, gluten free

Broiled Green Beans

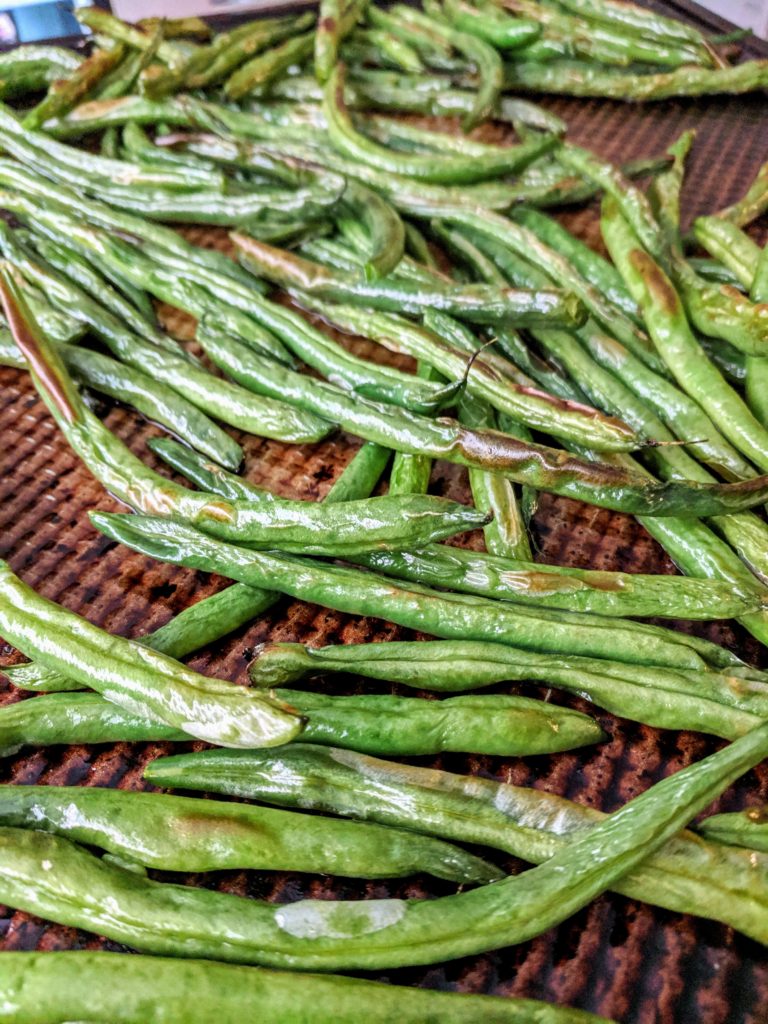
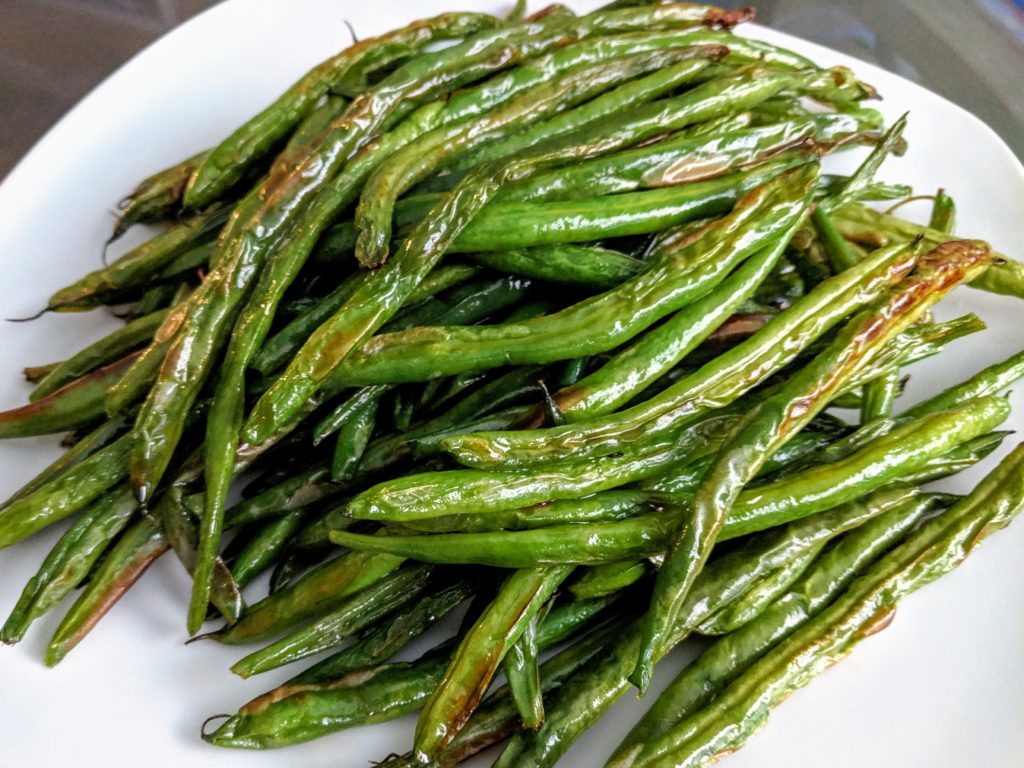
Eat them like French fries, with or without sauce, or enjoy them as a super quick side dish, or keep reading for another idea!

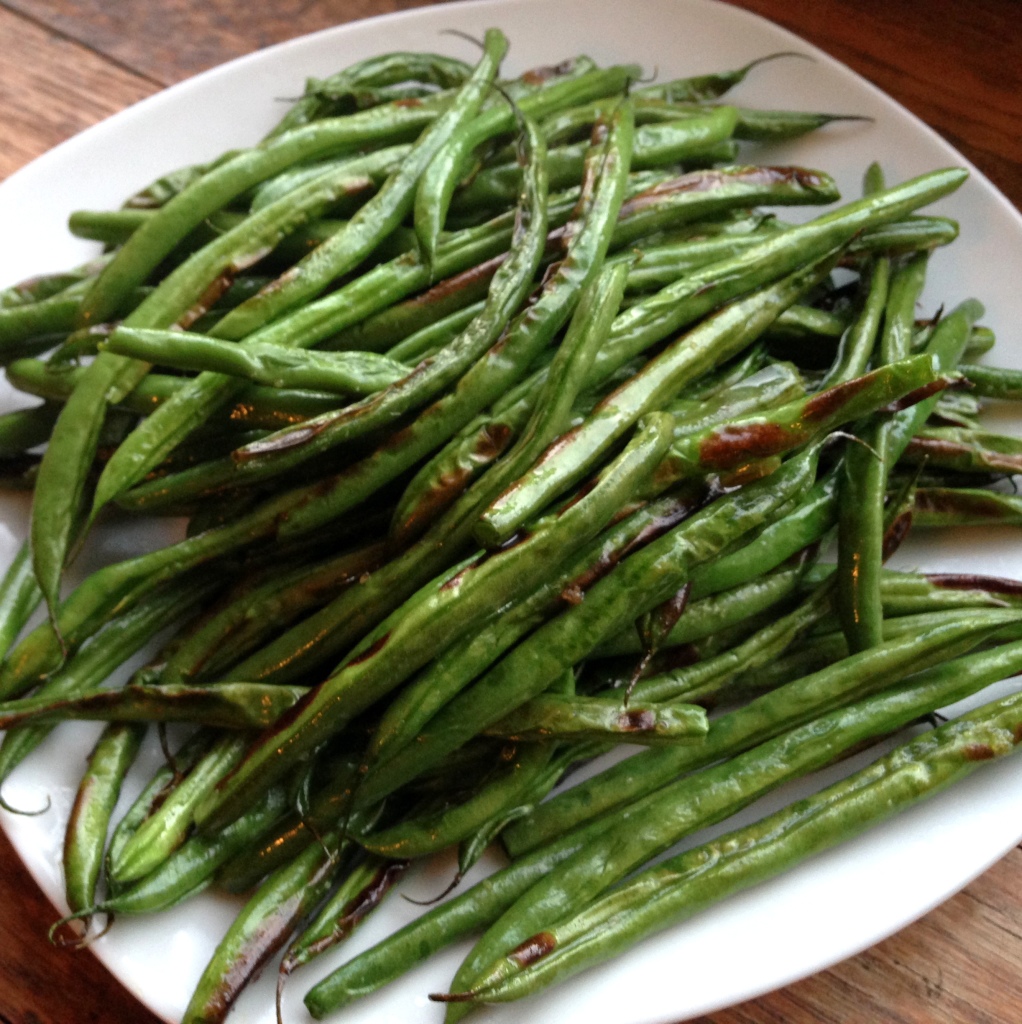
Haricot vert, French for green beans, are a variety of green beans that are longer and thinner than most varieties in the US. When you broil them, they will be tender yet crisp on the outside. Because they are thin, they cook very quickly and work really well in this recipe. If you can’t find them, just use the thinnest green beans you can find and increase the cooking time.

Broiling is a high temperature direct heat cooking method. The outcome is an appearance that mimics Chinese restaurant-style stir fried green beans, usually cooked in a wok over a very high flame, which isn’t always possible at home, especially when you have an electric (as opposed to gas) stove. After broiling, you could try quickly warming them in a large skillet with a Szechuan sauce.

Pro tip: Trim the stems off the green beans by using kitchen shears. It is easier and dirties less dishes than using a cutting board and knife.

You can even roast frozen green beans straight out of the freezer! Prepare them the same way except bake (rather than broil) at 400˚F for 10-15 minutes, stirring once or twice, until light golden brown.

Broiled Green Beans

Serves 3
Prep time 5 minutes
Cook time 15 minutes
Total time 20 minutes
Dietary Diabetic, Gluten Free, Vegan, Vegetarian
Meal type Side Dish, Snack
Misc Child Friendly, Serve Hot
This super simple recipe is addictively delicious and takes only about 5 minutes to cook!

Ingredients

  • 3 cups green beans, trimmed
  • olive oil
  • salt to taste

Optional

  • garlic powder

Directions

Step 1
Place oven rack in the top third of oven, second rack from the top. Set oven to broil.
Step 2
Toss green beans with a drizzle of olive oil, a generous pinch of salt, and if using, a light dusting of garlic powder. Spread an even layer of green beans on a baking sheet.
Step 3
Broil until light golden brown, tossing once or twice, about 5 minutes for haricot vert or very thin green beans, or up to 10-15 minutes for standard green beans. Watch the oven carefully the entire time to prevent burning.

Broiled Green Beans | GuessWhosCooking.com | Easy, quick, healthy, vegan, gluten-free, dairy-free, plant-based

Watermelon “Cake”

RDN Day

Today, March 11, 2015, is Registered Dietitian Day!

Happy RD Day to all the hardworking dietitians out there!

FYI, all dietitians are nutritionists, but not all nutritionists are registered dietitians. Trust the credentialed experts!

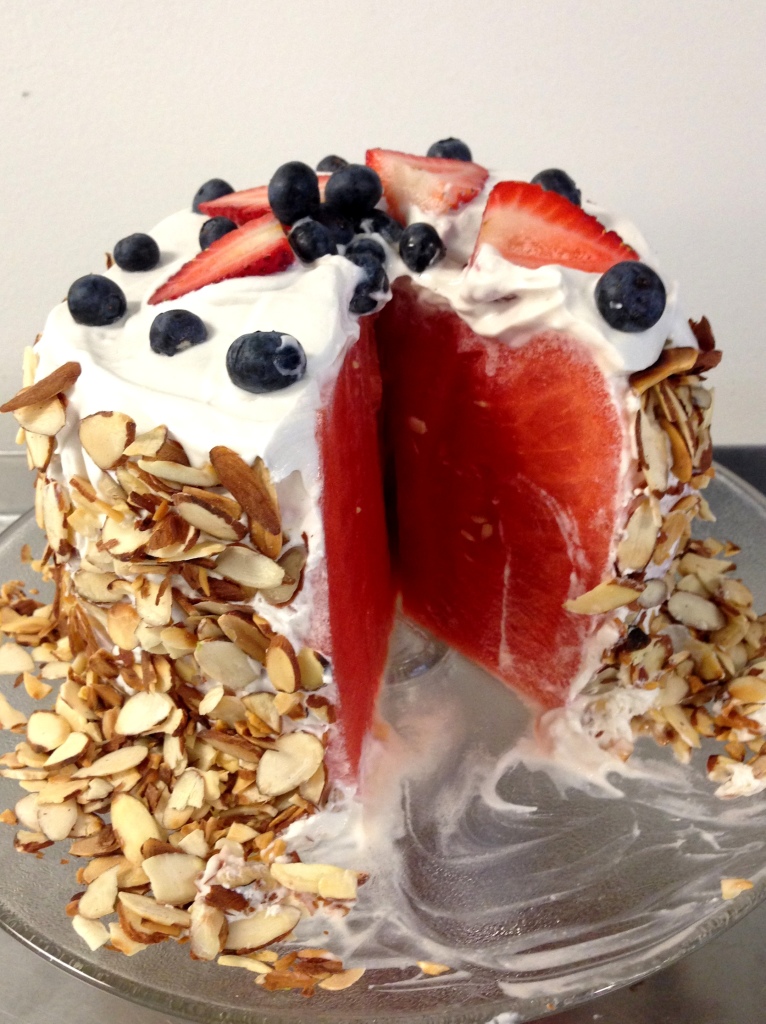
Watermelon Cake - guesswhoscooking.com | healthy, vegan, low-carb, no-sugar-added, gluten-free, dairy-free.

This “cake” will be a pleasant surprise at a party! It requires 3 basic ingredients – watermelon, coconut milk, and vanilla! Decorate it as you wish with fresh fruit, toasted nuts, and/or toasted coconut flakes.

Watermelon “Cake”

Serves 12
This stunning no-sugar-added "cake" is made from 3 ingredients - watermelon, coconut milk, and vanilla! It can be decorated with fresh fruit and toasted nuts or coconut.

Ingredients

  • 1 large seedless watermelon (refrigerated)
  • 2 cans full-fat coconut milk or cream (without guar gum as an ingredient, refrigerated for 24 hours)
  • 1 teaspoon vanilla extract (or contents of 1 vanilla pod)

For decoration

  • 1 cup sliced almonds (toaster)
  • 1-2 cup berries, such as strawberries and blueberries

Directions

Step 1
For best results, place a glass or metal mixing bowl in the freezer for 5-10 minutes. Carefully open the cans of coconut milk and spoon out the thick layer of cream that has separated from the liquid at the top of the can. Place into chilled mixing bowl. Discard the liquid, or save for another recipe such as a smoothie.
Step 2
Beat the cream on medium speed with a hand or stand mixer for 2-4 minutes, or until it becomes light and fluffy and soft peaks form. Add vanilla and beat until just mixed. Set aside. If it becomes too thin to frost the "cake," refrigerate to stiffen the frosting. If it becomes to stiff from refrigeration, beat with the mixer for a few seconds.
Step 3
Cut the ends off the watermelon, then place it on one of the flat ends. Use a large knife to cut vertically around the melon to remove the rind, creating a cylindrical form. As desired, shape the watermelon so it resembles a round cake, cutting off part of the tapered ends if desired.
Step 4
If not frosting the watermelon right away, keep it in the refrigerator until ready. Once ready, pat try the outside of the melon with a towel. Cover with frosting, then decorate with desired toppings.

Watermelon Cake - guesswhoscooking.com | healthy, vegan, low-carb, no-sugar-added, gluten-free, dairy-free.

Watermelon Cake - guesswhoscooking.com | healthy, vegan, low-carb, no-sugar-added, gluten-free, dairy-free.

Confession: The pictured cake was made using coconut milk with guar gum, so the frosting wasn’t as stiff as it should have been. However, if you also make this mistake, it will still turn out pretty well!


Peanut Butter & Chocolate Apple “Nachos”

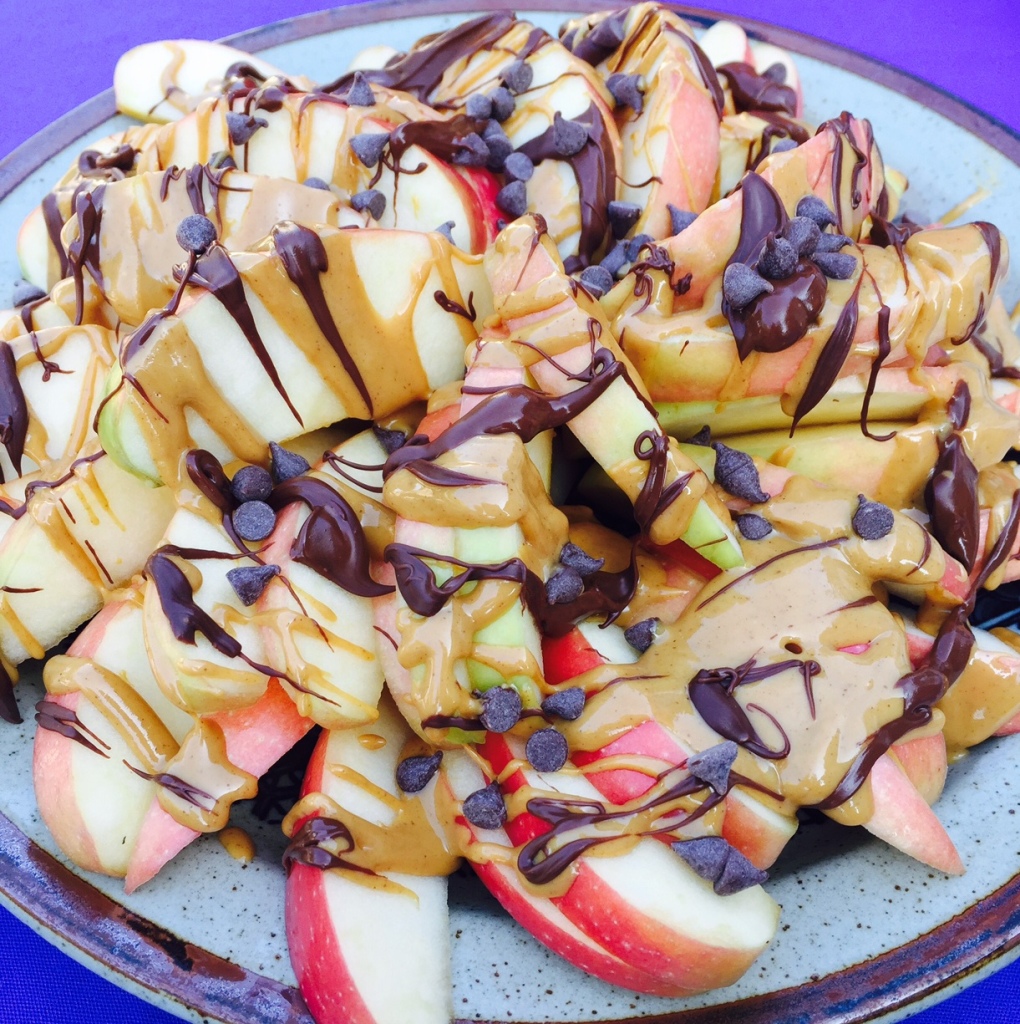
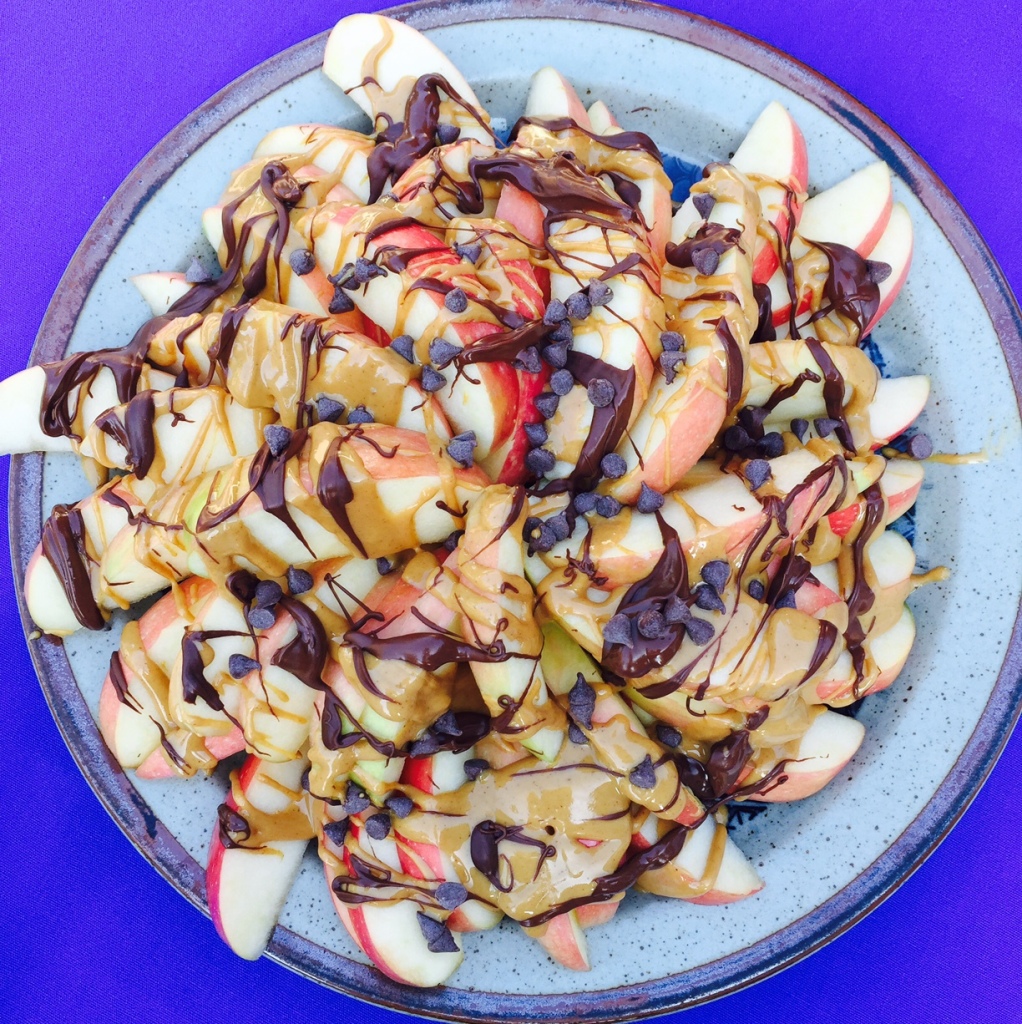
Peanut Butter Chocolate Apple Nachos - healthy dessert that is gluten free, low in added sugar, and can be made dairy free and vegan. Guess Who's Cooking

This guilt-free dessert or appetizer is easy, requires very little cooking (microwaving), and is low in added sugar, gluten-free, and can be made dairy-free and vegan (depending on the chocolate chips). It only takes a few minutes to prepare, but is sure to please!

Peanut Butter Chocolate Apple Nachos

Serves 4-5
Prep time 10 minutes
Cook time 1 minute
Total time 11 minutes
Meal type Appetizer, Dessert
Misc Child Friendly
This fun-looking and fun-tasting dish is a great dessert with very little added sugar.

Ingredients

  • 3 large apples
  • 1/2 cup natural peanut butter (preferably organic and unsweetened)
  • 1/2 cup mini dark or semisweet chocolate chips (divided. Look for vegan chips to make this a vegan recipe)

Directions

Step 1
Cut apples into thin slices, about 16 per apple. Place on a large plate.
Step 2
Microwave the peanut butter in a small bowl on high until it becomes melted enough to drizzle, 15 seconds at a time. You may be able to skip this step if using a fresh jar of natural peanut butter because it will already be somewhat thin. Drizzle over the apples.
Step 3
Microwave 2-3 tablespoons of the chocolate chips in a small bowl on high for about 30 seconds. Stir, then continue heating 15 seconds at a time until completely melted when stirred. Drizzle over the apples.
Step 4
Garnish with the remaining chocolate chips and serve immediately. The apples will start to brown, so don't wait to long to serve.
Peanut Butter Chocolate Apple Nachos - healthy dessert that is gluten free, low in added sugar, and can be made dairy free and vegan. Guess Who's Cooking