1/4cupvegan butteror use regular butter if you prefer
1medium yellow onion, finely dicedabout 1 cup
2stalkscelery, finely dicedabout 1 cup
2tablespoonscorn starch
2 1/2cupsvegetable broth
1tablespoonolive oil
Instructions
Preheat the oven to 350°F.
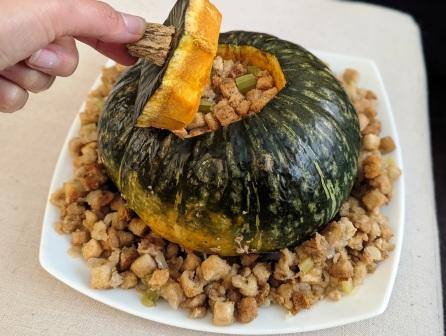
Wash the outside of the pumpkin. Cut a round opening in the top of the pumpkin by using a sharp knife to make incisions that eventually connect to create an opening. If necessary, use a butter knife to gently pry the top loose. Scoop the seeds and stringy parts of the pumpkin out. Sprinkle salt on the inside.
Place the pumpkin and the lid on a baking sheet and bake for 30 minutes. Remove from oven and let cool. Reserve the baking sheet.
In a Dutch oven or stock pot, heat butter over medium heat. Add onion and celery and cook for 5 minutes or until tender-crisp, stirring occasionally.
Add the stuffing mix to the pot and stir.
In a medium bowl, mix the broth and cornstarch well. Slowly drizzle over the stuffing mixture and toss. Continue adding more broth slowly until the bread is just barely soaked through.
With the pumpkin on the reserved baking sheet, fill it with stuffing, pressing down gently to fill the space. Place the pumpkin lid on the baking sheet. Grease a loaf pan with olive oil (or butter) and fill with any remaining stuffing. Cover loaf pan with foil.
Bake the stuffed pumpkin, lid, and extra stuffing for 30 minutes. Remove foil and pumpkin lid, setting aside, then continue baking for 10 minutes or until top of stuffing is lightly crisp.
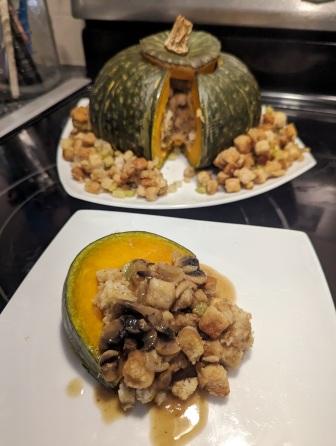
Move pumpkin to serving plate and put lid on top. Serve extra stuffing on the side or surround the pumpkin with it on the serving plate. Place the pumpkin lid on top.
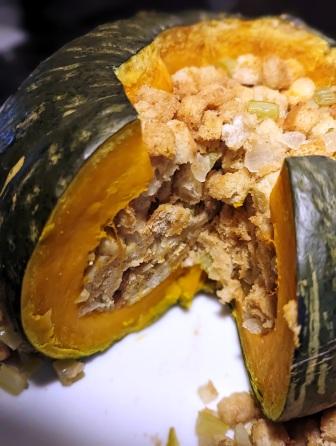
Serve by cutting pumpkin into slices and serve with an extra scoop or two of stuffing. Serving suggestion: top with gravy once sliced.
Recipe Notes
Serve with gravy.
Substitute another stuffing recipe if you’d like.
You can fully cook the pumpkin and the stuffing separately if you prefer to have more control and make it a little easier to tell when the pumpkin is fully cooked. Spoon the stuffing into the pumpkin once cooked, gently pressing down to fill any gaps.
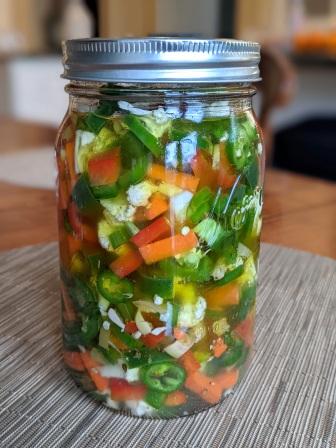
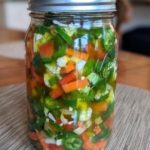
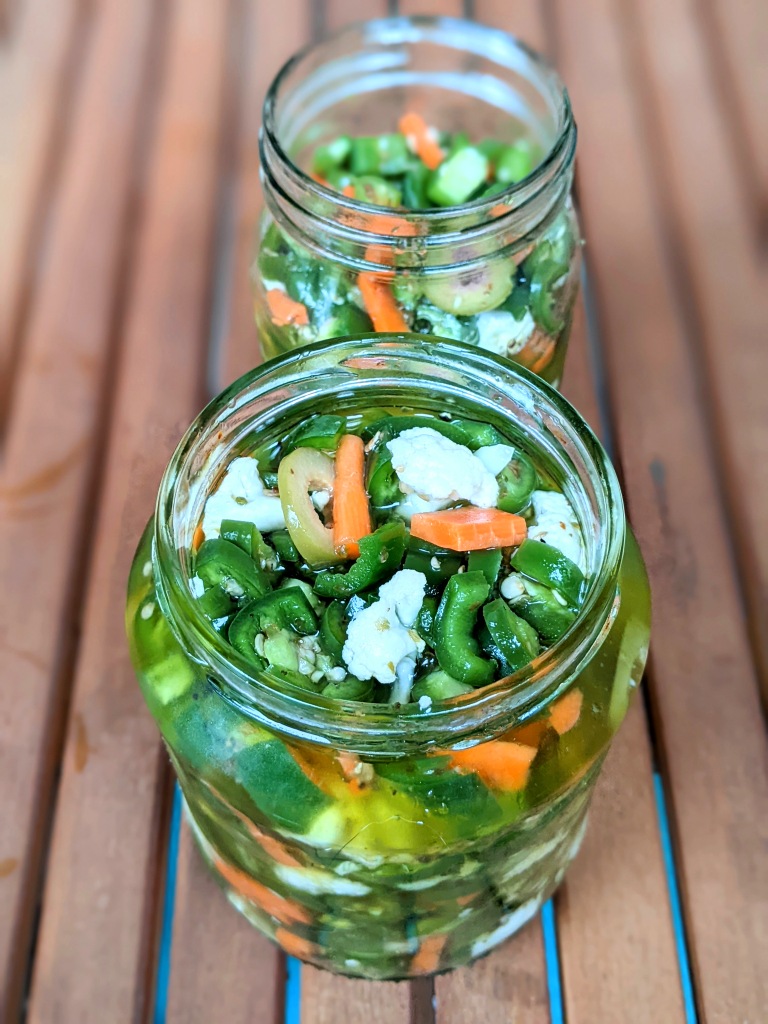
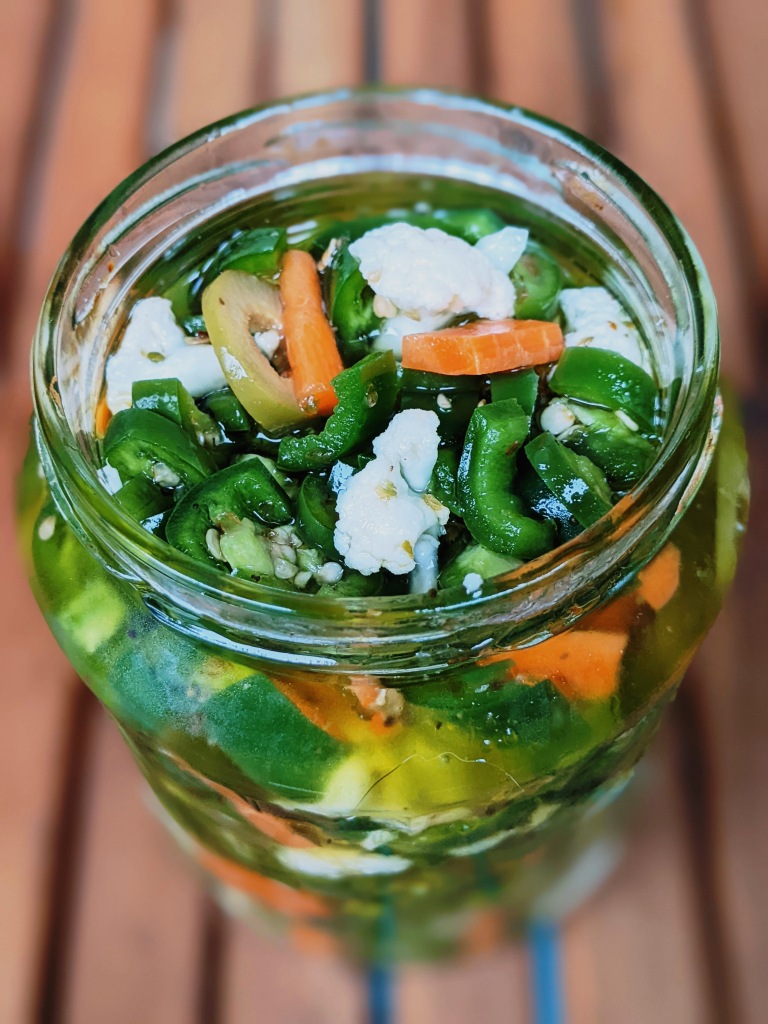
This hot pepper mixture is a delicious topping for sandwiches, wraps, salads, eggs, and more! It is basically a Chicago-Style giardiniera, which is condiment typically higher in oil, lower in vinegar, and made with smaller pieces of vegetables. Italian style giardiniera tends to be lower in oil (if any at all) and larger chunks, so it is more of a pickled vegetable appetizer or side.
You can adjust the spice level of this recipe. To make it milder, remove some or all of the hot pepper seeds and/or replace some of the hot peppers (especially the serranos) with bell pepper or other veggies like celery.
This recipe is adapted from a recipe on fundiego.com, which intends to replicate the hot pepper mix from a sandwich chain called Potbelly.
1/2poundjalapenosquartered and sliced, seeds removed if desired
1/2poundserrano peppersquartered and sliced, seeds removed if desired
1cupcauliflowercut into tiny florets
2carrotspeeled and finely chopped
1/3cupsalt
1cupcanola oilor other neutral flavored oil
1/2cupextra virgin olive oil
1/2 cupwhite vinegar
3clovesgarlicminced
1 1/2teaspoonsdried oregano
Instructions
Combine jalapenos, serrano peppers, cauliflower, and carrots in a medium bowl or container. Sprinkle the salt over the vegetables, then add enough water to cover everything. Stir to disperse the salt. Cover and refrigerate for 12 hours.
Drain and rinse the vegetables.
In a medium non-reactive bowl (such as glass, stainless steel, or ceramic) combine the remaining ingredients. Add the vegetables and stir to combine. Cover the bowl and refrigerate for 2 days to allow the flavors to combine.
Optional: transfer the hot pepper mixture to smaller jars, or keep it in the container it marinated in. The pepper mixture should last about 4 weeks in the refrigerator.
Stir the peppers and allow the excess oil to drain back into the jar when serving. Add the hot pepper mixture to sandwiches, wraps, salads, pizza, eggs, pasta, or whatever else you'd like!
Recipe Notes
To make this recipe less spicy, remove some or all of the seeds from the jalapenos and serrano peppers. You can also substitute bell pepper for and equivalent amount of jalapenos or serrano peppers.
You can add other ingredients such as sliced green olives or chopped celery.
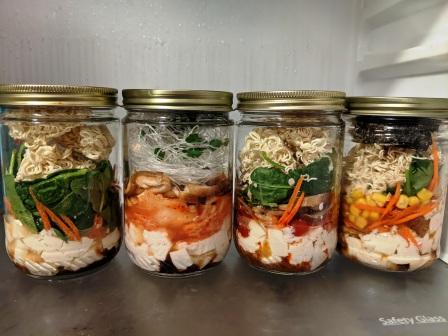
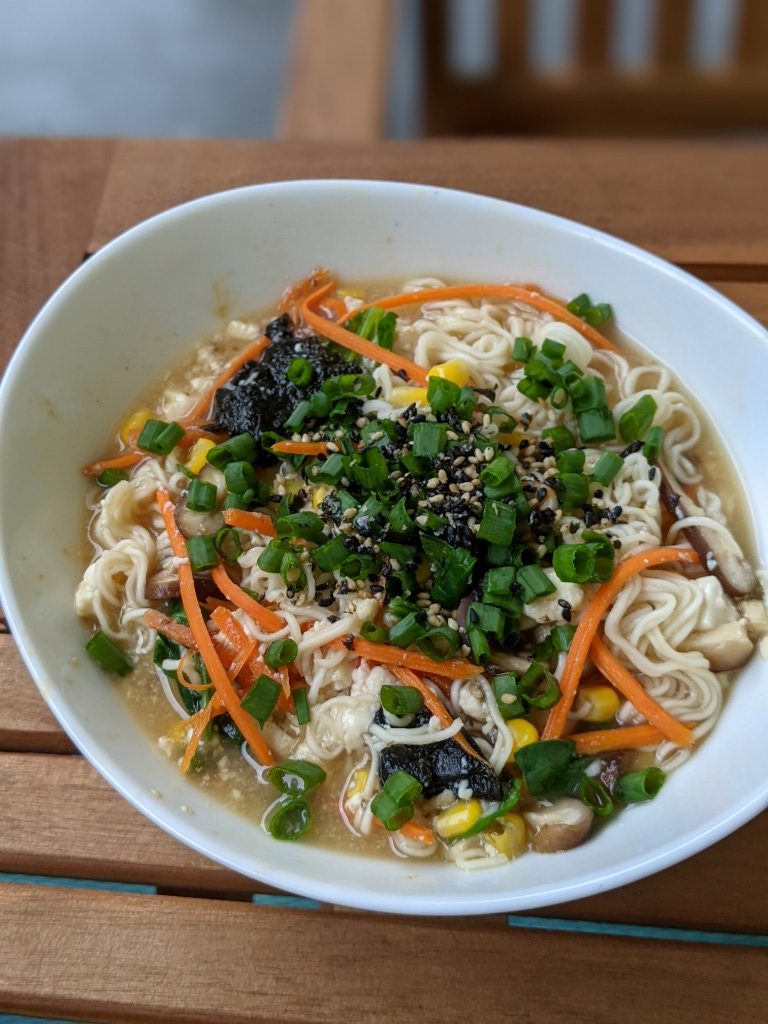
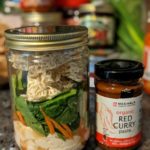
It is not my original idea to make homemade instant noodle cups, but these are 4 flavor combinations I’ve tried and enjoyed. I’m basing the proportions in the recipes below on this recipe from the Kitchn. Serious Eats also has a great article on how to make these instant noodle cups. The 4 suggested combinations I offer below are plant-based or can be made plant-based.
There are countless combinations you could try. The general format from the Kitchn is:
1-3 teaspoons flavor base
1-3 teaspoons flavoring extras
1/4-1/2 cup filler ingredients
3/4-1 cup noodles
1/4-1/2 cup fresh ingredients
I usually reuse 16 ounce glass jars (repurposed nut butter jars), but you could use 16 ounce canning/mason jars or another heat safe container. Just be sure to use a potholder and handle it carefully because it will get very hot once you pour the hot water in.
Other advice: use soft vegetables that will soften in hot water such as thinly sliced mushrooms, shredded carrots, baby spinach, tomato, or thawed frozen vegetables. Adding hot water will not cook the vegetables, just soften slightly, so don’t add things like chunks of zucchini. The examples I share below are plant-based, but if you eat meat or eggs, you could add cooked versions (boiled egg, shredded chicken, etc.). I like to add silken tofu because it’s easy and doesn’t require cooking, but you could also add other plant proteins like edamame, cooked tofu, or other types of raw tofu (such as medium firm)
Using the Kitchn's format, this is one flavor combination I tried and enjoyed. Find the original recipe at https://www.thekitchn.com/how-to-make-diy-instant-noodle-cups-222560
1teaspoonvegetable bouillon pasteor vegetarian no chicken bouillon
1teaspoonreduced sodium miso
1teaspoonreduced sodium soy sauce or tamari
3ouncessilken tofu or 1 soft boiled egg(1/4 of a 12 oz box tofu)
shredded carrots
baby spinach
frozen corn, thawed
2ouncesdried ramen
Toppings: sliced green onion, seaweed strips, and/or furikake
Instructions
Layer ingredients in a heat proof container such as a 16 ounce mason jar, in order of listing. Seal and refrigerate. You can keep the toppings in a separate container to keep them extra crisp if you'd like. Store the sliced green onion in the fridge.
To serve: Pour hot water into the jar until it is just about full and place the lid over it. Do not screw the lid on – the jar will likely be too hot. Let sit for 2-3 minutes or until noodles soften. Carefully stir everything together, holding the jar with a potholder – it will be hot! Alternatively, use a potholder to pour the jar contents into a bowl, then stir. If you'd like it to be hotter or if it needs more water, you can always add more water (if needed) and microwave it until warm enough.
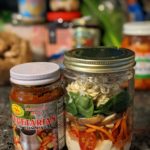
Using the Kitchn's format, this is one flavor combination I tried and enjoyed. Find the original recipe at https://www.thekitchn.com/how-to-make-diy-instant-noodle-cups-222560
Using the Kitchn's format, this is one flavor combination I tried and enjoyed. Find the original recipe at https://www.thekitchn.com/how-to-make-diy-instant-noodle-cups-222560
1teapoonvegetable boullion pasteor vegetarian no chicken bouillon
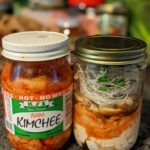
kimchi – use a vegan version if necessary (kimchi may contain fish)
3ouncessilken tofu(1/4 of a 12 ounce box)
Thinly sliced shiitake mushrooms
Dried bean vermicelli
Topping: Sliced green onion
1teaspoonGochugaru (Korean chili flakes)optional
Instructions
Layer ingredients in a heat proof container such as a 16 ounce mason jar, in order of listing. Seal and refrigerate. You can refrigerate the sliced green onion in a separate container to keep it extra crisp if you'd like.
To serve: Pour hot water into the jar until it is just about full and place the lid over it. Do not screw the lid on – the jar will likely be too hot. Let sit for 2-3 minutes or until noodles soften. Carefully stir everything together, holding the jar with a potholder – it will be hot! Alternatively, use a potholder to pour the jar contents into a bowl, then stir. If you'd like it to be hotter or if it needs more water, you can always add more water (if needed) and microwave it until warm enough.
Using the Kitchn's format, this is one flavor combination I tried and enjoyed. Find the original recipe at https://www.thekitchn.com/how-to-make-diy-instant-noodle-cups-222560
Layer ingredients in a heat proof container such as a 16 ounce mason jar, in order of listing. Seal and refrigerate. You can keep the toppings in a separate container to keep them extra crisp if you'd like. Store the sliced green onion in the fridge.
To serve: Pour hot water into the jar until it is just about full and place the lid over it. Do not screw the lid on – the jar will likely be too hot. Let sit for 2-3 minutes or until noodles soften. Carefully stir everything together, holding the jar with a potholder – it will be hot! Alternatively, use a potholder to pour the jar contents into a bowl, then stir. If you'd like it to be hotter or if it needs more water, you can always add more water (if needed) and microwave it until warm enough.
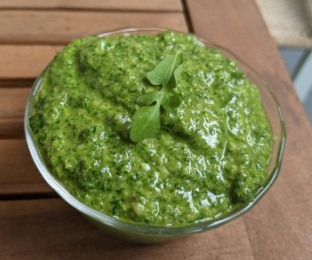
Arugula pesto is an easy, affordable, and peppery spin on traditional pesto, which is typically made with basil. Walnuts are used instead of pine nuts, which are more affordable but still provide a nice texture and flavor, but you can use pine nuts if you’d like. You can also replace some of the arugula with fresh basil. Use this pesto on pasta, sandwiches, wraps, eggs, and more.
zest and juice of 1/2 lemonabout 1 tablespoon juice or more to taste
1tablespoonnutritional yeast
1clovegarlic
1/2teaspoonsalt
Instructions
Combine all ingredients in a food processor and pulse until smooth. You can add more olive oil, salt or lemon juice to reach desired consistency and flavor.
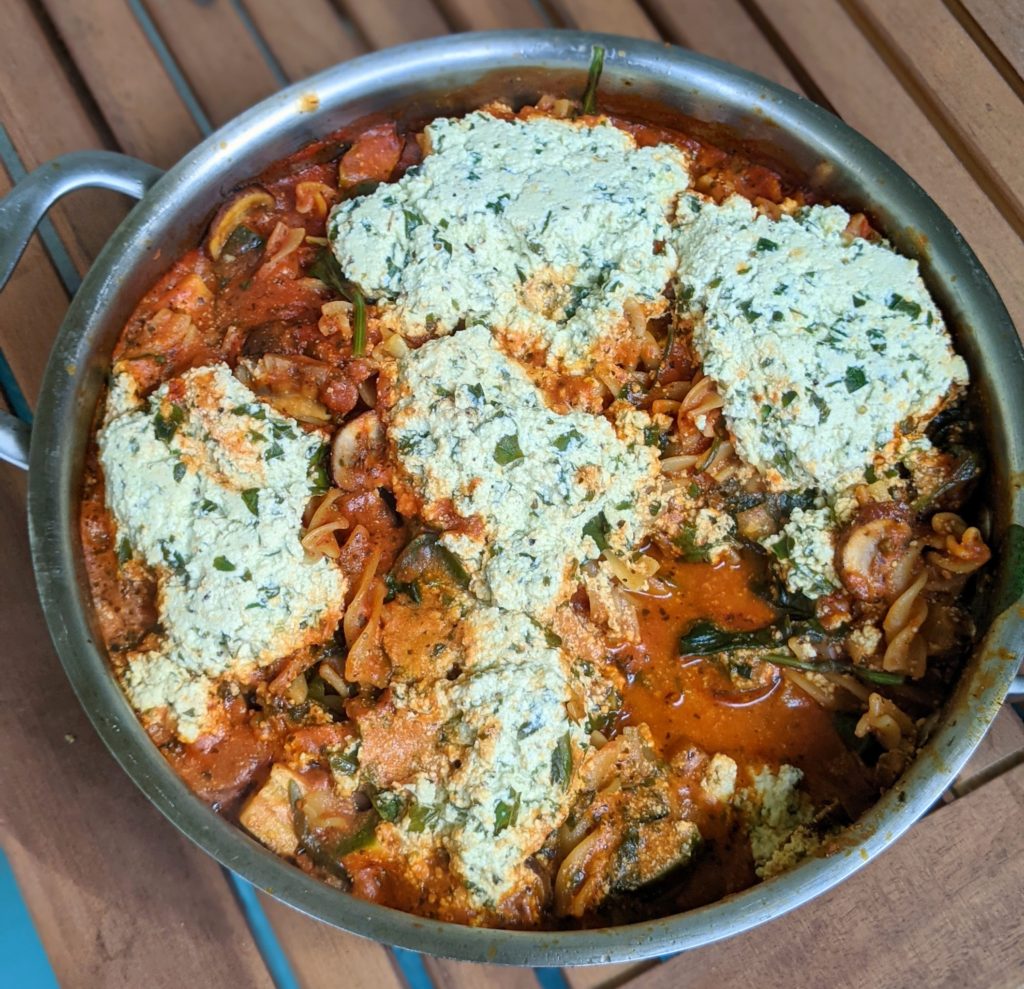
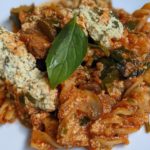
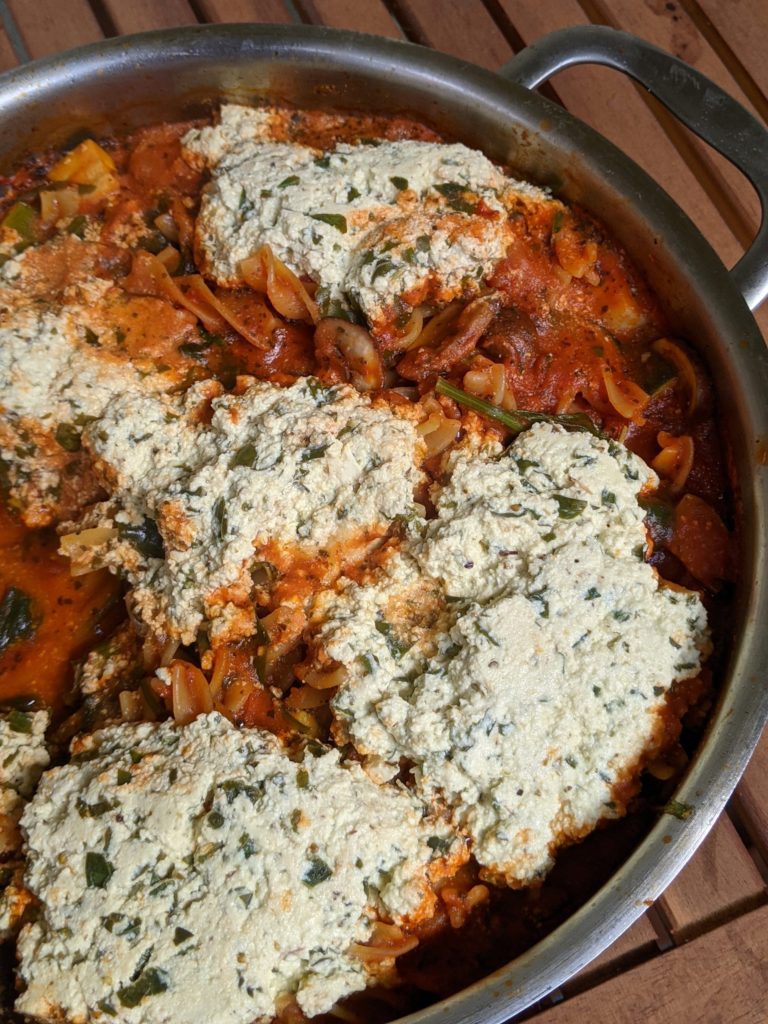
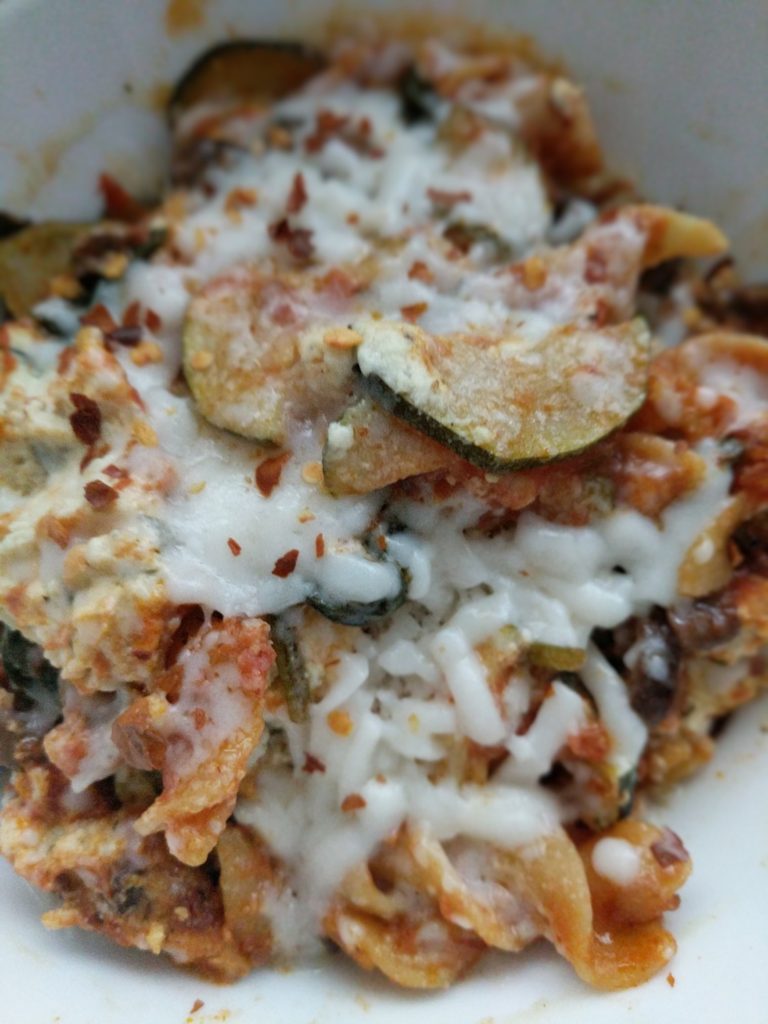
If you love the flavors of lasagna but don’t have the time or patience to assemble it, try skillet lasagna! The whole recipe is made in one pan in about 40 minutes. The tofu ricotta recipe is from Minimalist Baker. If you do not need this recipe to be vegan or dairy-free, you can replace the tofu ricotta (and steps to make it) with regular ricotta cheese. If you do need the recipe to be vegan, be sure to use pasta without egg (or other dairy products) rather than egg noodles. Fusilli is the closest shape to egg noodles. Substitute or add other veggies if you’d like, such as kale, roasted eggplant, or tomatoes.
6ouncesegg noodles (or fusilli to make vegan)3 cups dry
1jarmarinara sauce (about 28 ounces)
2zucchini, chopped into 1/2 inch chunksabout 2 cups
1cupbaby spinach
Instructions
To make tofu ricotta: In a food processor, puree tofu, lemon juice, 3 tablespoons olive oil, nutritional yeast, oregano, salt and pepper. Pulse basil until it is distributed but not completely pureed. Set aside.
In a large skillet, heat remaining 1 tablespoon olive oil over medium high heat. Add onions and cook until they begin to brown, about 5 minutes. Add garlic and cook until fragrant, about 30-60 seconds. Add mushrooms and cook until they begin to cook down, about 3 minutes.
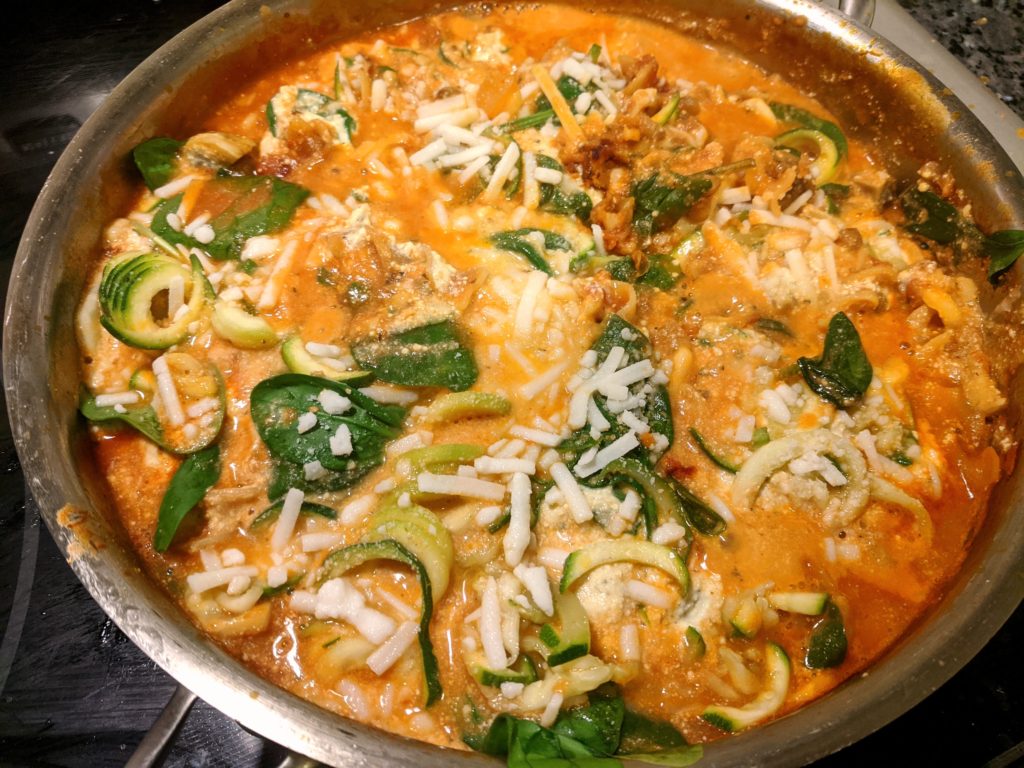
Add marinara sauce, pasta, zucchini, spinach, and 1cup water. Stir together, then top with dollops of tofu ricotta. Cover, reducing heat to a simmer, until noodles are cooked, about 10 minutes. For whole wheat noodles, add an extra ½ cup water and 4-5minutes cooking time, or until noodles are al dente or cooked to your liking.
With spiralized zucchini and dairy-free mozzarella shredsWith dairy-free mozzarella shreds
This recipe is by no means authentic, but it is a fairly easy, plant-based version that you can make at home without any special equipment.
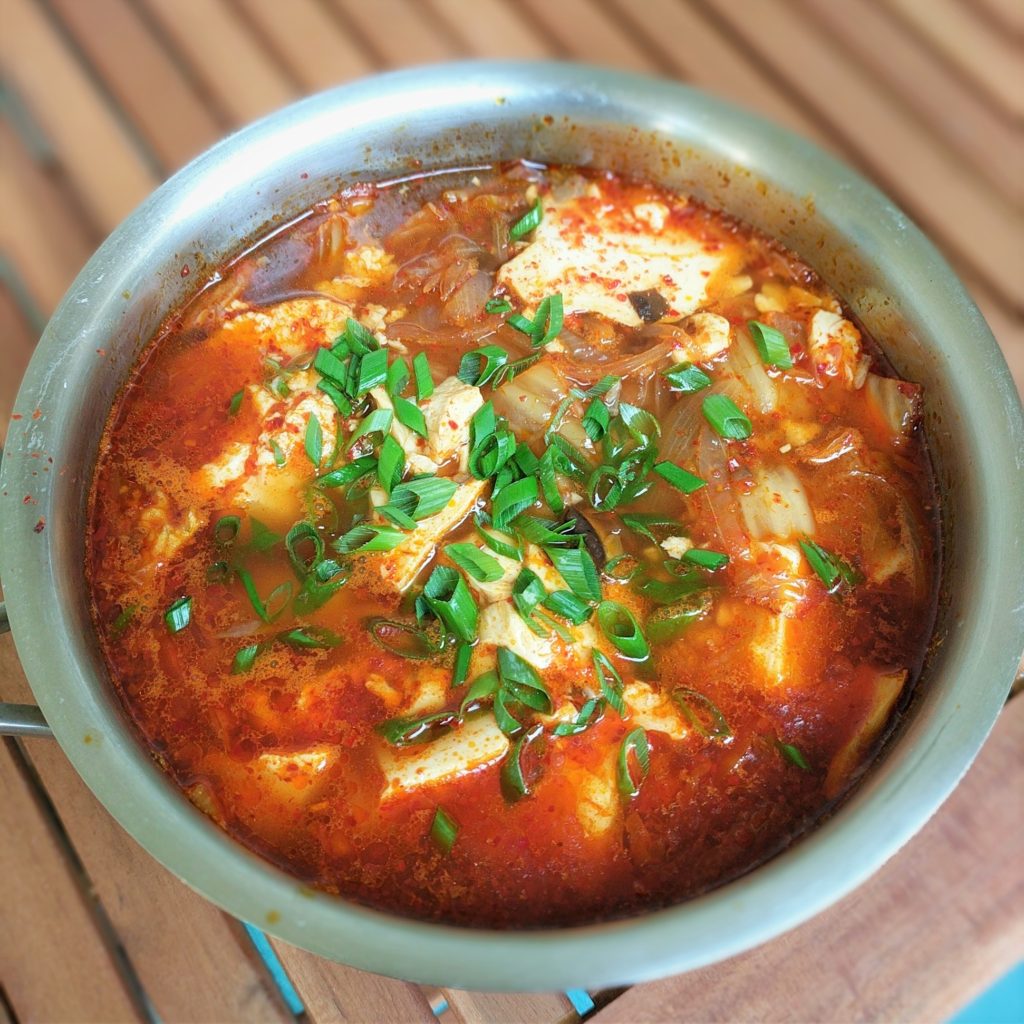
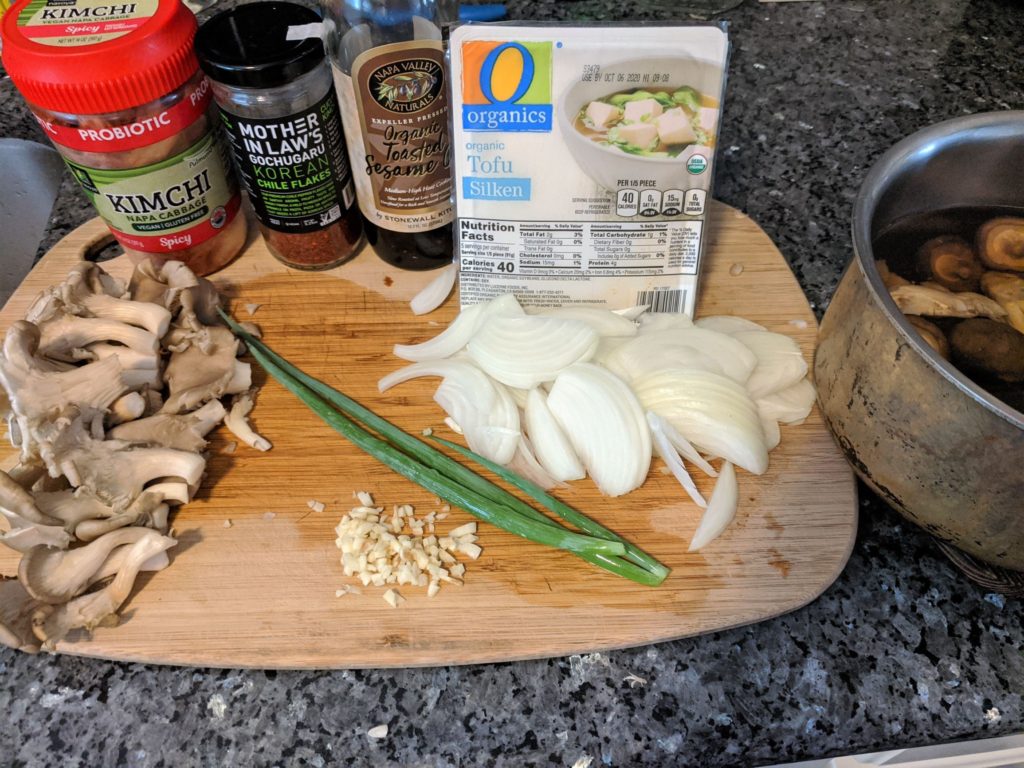
Korean soft tofu stew, soondubu jigae, is a flavorful, thick, spicy, tangy and hearty bowl of deliciousness. I highly encourage you to try a more authentic version at a Korean restaurant if you have the opportunity. It is typically served bubbling hot in a a special pot in which it was cooked, alongside rice and several banchan, or side dishes. It may also contain seafood or meat.
This recipe does use a few ingredients that you may not find at your usual supermarket – kimchi, gochugaru (chili flakes), and kombu (seaweed). You can likely find these ingredients at an Asian market. You can also omit the kimchi, or skip the step of making the broth with the kombu and use vegetable broth instead, although this helps give it a rich, savory, seafood-like taste. However, the chili flakes really make the recipe, so don’t skip them!
Kimchi is a Korean staple made of fermented vegetables, often cabbage, but can be made with a variety of vegetables. Fermented foods like kimchi often have nutrients that are more bioavailable, reduced “anti-nutrients,” and contain beneficial microorganisms that may improve gut health. A few recent studies on kimchi suggested that it may reduce the risk of heart disease and diabetes, but you may not want to overdo it on pickled foods in general – they can contain a lot of salt and byproducts that may have adverse health effects.
This recipe is not authentic soft tofu stew, but it is a vegetarian/vegan version that can be made without any special equipment. I highly encourage you to try a more authentic version at a Korean restaurant if you have the opportunity!
1cupkimchisometimes contains fish sauce, check the label if you need it to be vegetarian
3tablespoonsKorean chili flakes (gochugaru)
1teaspoonsesame oil
1teaspoonsalt or to taste
12-16ouncepackage silken tofu, drained
2stalksgreen onion, diagonally sliced
Instructions
Make the broth: Separate the stems from the shiitake mushrooms and put mushrooms and stems in a saucepan, along with 5 cups of water and kombu. You can also add the stems from the oyster mushrooms. Bring to a boil, then simmer for 25 minutes. Strain the broth, keeping the broth and the vegetables. Set broth aside. Discard kombu and mushroom stems, and slice mushrooms and set aside.
In a saucepan, heat 1 tablespoon oil over medium-high heat. Add onions, stirring occasionally, and cook until translucent and beginning to brown. Add garlic and cook for 30 seconds. Add oyster mushrooms and cook until softened.
Add broth, reserved shiitake mushrooms, kimchi, chili flakes, sesame oil, and salt. Bring to a simmer.
Add tofu in large chunks. Bring to a simmer and cook for 10 minutes.
Divide stew into 4 bowls. Top with green onion and serve.
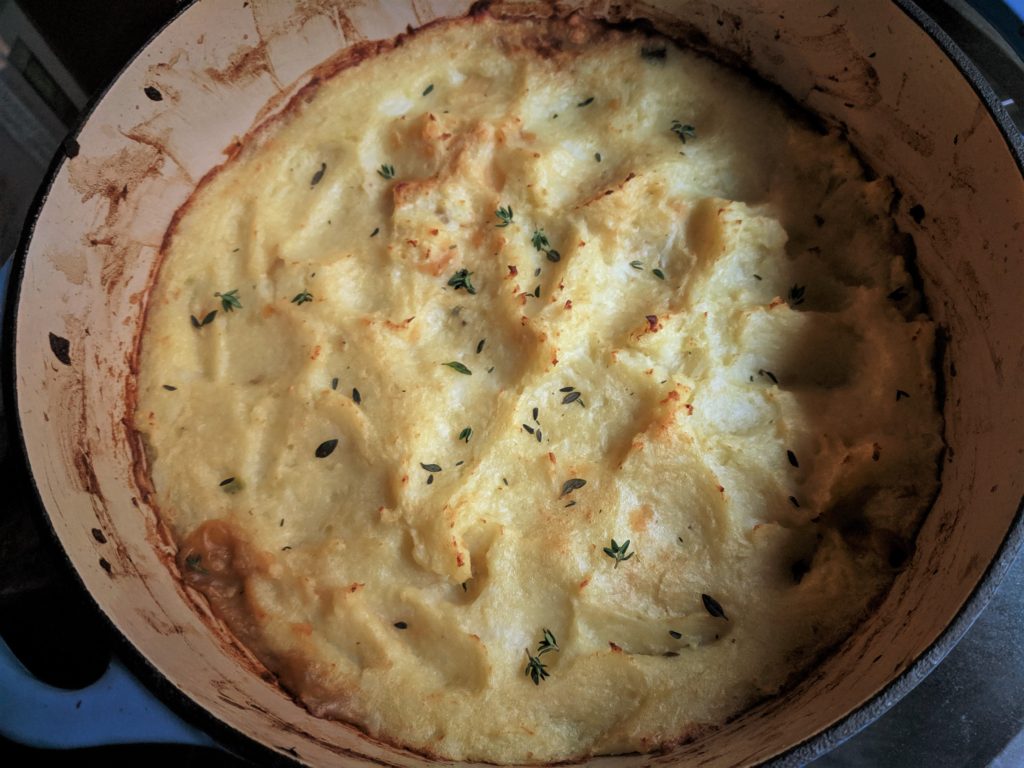
This hearty, rich and savory meal is made solely of plants! It is basically a vegan version of shepherd’s pie and cottage pie. Complex flavor is developed with delicious ingredients such as garlic, onion, thyme, tamari, Worcestershire sauce, and red wine (vinegar).
Heat oil in a Dutch oven or stock pot over medium-high heat.
Add onions and saute for 5 minutes or until they start to become translucent. Add garlic and cook for 30 seconds.
Add vinegar/juice to deglaze the pan, then add stock, mushrooms, mixed vegetables, lentils, tamari, thyme, and worcestershire sauce. Cook until lentils are tender, about 15 minutes.
Preheat broiler on high.
Mix corn starch with ¼ cup water to make a slurry. Add to pot and stir until liquid is thickened. Add 1-2 more tablespoons corn starch if necessary, or more stock or water if it's too thick. The sauce should be thicker than gravy. Add salt to taste.
If prepared in a stock pot, transfer the mixture to a large casserole dish. If using a Dutch oven, keep it in there. Place about ½ cup mashed cauli-tatoes at a time on top of the mixture with remaining cauli-tatoes. Use a spoon or spatula to smooth out the mash, covering the mixture below, and sealing off the edges.
Broil for 10-15 minutes or until lightly browned on top.
Red Wine: If using red wine instead of red wine vinegar, use 1/4 cup and decrease vegetable broth by 2 tablespoons.
Flour: If using flour instead of corn starch, there is no need to make a slurry. Add the flour directly to the pan and stir. Use twice as much flour as corn starch.
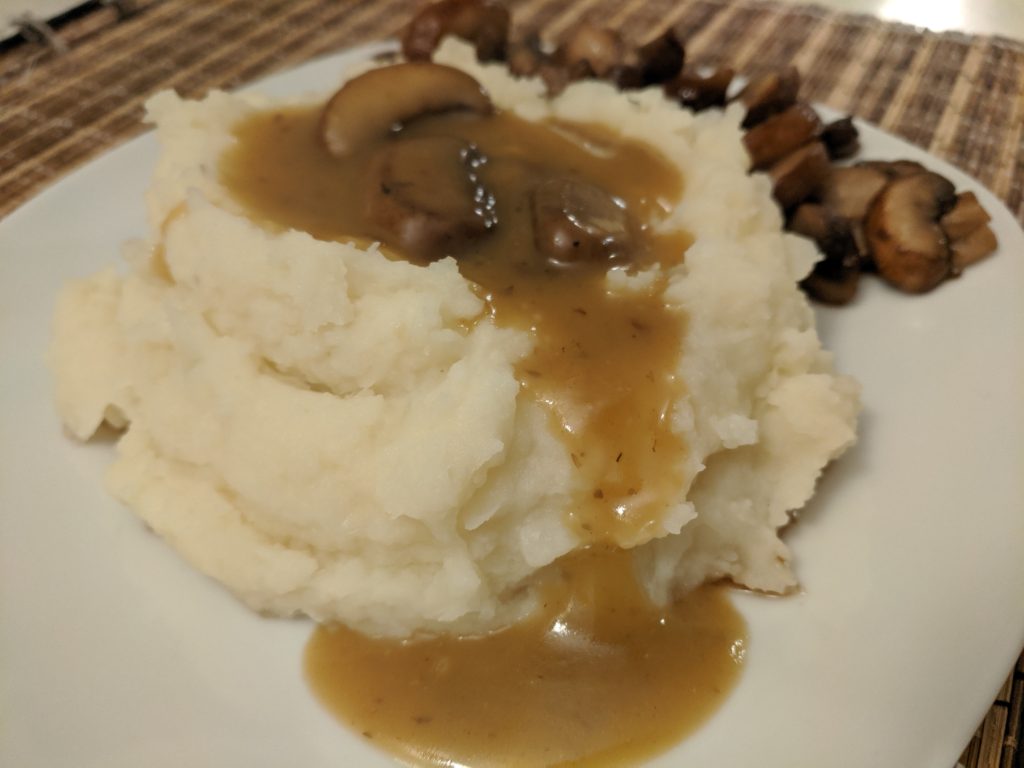
Simpler Version: Simply top the mashed cauli-tatoes with the vegetable mixture, sort of like mashed potatoes and gravy. This saves about 15 minutes or so.
Ingredients like Worcestershire sauce and tamari can be left out if you don't have them, but they help build a more complex flavor.
Vegan: make sure to use vegan Worcestershire sauce
Gluten-free: Use tamari (usually gluten-free but check the label) or gluten-free soy sauce. Use corn starch, not flour, to thicken.
This one pot recipe is so simple but so hearty. The 50/50 mixture of cauliflower and potatoes takes on the starchiness of the potatoes to create a rich and creamy consistency very similar to traditional mashed potatoes. There is no need to steam the cauliflower separately, simply place it on top of the potatoes while they boil and cover, essentially steaming it in the same pot! It is completely plant-based, simply replacing butter with olive oil and milk with a plant-based milk such as cashew.
5cupspotatoes, peeled and choppedideally organic, about 2 pounds
5cupscauliflower florets1 medium head
3tablespoonsolive oil or non-dairy butter
1/2cupplain and unsweetened cashew or other plant milk
1/2teaspoonsaltor to taste
1/2teaspoonblack pepper
Instructions
Place potatoes in a stockpot and cover with water and a lid. Bring to a boil over medium-high heat and cook until they begin to soften, about 5 minutes.
Add cauliflower to the pot on top of the potatoes and cover. Continue cooking until a knife slides easily into the cauliflower and potatoes, about 10 minutes more, adding more water if necessary.
Drain the cauliflower and potatoes, then mash with a potato masher or whisk. Add oil or butter and ¼ cup milk and continue mashing. Add salt and pepper to taste, and more milk if necessary to reach desired consistency.
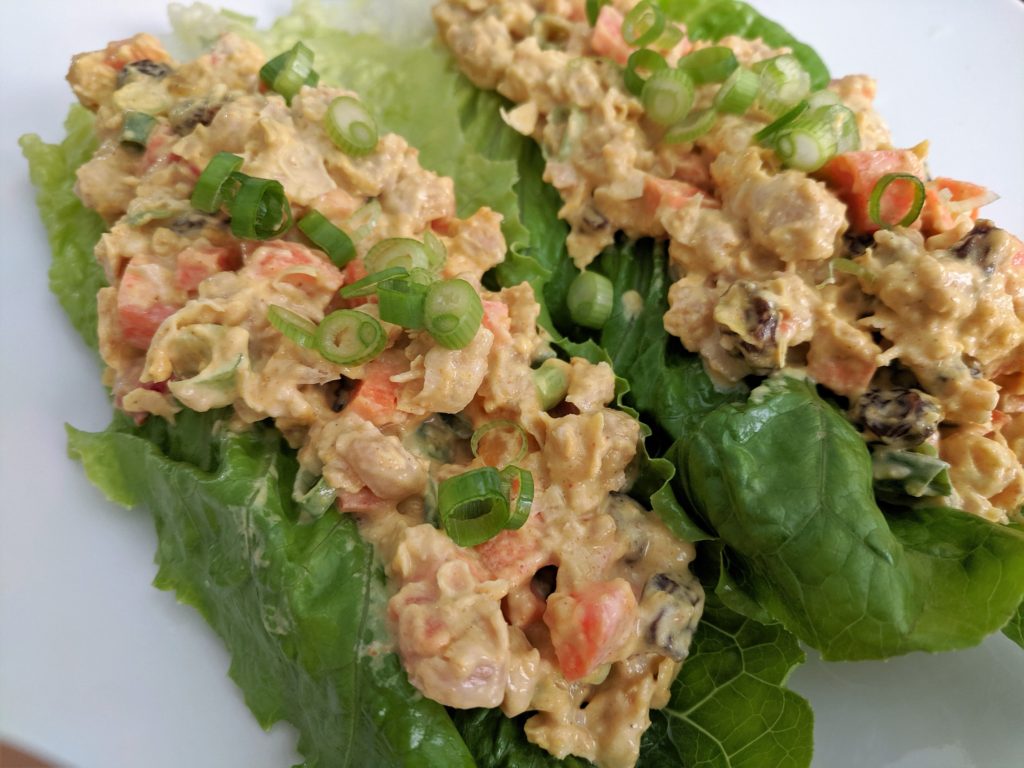
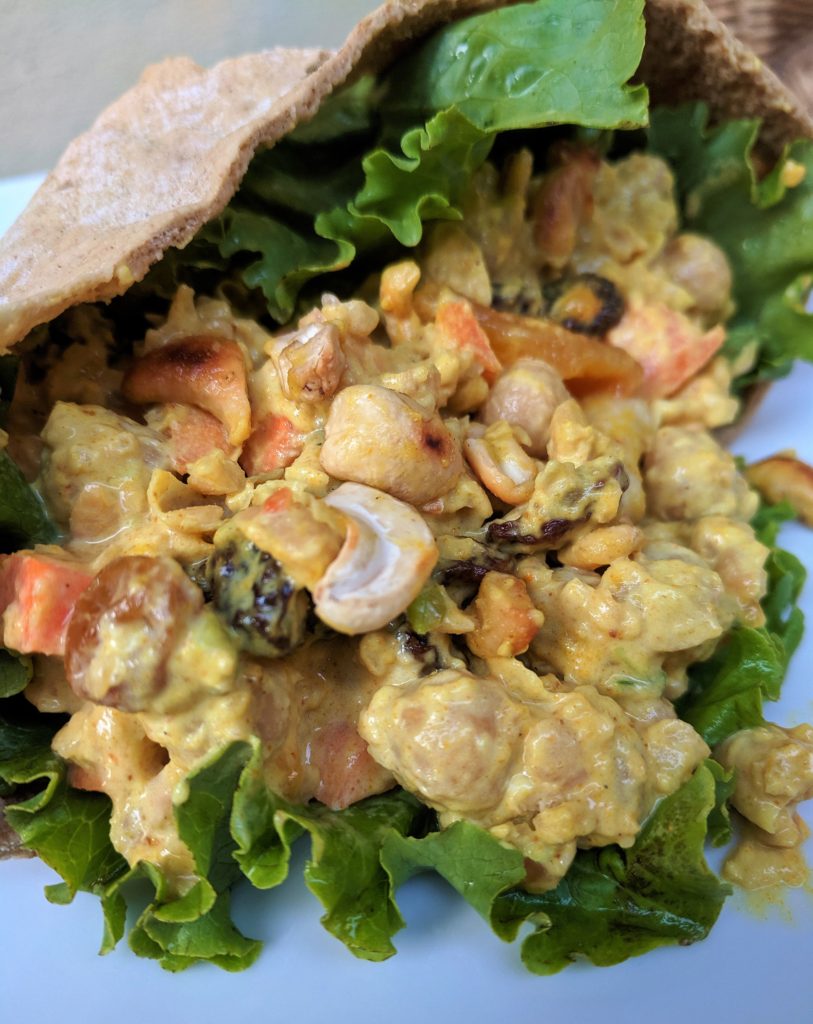
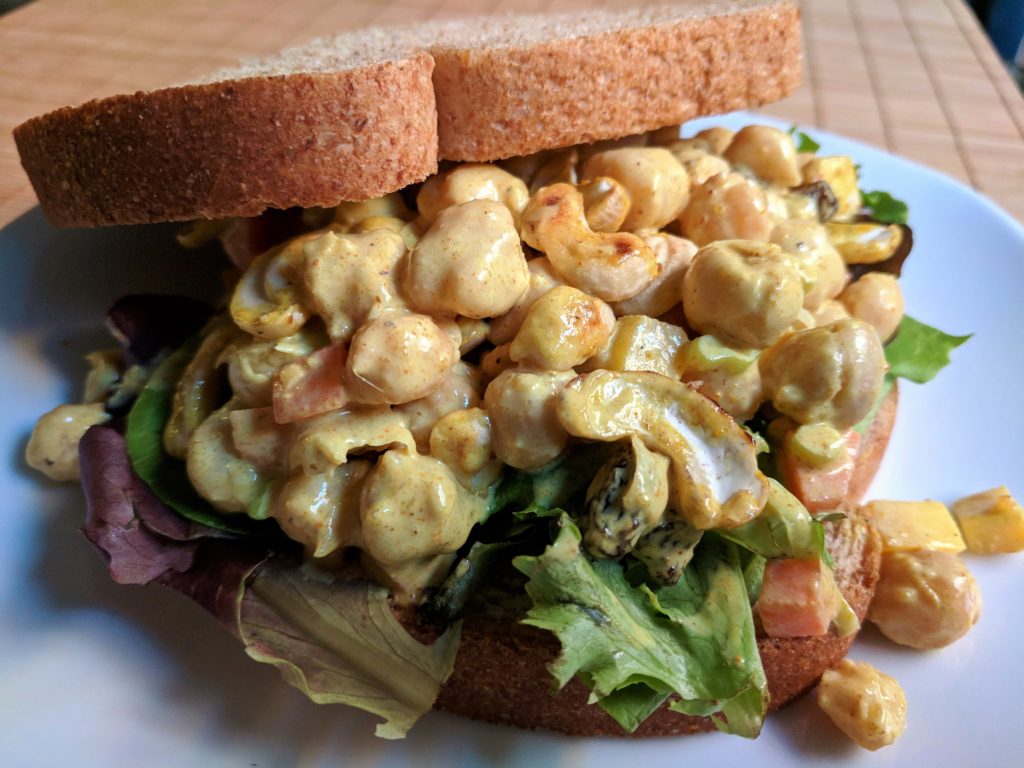
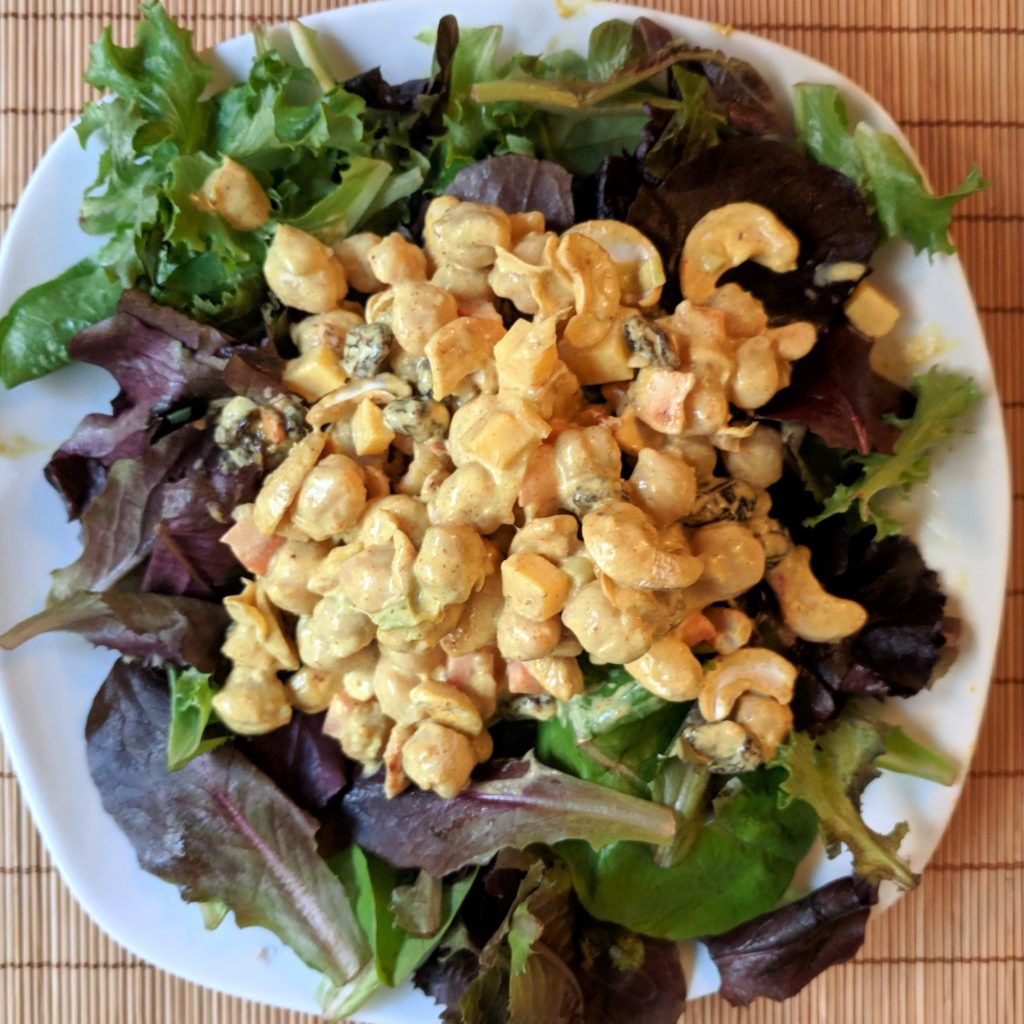
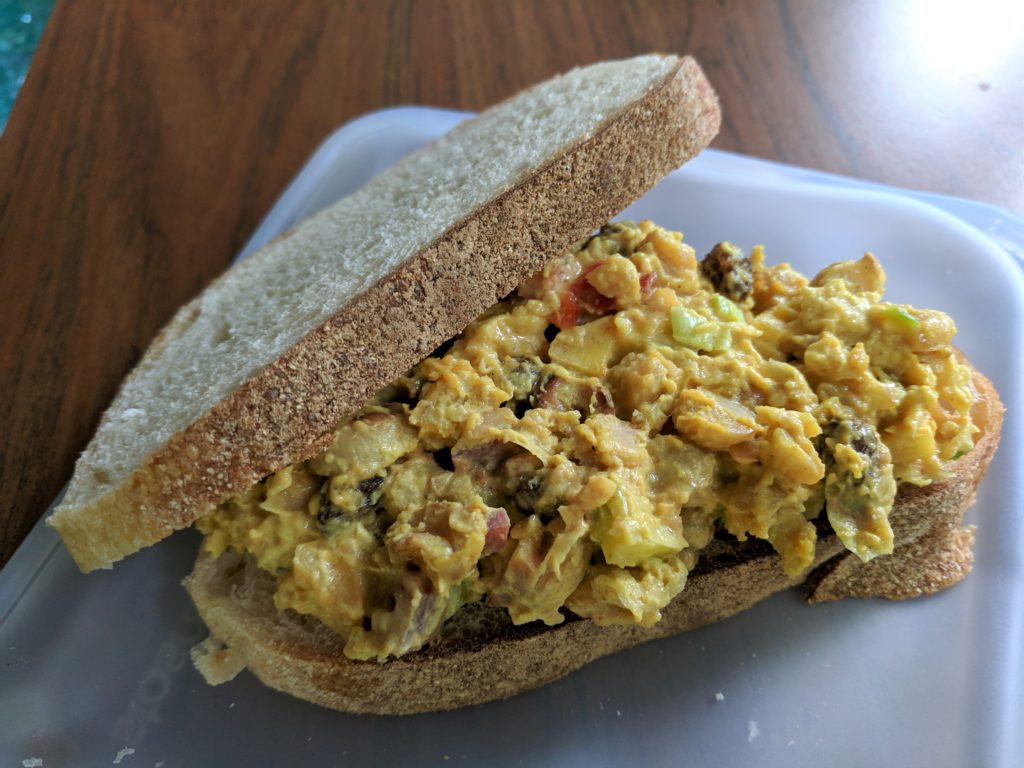
This plant-based salad is very easy and full of flavor – great for a quick make-ahead lunch. It’s cool, creamy, crunchy, chewy, sweet, savory, and rich. It’s easy to keep the ingredients on hand and throw this recipe together anytime. You can easily double the recipe and use it throughout the week, switching up how you serve it – on a romaine boat as pictured above (our favorite because it’s crisp and refreshing), on a salad, in a pita or wrap, or on a sandwich. It’s a great lunch to bring to work or school because it doesn’t need to be reheated, making the (delicious) smell much milder.
This plant-based salad is very easy and full of flavor - great for a quick make-ahead lunch. It's cool, creamy, crunchy, chewy, sweet, savory, and rich.
15ouncecan chickpeas, rinsed and drainedor 1 3/4 cup cooked chickpeas
1/2cuptoasted cashews
1/4cupvegan mayonnaisecould use regular mayo if it doesn't need to be vegan or egg-free
1-2carrots, finely diced
1/4cupraisinsideally organic
2tablespoonsmango chutney
1stalkgreen onion, slicedabout 2 tablespoons
2teaspoonscurry powder
1/2teaspoonsalt or to taste
1/2teaspoonblack pepper
Instructions
Optional: To achieve a softer texture and a mixture that sticks together more, mash about half of the chickpeas with a fork, picking out the loose skins afterwards. Alternatively, put the chickpeas in a towel and rub with the towel to loosen the skins first, then discard the skins and mash.
You can also skip this step and leave the chickpeas whole.
Combine all ingredients in a bowl and stir until well combined.
Serve on top of a salad, in a romaine lettuce boat, or in a sandwich or pita.
Carrot dogs are a plant-based alternative to hot dogs, but thanks to a spice-full marinade, just as flavorful! They may sound a little weird, but if you think about what a hot dog is, is a carrot really weirder? Like hot dogs, these carrot dogs can be grilled or cooked on the stove. This recipe can be gluten-free if you use gluten-free tamari and hold the bun or use a gluten-free bun.
They can be prepared ahead of time for camping – steam the carrots, put them in an airtight container in the marinade, and bring them to your campsite in a cooler with plenty of ice. Grill them ideally within 24 hours of putting them in the marinade, otherwise they may start to break down or get mushy. You can leave out the liquid smoke if you are going to be grilling them or cooking them over a fire.
A flavorful marinade helps make carrots take on that classic hot dog taste without the meat. Make this recipe at home on the stove or grill, or bring them on your next camping trip and roast them over a camp fire!
Course
Main Course
Cuisine
American
Keyword
grill, hot dog, plant-based, vegan, vegetarian
Prep Time10minutes
Cook Time10minutes
Total Time20minutes
Servings6
Ingredients
6large carrots
1cupvegetable broth
1/4cupapple cider vinegar
1/4cupreduced sodium tamarior soy sauce
1tablespoon brown or yellow mustard
4teaspoonssmoked paprika
2teaspoongarlic powder
2teaspoonblack pepper
1/2teaspoonliquid smokeoptional
6hot dog buns, ideally whole grain
Instructions
Cut ends off of carrots to be about the same length as hot dog bun. Peel carrots. Optional: round off ends with peeler to resemble hot dog.
Steam carrots until slightly tender, or when a sharp knife can pierce them, 12-15 minutes, depending on thickness.
Meanwhile, combine remaining ingredients except buns to make the marinade.
Place carrots into marinade and refrigerate overnight, up to one day (8-24 hours).
Heat grill or skillet with 1 tablespoon oil to medium high heat, remove from marinade, and cook until slightly charred, turning twice, about 5-8 minutes. Serve on a hot dog bun with any desired toppings, such as mustard or chili.