Tag Archives: lunch

Homemade Instant Noodle Cups – 4 Flavors

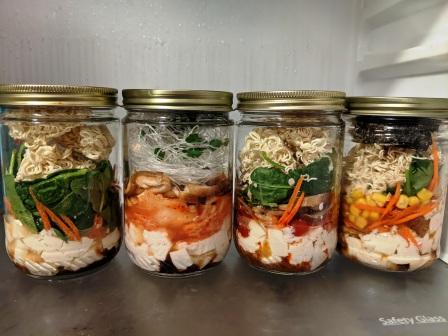
4 types of instant noodle jars in a fridge

It is not my original idea to make homemade instant noodle cups, but these are 4 flavor combinations I’ve tried and enjoyed. I’m basing the proportions in the recipes below on this recipe from the Kitchn. Serious Eats also has a great article on how to make these instant noodle cups. The 4 suggested combinations I offer below are plant-based or can be made plant-based.

There are countless combinations you could try. The general format from the Kitchn is:

1-3 teaspoons flavor base

1-3 teaspoons flavoring extras

1/4-1/2 cup filler ingredients

3/4-1 cup noodles

1/4-1/2 cup fresh ingredients

I usually reuse 16 ounce glass jars (repurposed nut butter jars), but you could use 16 ounce canning/mason jars or another heat safe container. Just be sure to use a potholder and handle it carefully because it will get very hot once you pour the hot water in.

Other advice: use soft vegetables that will soften in hot water such as thinly sliced mushrooms, shredded carrots, baby spinach, tomato, or thawed frozen vegetables. Adding hot water will not cook the vegetables, just soften slightly, so don’t add things like chunks of zucchini. The examples I share below are plant-based, but if you eat meat or eggs, you could add cooked versions (boiled egg, shredded chicken, etc.). I like to add silken tofu because it’s easy and doesn’t require cooking, but you could also add other plant proteins like edamame, cooked tofu, or other types of raw tofu (such as medium firm)
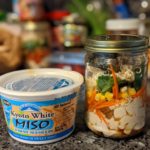
Miso Ramen Instant Noodle Cup

Using the Kitchn's format, this is one flavor combination I tried and enjoyed. Find the original recipe at https://www.thekitchn.com/how-to-make-diy-instant-noodle-cups-222560

Course Main Course
Keyword instant, Japanese, Lunch, make ahead, meal prep, miso, noodles, plant-based, ramen, vegan, vegetables, vegetarian
Prep Time 5 minutes
Cook Time 5 minutes
Total Time 10 minutes
Servings 1

Ingredients

  • 1 teaspoon vegetable bouillon paste or vegetarian no chicken bouillon
  • 1 teaspoon reduced sodium miso
  • 1 teaspoon reduced sodium soy sauce or tamari
  • 3 ounces silken tofu or 1 soft boiled egg (1/4 of a 12 oz box tofu)
  • shredded carrots
  • baby spinach
  • frozen corn, thawed
  • 2 ounces dried ramen
  • Toppings: sliced green onion, seaweed strips, and/or furikake

Instructions

  1. Layer ingredients in a heat proof container such as a 16 ounce mason jar, in order of listing. Seal and refrigerate. You can keep the toppings in a separate container to keep them extra crisp if you'd like. Store the sliced green onion in the fridge.

  2. To serve: Pour hot water into the jar until it is just about full and place the lid over it. Do not screw the lid on – the jar will likely be too hot. Let sit for 2-3 minutes or until noodles soften. Carefully stir everything together, holding the jar with a potholder – it will be hot! Alternatively, use a potholder to pour the jar contents into a bowl, then stir. If you'd like it to be hotter or if it needs more water, you can always add more water (if needed) and microwave it until warm enough.
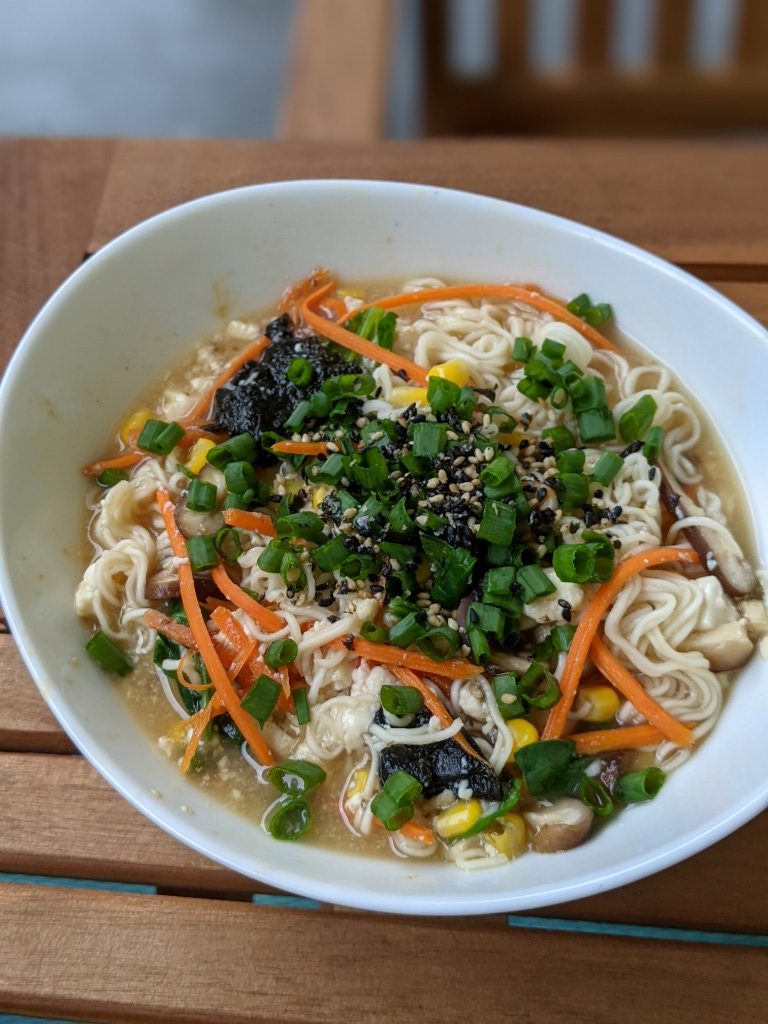
Miso Ramen – Prepared

Spicy Thai Red Curry Ramen

Using the Kitchn's format, this is one flavor combination I tried and enjoyed. Find the original recipe at https://www.thekitchn.com/how-to-make-diy-instant-noodle-cups-222560

Course Main Course
Keyword easy, entree, Lunch, make ahead, meal prep, noodles, plant-based, soup, Thai, vegan, vegetables, vegetarian
Prep Time 5 minutes
Cook Time 5 minutes
Total Time 10 minutes
Servings 1

Ingredients

  • 1 teaspoon vegetable bouillon paste or vegetarian no chicken bouillon
  • 2 teaspoons red curry paste or other curry paste, which may be milder
  • 2-3 tablespoons coconut cream
  • 3 ounces silken tofu (1/4 of a 12 ounce box)
  • thinly sliced shiitake mushrooms
  • shredded carrot
  • baby spinach
  • 2 ounces dried ramen
  • Topping: Thai basil

Kimchi & Vermicelli Soup

Using the Kitchn's format, this is one flavor combination I tried and enjoyed. Find the original recipe at https://www.thekitchn.com/how-to-make-diy-instant-noodle-cups-222560

Course Main Course
Keyword easy, entree, kimchi, Korean, Lunch, make ahead, noodles, plant-based, soup, vegan, vegetables, vegetarian
Prep Time 5 minutes
Cook Time 5 minutes
Total Time 10 minutes
Servings 1

Ingredients

  • 1 teapoon vegetable boullion paste or vegetarian no chicken bouillon
  • kimchi – use a vegan version if necessary (kimchi may contain fish)
  • 3 ounces silken tofu (1/4 of a 12 ounce box)
  • Thinly sliced shiitake mushrooms
  • Dried bean vermicelli
  • Topping: Sliced green onion
  • 1 teaspoon Gochugaru (Korean chili flakes) optional

Instructions

  1. Layer ingredients in a heat proof container such as a 16 ounce mason jar, in order of listing. Seal and refrigerate. You can refrigerate the sliced green onion in a separate container to keep it extra crisp if you'd like.

  2. To serve: Pour hot water into the jar until it is just about full and place the lid over it. Do not screw the lid on – the jar will likely be too hot. Let sit for 2-3 minutes or until noodles soften. Carefully stir everything together, holding the jar with a potholder – it will be hot! Alternatively, use a potholder to pour the jar contents into a bowl, then stir. If you'd like it to be hotter or if it needs more water, you can always add more water (if needed) and microwave it until warm enough.
Tom Yum Ramen

Using the Kitchn's format, this is one flavor combination I tried and enjoyed. Find the original recipe at https://www.thekitchn.com/how-to-make-diy-instant-noodle-cups-222560

Course Main Course
Keyword easy, entree, Lunch, make ahead, meal prep, noodles, plant-based, soup, Thai, vegetables, vegetarian
Prep Time 5 minutes
Cook Time 5 minutes
Total Time 10 minutes
Servings 1

Ingredients

  • 2 teaspoons tom yum paste vegetarian if necessary
  • 3 ounces silken tofu (1/4 of a 12 ounce package)
  • cherry tomatoes, halved about 8
  • shiitake mushroom, thinly sliced
  • shredded carrot
  • baby spinach
  • 2 ounces Dried ramen
  • Toppings: lime wedge, cilantro (optional)

Instructions

  1. Layer ingredients in a heat proof container such as a 16 ounce mason jar, in order of listing. Seal and refrigerate. You can keep the toppings in a separate container to keep them extra crisp if you'd like. Store the sliced green onion in the fridge.

  2. To serve: Pour hot water into the jar until it is just about full and place the lid over it. Do not screw the lid on – the jar will likely be too hot. Let sit for 2-3 minutes or until noodles soften. Carefully stir everything together, holding the jar with a potholder – it will be hot! Alternatively, use a potholder to pour the jar contents into a bowl, then stir. If you'd like it to be hotter or if it needs more water, you can always add more water (if needed) and microwave it until warm enough.
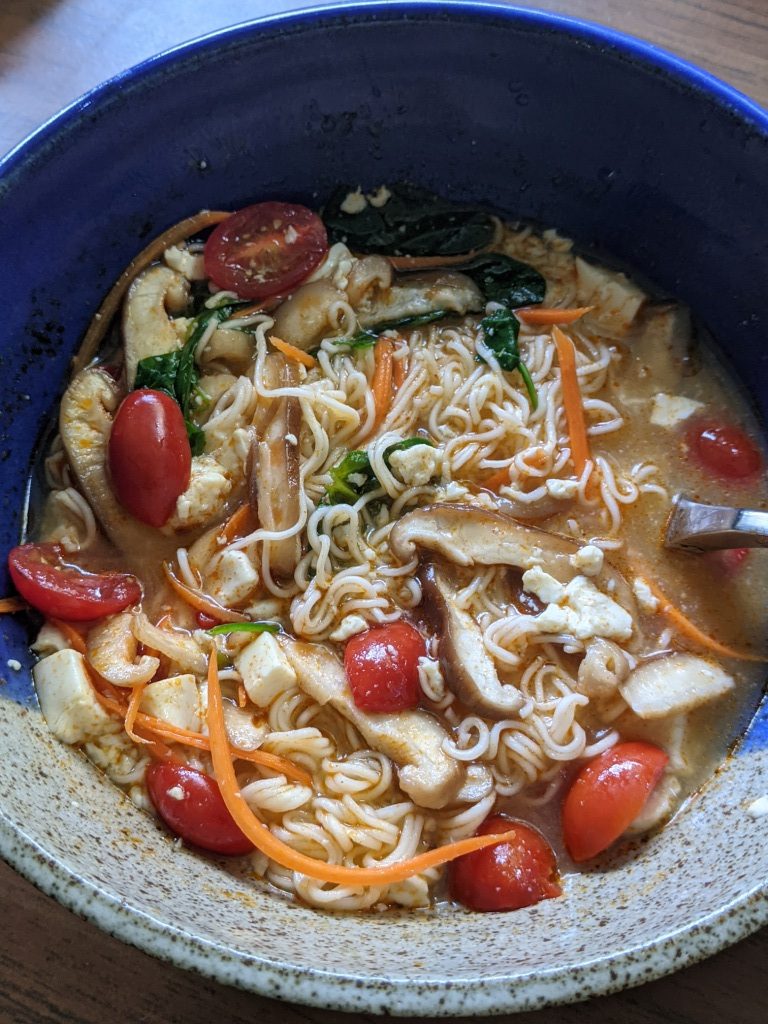
Tom Yum - Prepared
Tom Yum – Prepared

Curried Chickpea Salad

Curried Chickpea Salad - Guess Who's Cooking

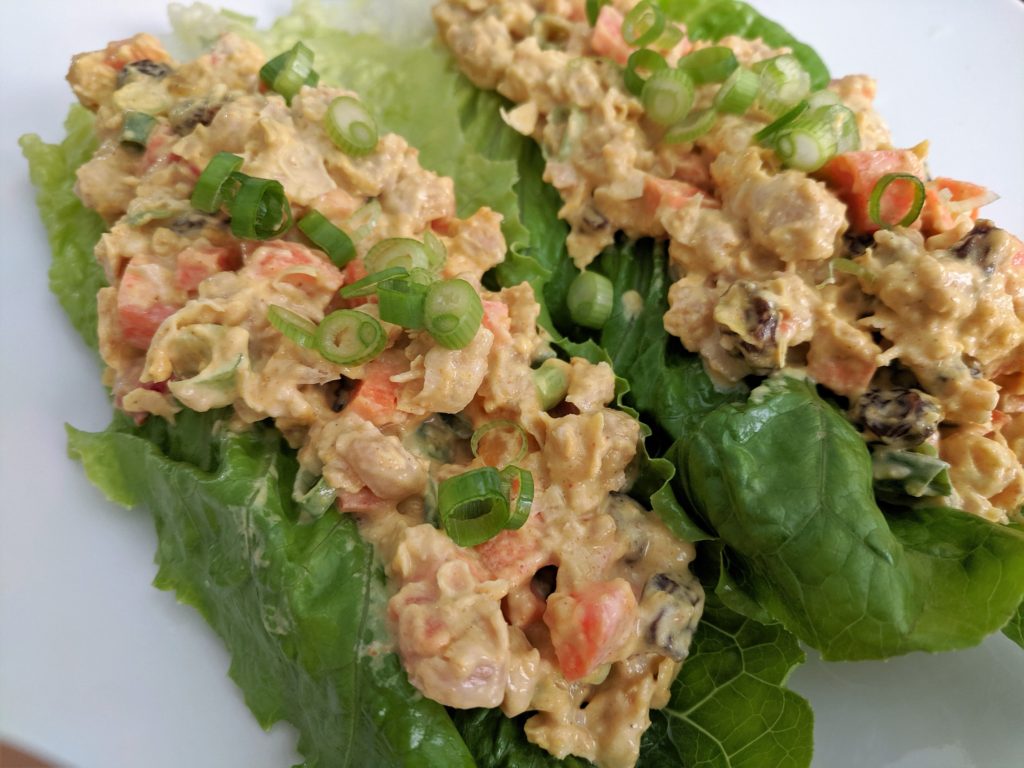
This plant-based salad is very easy and full of flavor – great for a quick make-ahead lunch. It’s cool, creamy, crunchy, chewy, sweet, savory, and rich. It’s easy to keep the ingredients on hand and throw this recipe together anytime. You can easily double the recipe and use it throughout the week, switching up how you serve it – on a romaine boat as pictured above (our favorite because it’s crisp and refreshing), on a salad, in a pita or wrap, or on a sandwich. It’s a great lunch to bring to work or school because it doesn’t need to be reheated, making the (delicious) smell much milder.

Curried Chickpea Salad

This plant-based salad is very easy and full of flavor - great for a quick make-ahead lunch. It's cool, creamy, crunchy, chewy, sweet, savory, and rich.

Course Main Course
Cuisine American, Indian
Keyword Beans, Chickpeas, Curry, Lunch, pita, plant-based, Salad, sandwich, vegan, vegetarian
Prep Time 10 minutes
Total Time 10 minutes
Servings 4

Ingredients

  • 15 ounce can chickpeas, rinsed and drained or 1 3/4 cup cooked chickpeas
  • 1/2 cup toasted cashews
  • 1/4 cup vegan mayonnaise could use regular mayo if it doesn't need to be vegan or egg-free
  • 1-2 carrots, finely diced
  • 1/4 cup raisins ideally organic
  • 2 tablespoons mango chutney
  • 1 stalk green onion, sliced about 2 tablespoons
  • 2 teaspoons curry powder
  • 1/2 teaspoon salt or to taste
  • 1/2 teaspoon black pepper

Instructions

  1. Optional: To achieve a softer texture and a mixture that sticks together more, mash about half of the chickpeas with a fork, picking out the loose skins afterwards. Alternatively, put the chickpeas in a towel and rub with the towel to loosen the skins first, then discard the skins and mash. 

    You can also skip this step and leave the chickpeas whole.


  2. Combine all ingredients in a bowl and stir until well combined. 

  3. Serve on top of a salad, in a romaine lettuce boat, or in a sandwich or pita. 

Curried Chickpea Salad - Guess Who's Cooking
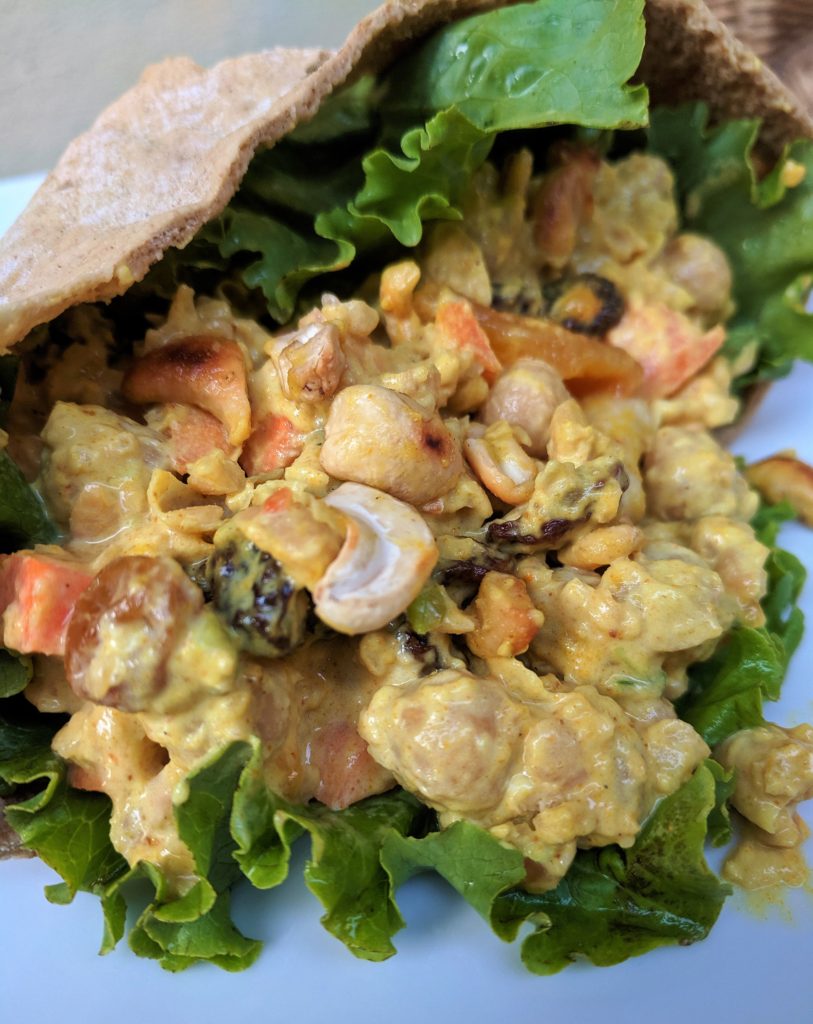
In a whole wheat pita with green leaf lettuce

Curried Chickpea Salad - Guess Who's Cooking
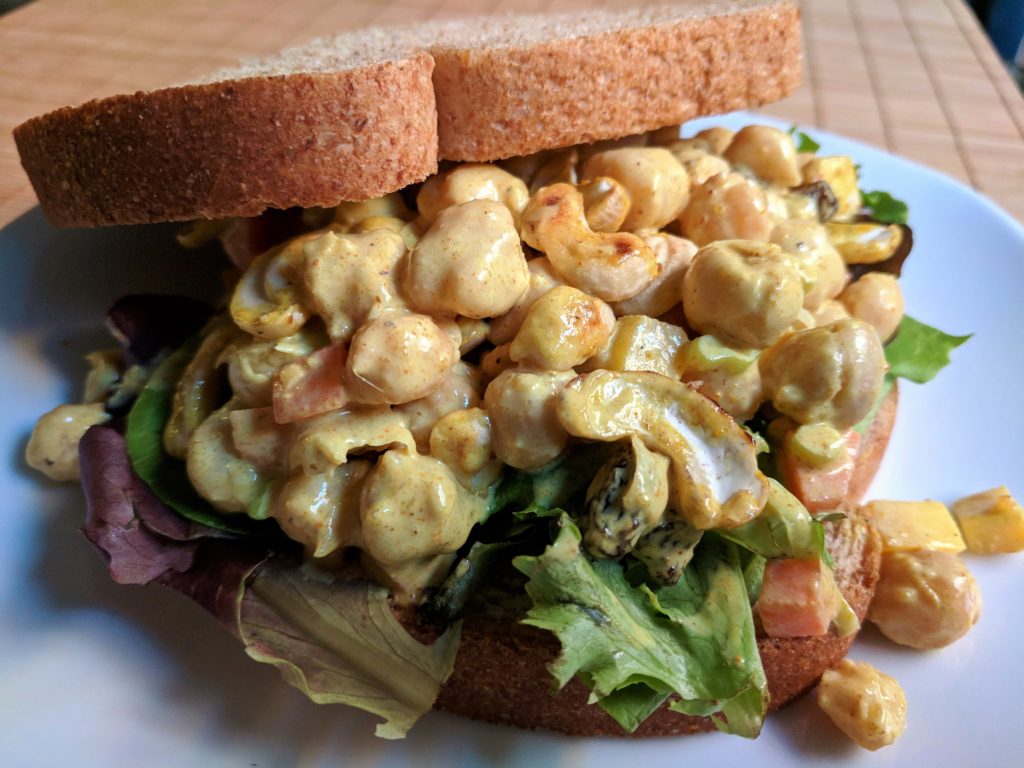
On a whole grain bread sandwich with spring mix

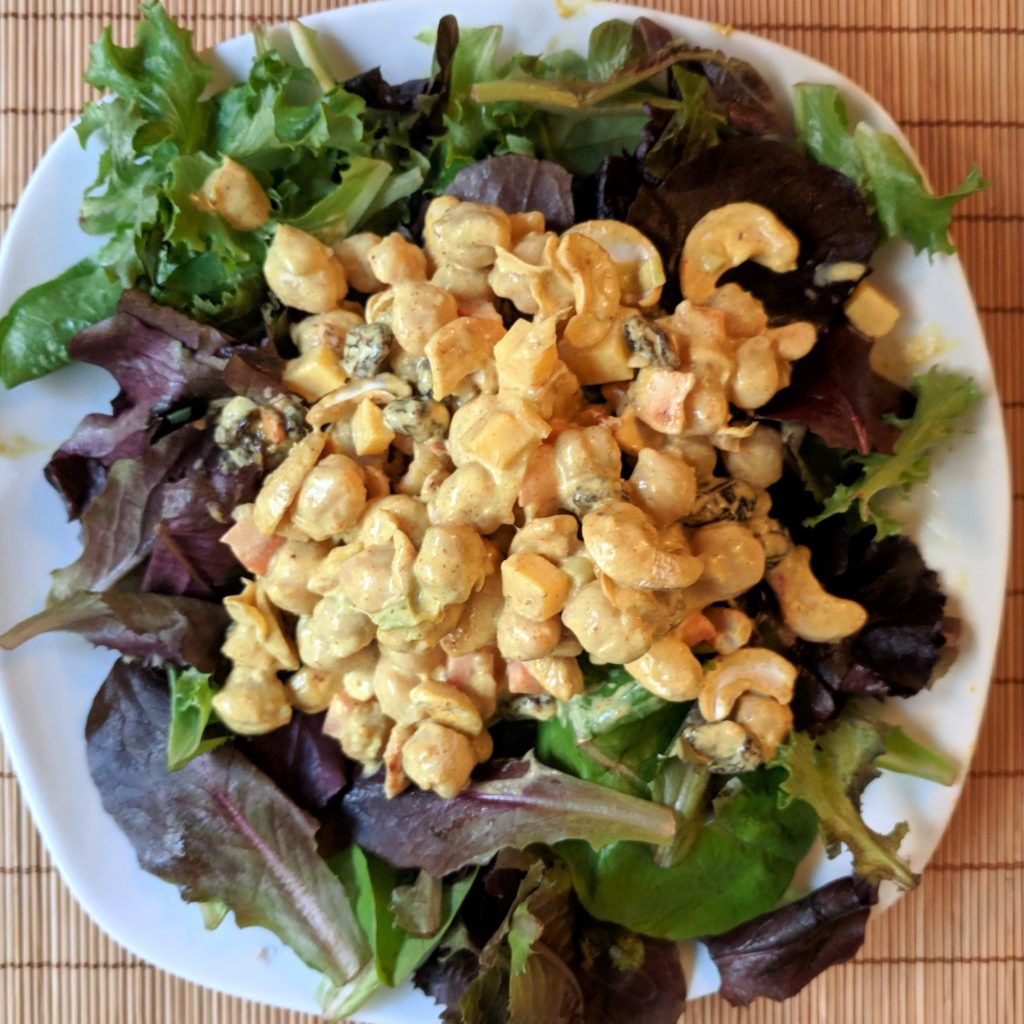
On a spring mix salad

Curried Chickpea Salad - Guess Who's Cooking
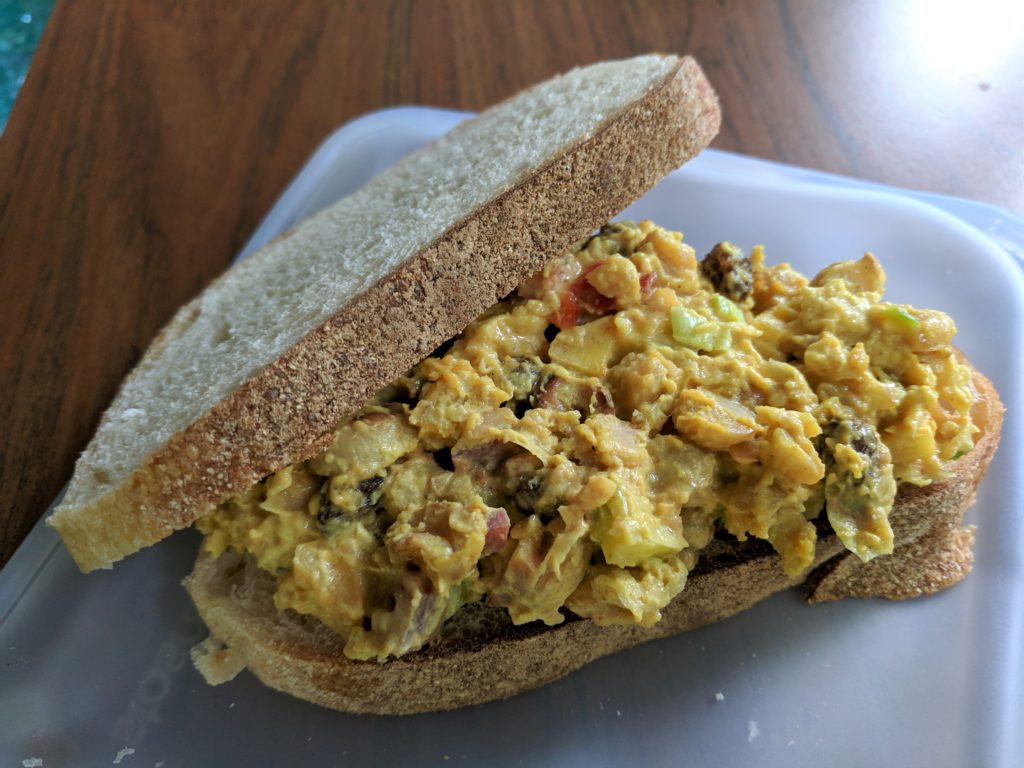
On a sandwich, stored in a reusable silicone bag


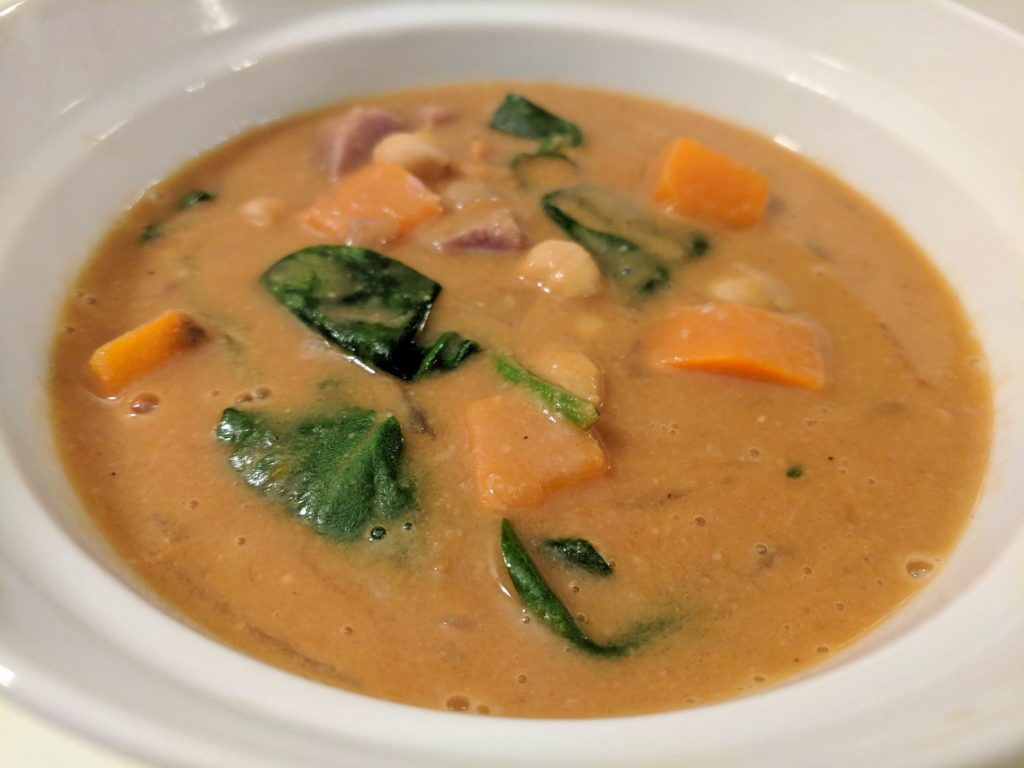
African Peanut Stew

I wanted to share this delicious recipe from Sweet Peas and Saffron. Serve it on its own, or with crusty bread or cooked grains (millet, quinoa, brown rice, etc.). The original recipe is made in a slow cooker, but I experimented with it to cook it on the stovetop. Here are the changes I made: 

  • Cooked it on the stovetop in a stock pot. 
  • Heated 1 tablespoon canola oil over medium-high heat to saute the onions until light brown, about 5 minutes.
  • Added remaining ingredients (except peanuts) and cooked until sweet potatoes were tender and the stew was thickened, 20-30 minutes.
  • Used 8 chopped plum tomatoes (when in season) instead of canned tomatoes
  • Used 1 bunch chopped collard greens (or kale) instead of spinach and added along with remaining ingredients.

There are many variations of this recipe in various regions of African. Some are a thinner soup, but this one is a thicker stew. Other ingredients sometimes used include okra, chicken, or beef. This version is plant-based and can also be made in the slow cooker – just cook all ingredients except greens and peanuts, reducing broth to 3 cups, for 8 hours on low. After cooking, garnish with peanuts. It can also be frozen after cooking.

African Peanut Stew image

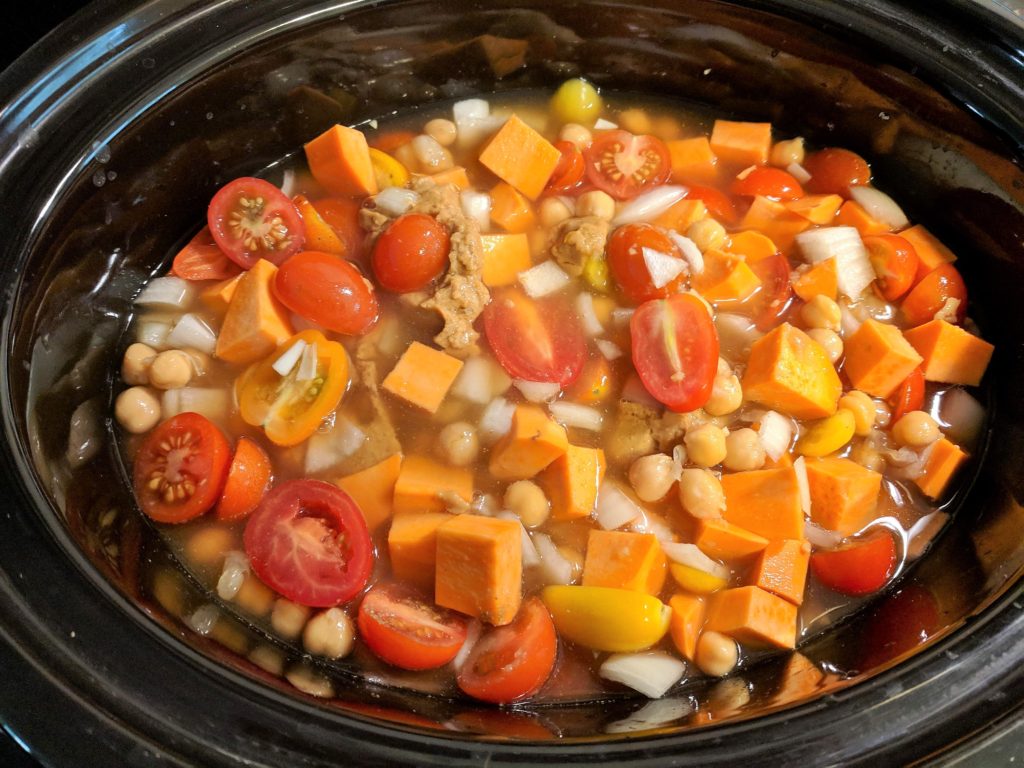
African peanut stew image, uncooked in slow cooker
Uncooked, in slow cooker
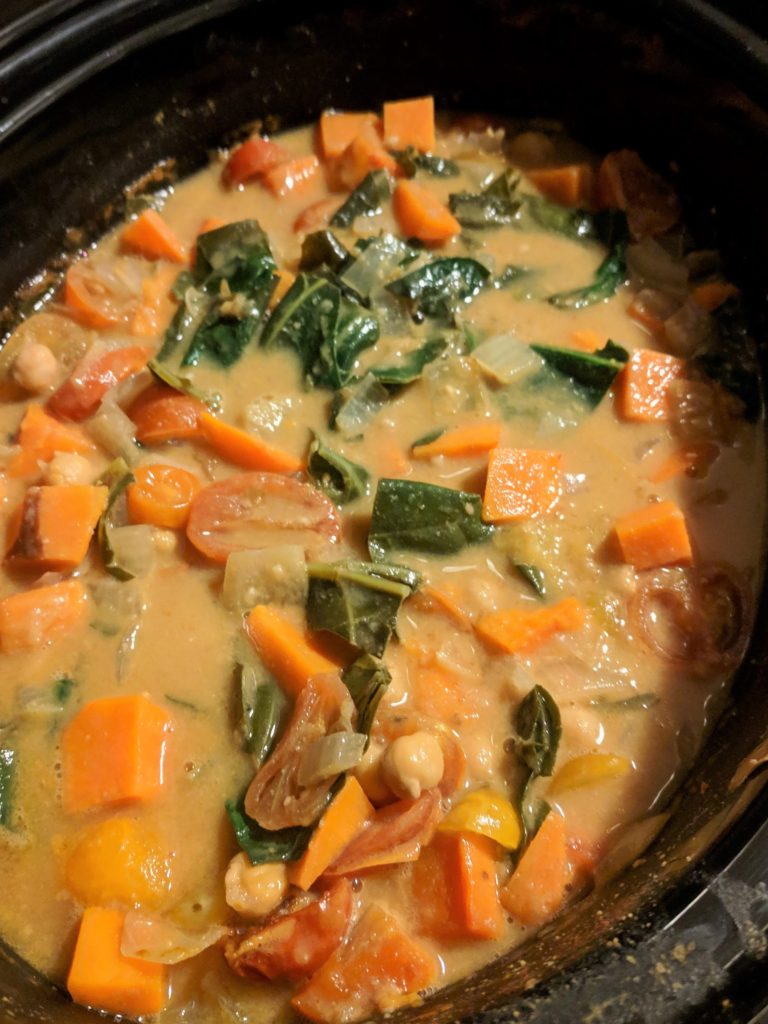
African Peanut Stew image, finished in slow cooker
Finished in slow cooker


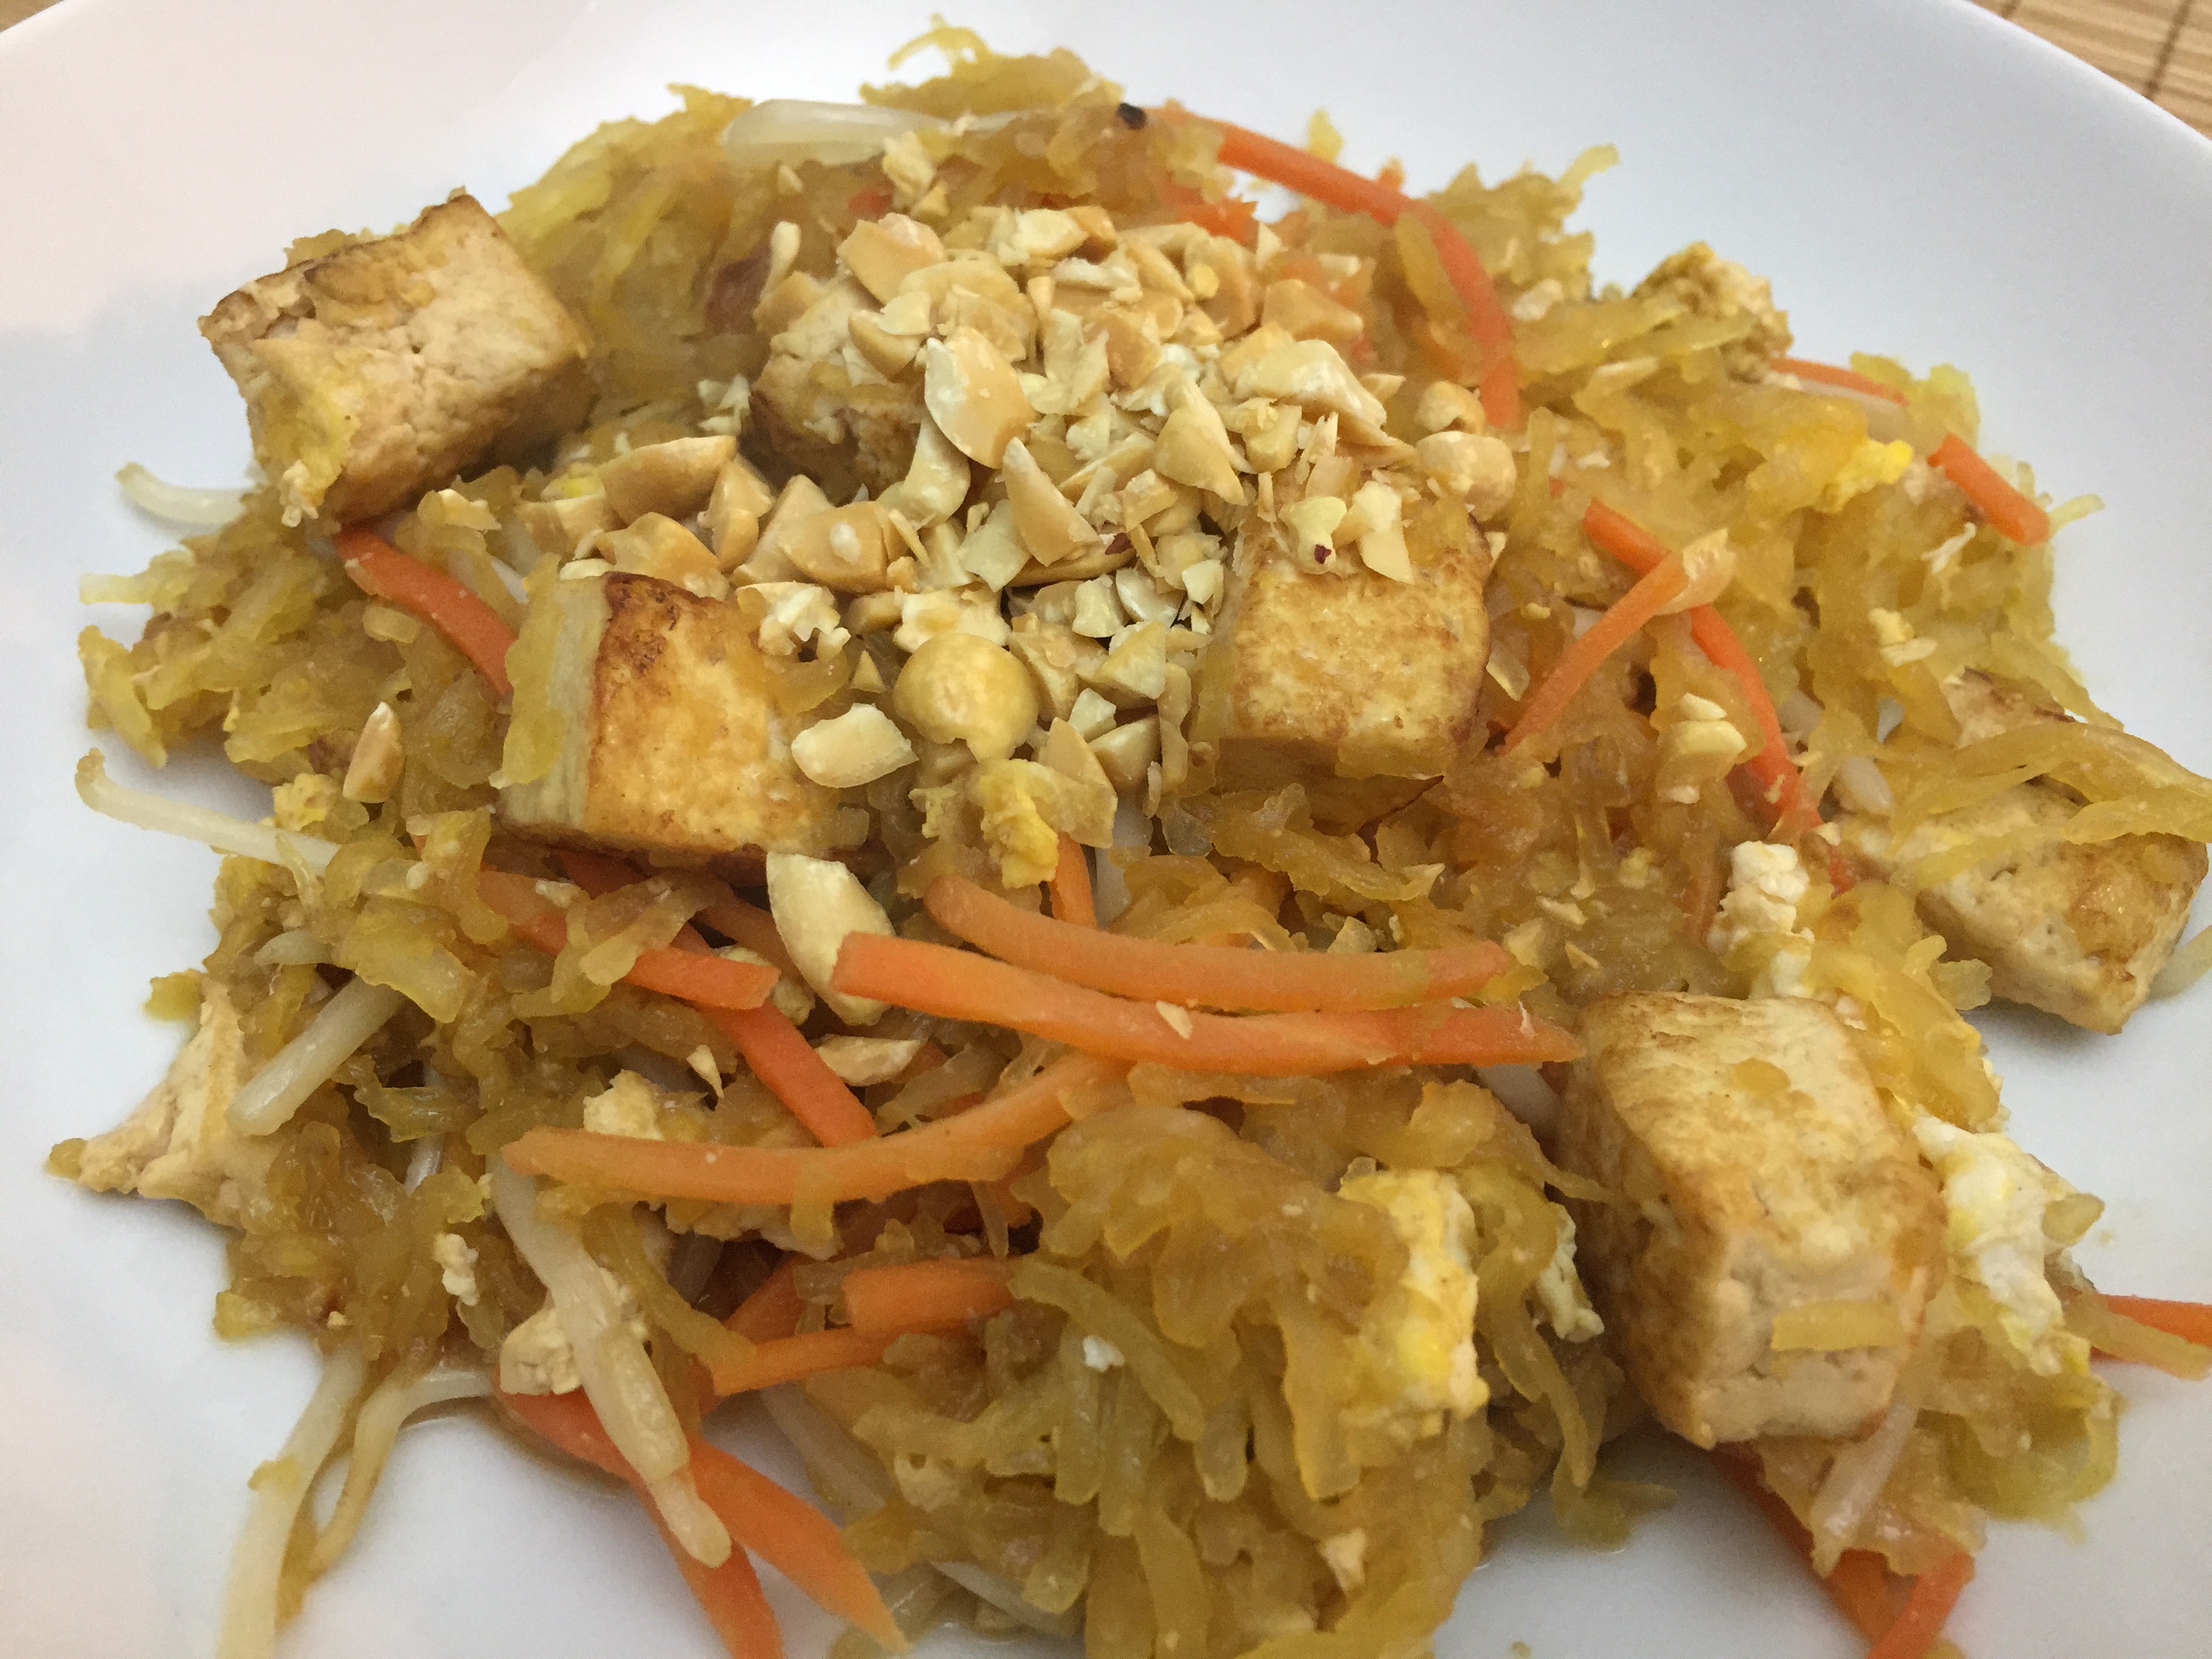
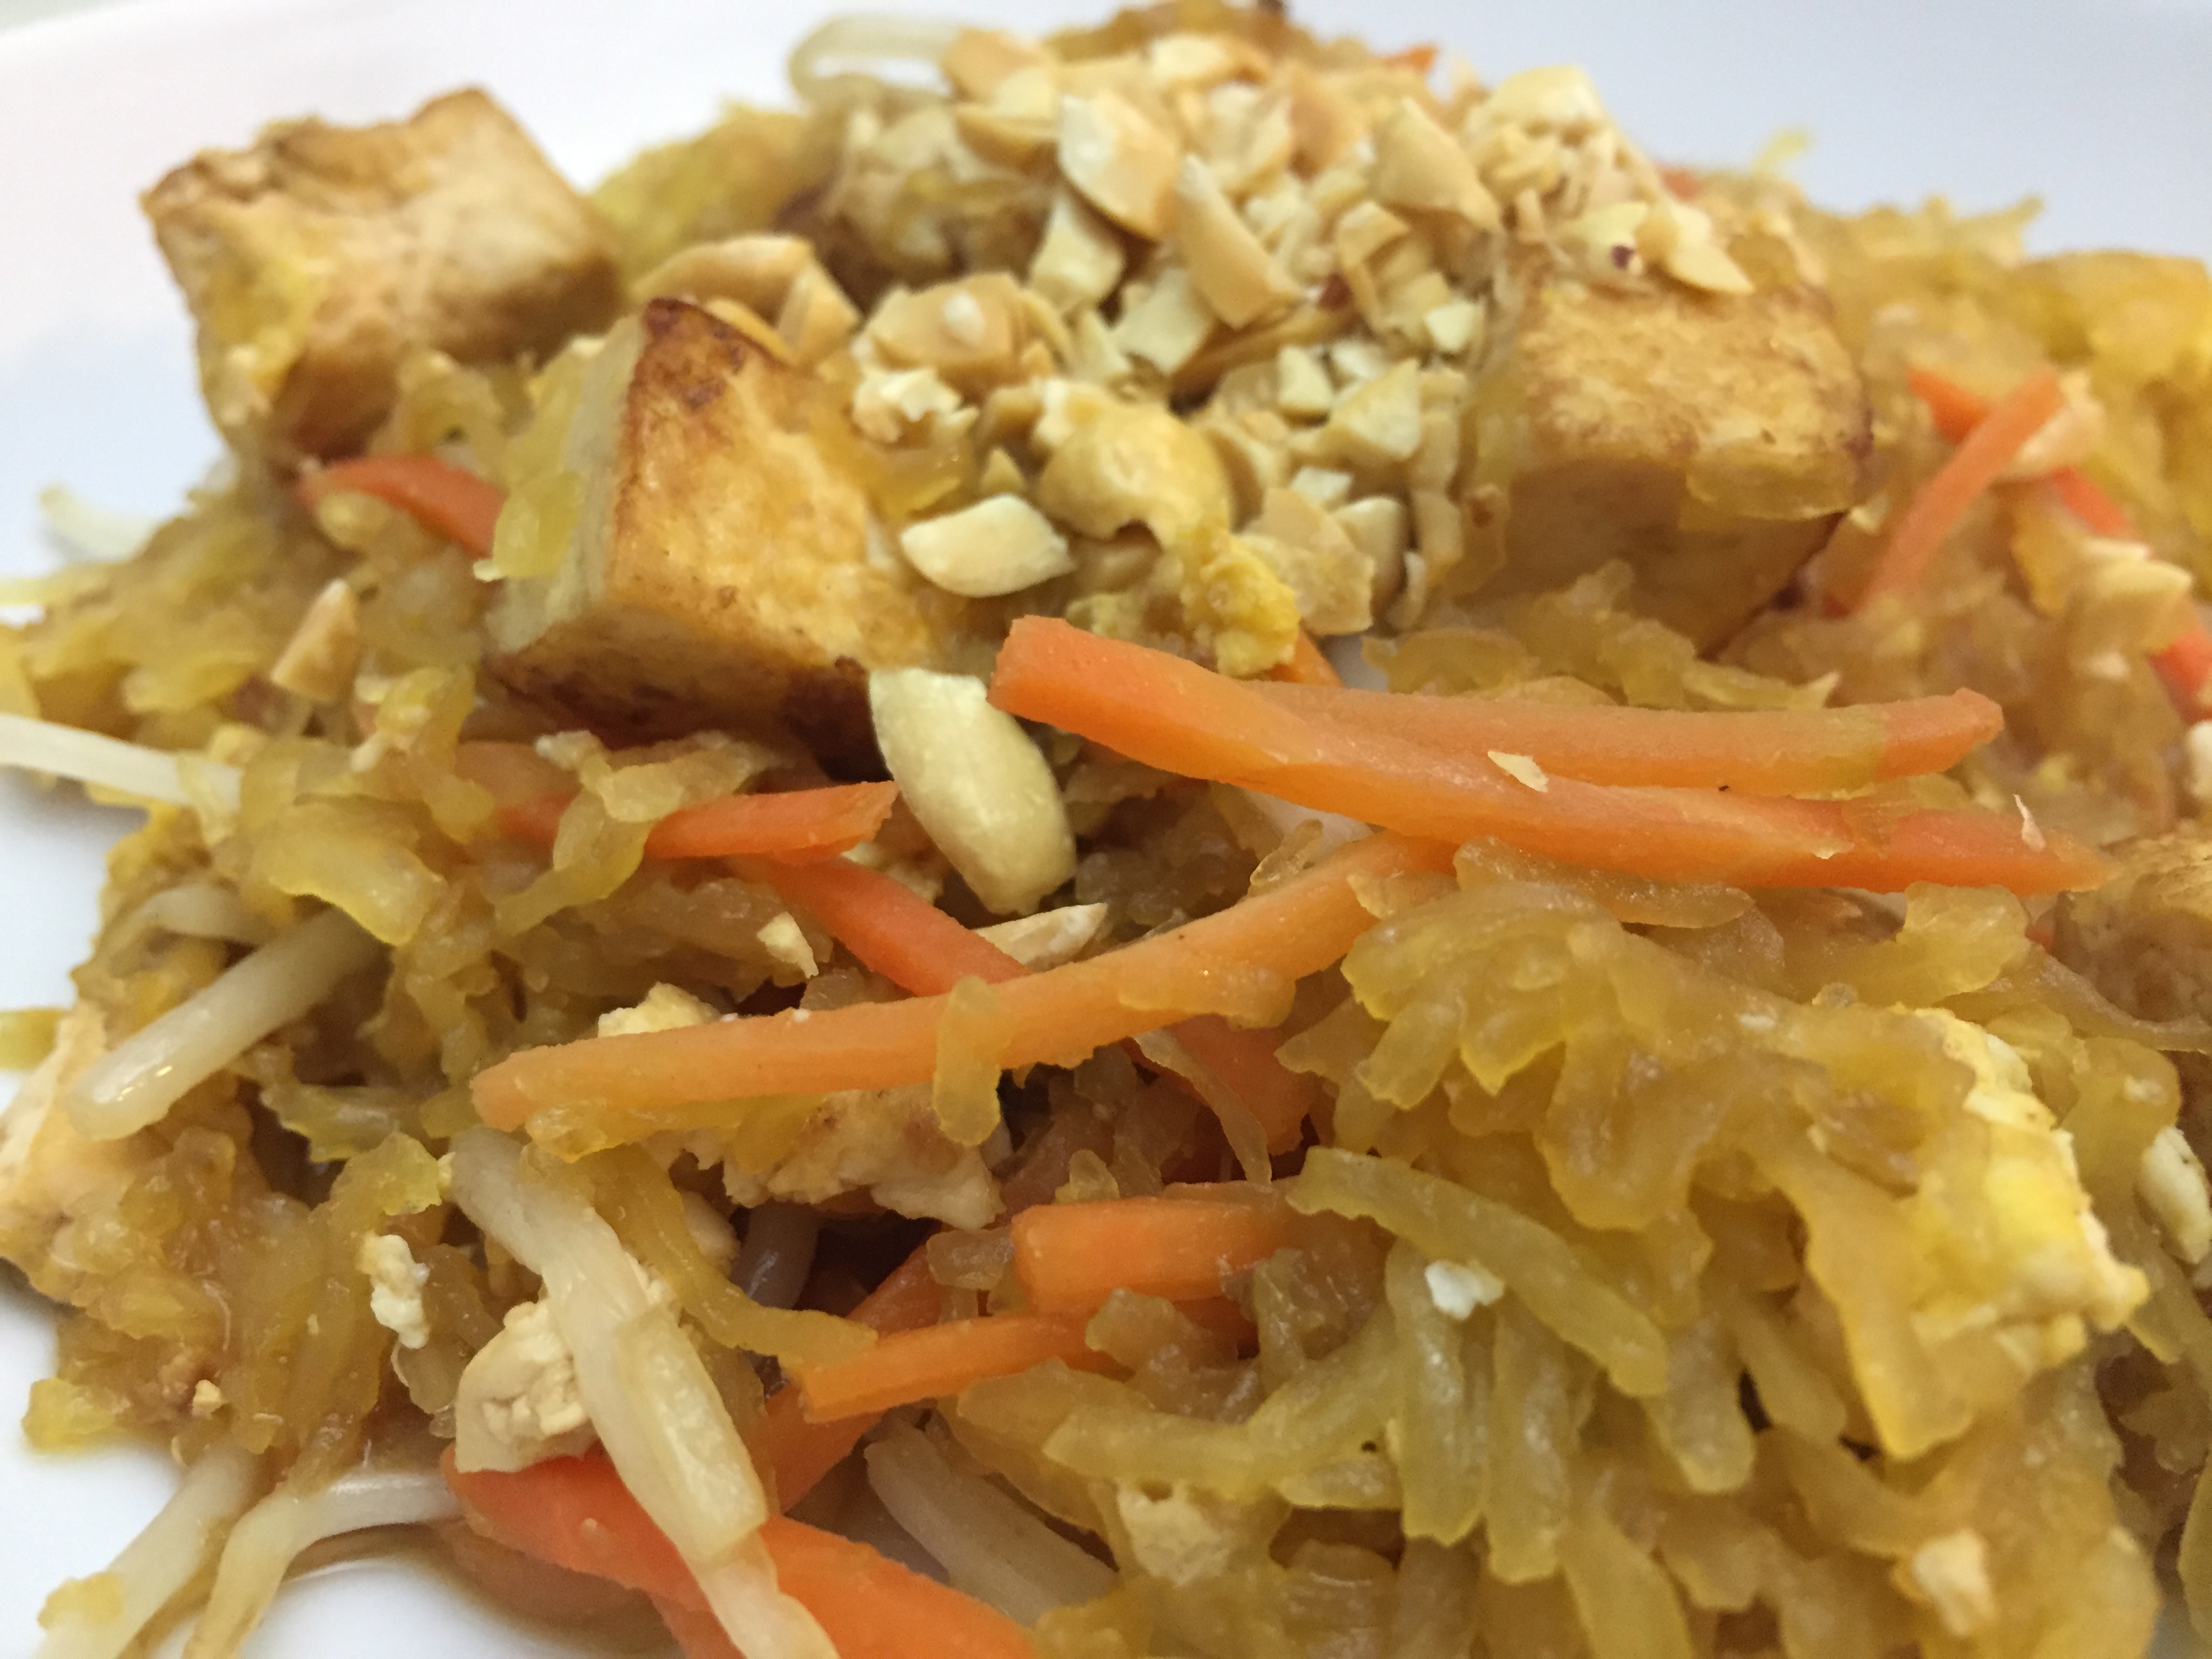
Spaghetti Squash Pad Thai

Spaghetti Squash Pad Thai

Pad Thai is a very popular Thai dish traditionally made with rice noodles. This recipe replaces the rice noodles with spaghetti squash, replacing refined grains with a nutritious vegetable. Spaghetti squash also has about 5 times less calories than most noodles or pasta! This recipe is based off of an authentic Pad Thai recipe from Basil Cookery School in Chiang Mai, Thailand.


Here are some possible substitutions. You can use more authentic ingredients if you can find them – check international markets:

  • Use rice noodles instead of spaghetti squash – but it won’t be as healthy! Or replace 1/2 of the spaghetti squash with rice noodles
  • Use oyster sauce instead of tamari/soy sauce
  • Use 2 tablespoons of tamarind paste instead of lime juice and brown sugar. This is a very unique flavor that is critical to authentic pad Thai.
  • To make this dish vegetarian, substitute the fish sauce for tamari/soy sauce or another fish sauce alternative and do not substitute oyster sauce for tamari/soy sauce.
  • To make this dish vegan, make it vegetarian (above) and omit the eggs.

Spaghetti Squash Pad Thai

Serves 4
Prep time 10 minutes
Cook time 50 minutes
Total time 1 hour
Dietary Diabetic
Meal type Main Dish
Adapted from an authentic Pad Thai recipe from Thailand, this recipe replaces rice noodles with spaghetti squash, which has about 5 times less calories!

Ingredients

  • 1 spaghetti squash
  • 14oz firm or extra firm tofu
  • 2 tablespoons canola oil, divided
  • 2 tablespoons shallots, minced
  • 1 tablespoon garlic, minced
  • 2 eggs
  • 1 cup carrots, shredded
  • 1 cup bean sprouts
  • 1/4 cup reduced sodium tamari or soy sauce
  • 2 tablespoons fish sauce
  • 1 tablespoon lime juice
  • 1 tablespoon brown sugar

Optional

  • 1/4 cup green onions, sliced
  • crushed peanuts
  • lime wedges

Directions

Step 1
Preheat oven to 400°F. Cut spaghetti squash in half and scoop out the seeds with a spoon. Brush with 1 tablespoon oil and roast on a baking sheet, cut side down, for 35-45 minutes, or until tender. Set aside to cool.
Step 2
Meanwhile, drain tofu and cut in half lengthwise. Place slices between towels and place a heavy item such as a cast iron pan on top to press out excess moisture. Let sit for 10-15 minutes.
Step 3
Once spaghetti squash has cooled, use a fork to shred the flesh into strands. Set aside.
Step 4
Heat a wok or large skillet over medium heat. Add remaining oil, then shallots and garlic. Cook until fragrant, 30-60 seconds.
Step 5
Add tofu to pan and cook, stirring occasionally, until most sides are browned, about 8 minutes.
Step 6
Push tofu to one side of the pan and crack eggs into the open space. Stir until cooked, then add spaghetti squash, carrots, and bean sprouts. Stir and cook for 1-2 minutes or until sprouts start to wilt.
Step 7
Mix tamari or soy sauce, fish sauce, lime juice, and brown sugar. Add to pan and stir to coat everything. Remove from heat and add optional garnishes.

Spaghetti Squash Pad Thai


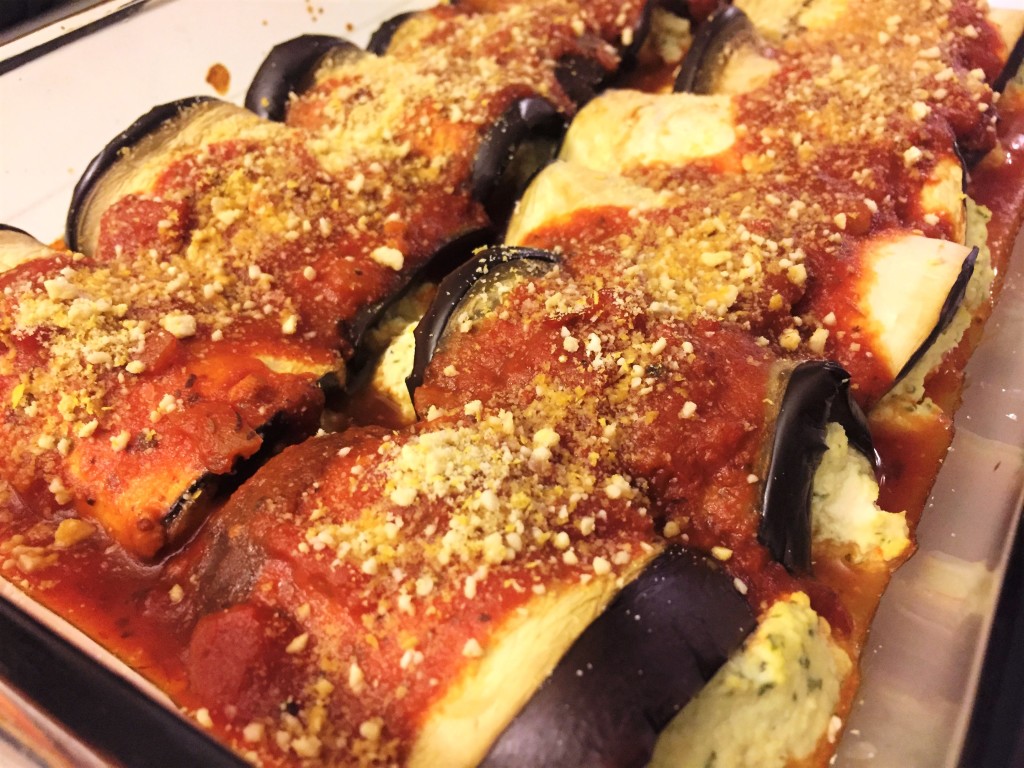
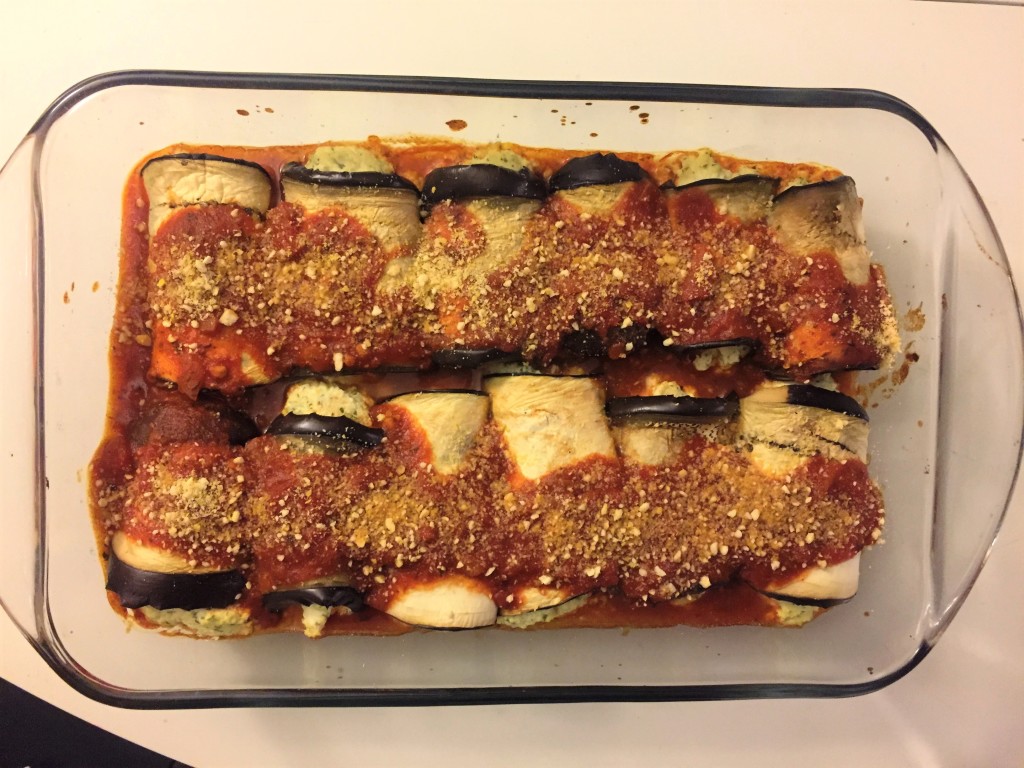
Eggplant Lasagna Rolls (from Minimalist Baker)

Eggplant Lasagna Rolls | Healthy, vegan, vegetarian, plant-based, gluten-free, dairy-free

I wanted to share this recipe from Minimalist Baker, an amazing recipe resource. People that dislike both tofu and eggplant have said they liked this recipe. You will be amazed how much the tofu tastes like ricotta. This recipe is much healthier than typical lasagna, which is made with refined grains (noodles), lots of dairy (cheese), and not much vegetables. With this recipe, you get at least a couple servings of vegetables along with some plant-based protein. It is also easier to make (and eat) rolls rather than a whole layered eggplant lasagna.

Eggplant Lasagna Roll recipe – on MinimalistBaker.com

Eggplant Lasagna Rolls | Healthy, vegan, vegetarian, plant-based, gluten-free, dairy-free


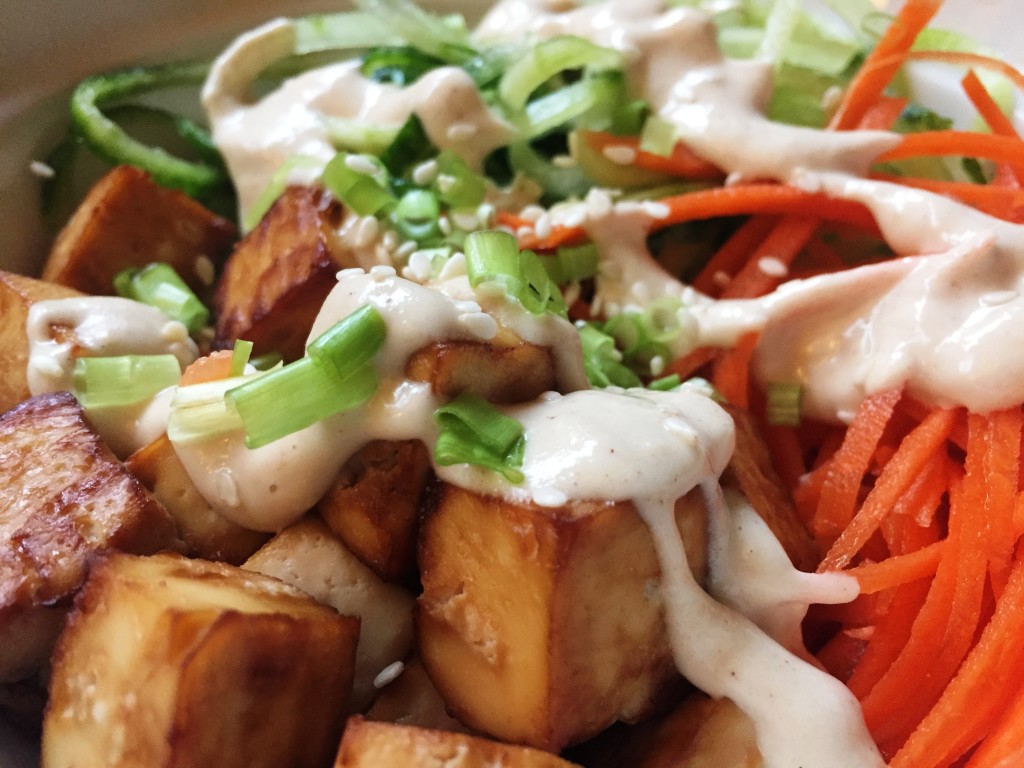
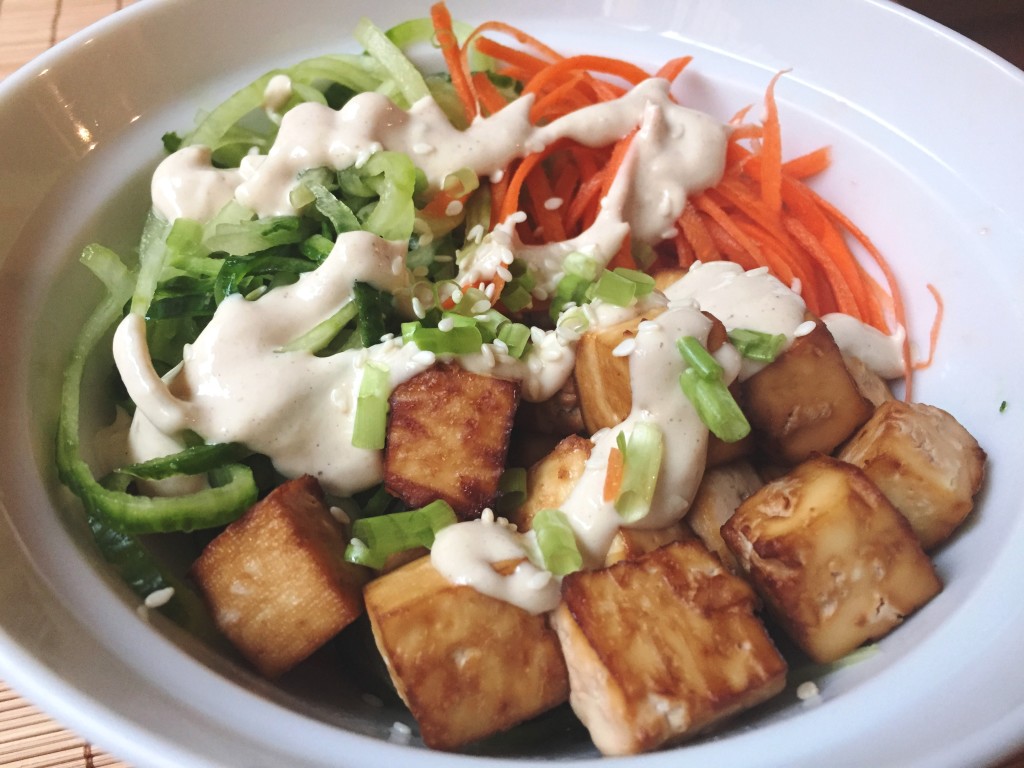
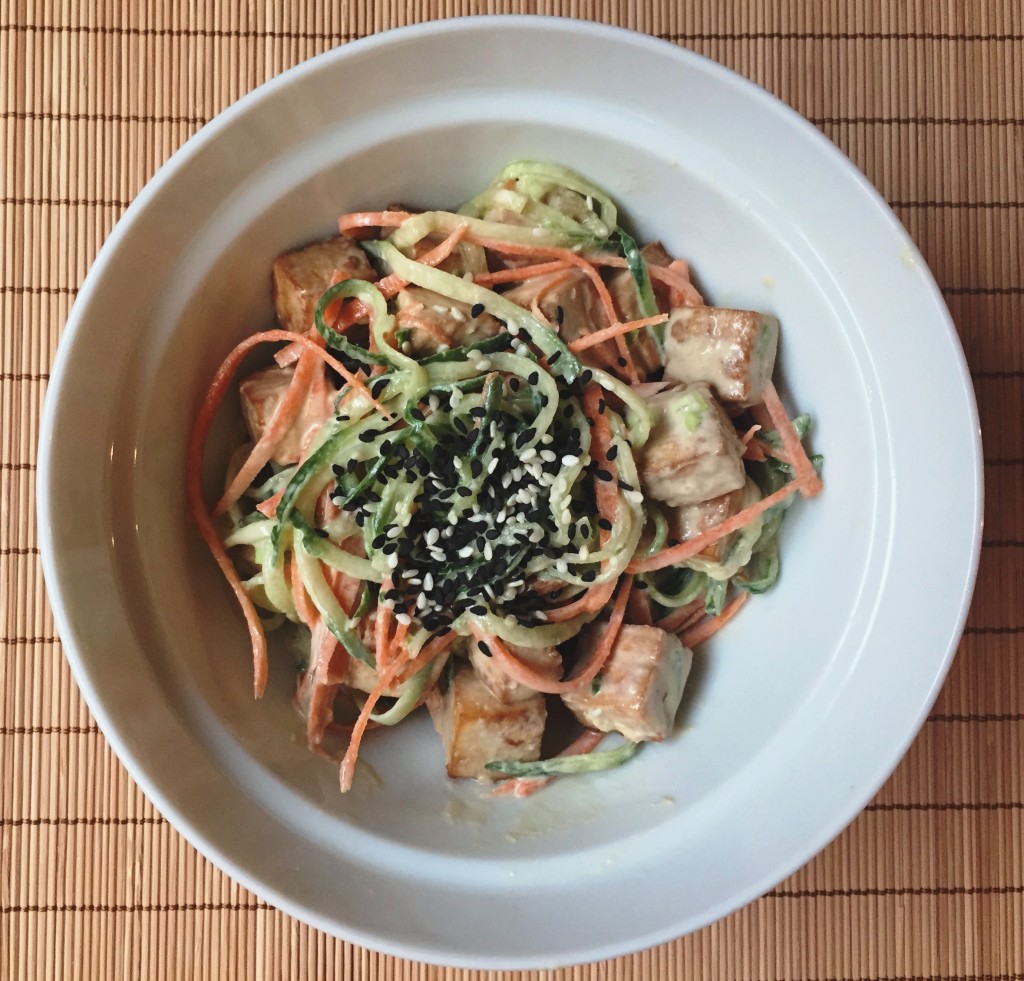
Tahini Cucumber Noodles

Cucumber Tahini Bowl

Put a twist on traditional salad and enjoy it in the form of “noodles!” With all the components of a salad (raw vegetables, dressing, and a healthy protein), this recipe is hearty enough to fill you up but light enough to keep you from feeling sluggish. It is a perfect meal to make ahead and bring to work or school for lunch.

Recipe inspired by Inspiralized.

Tahini Cucumber Noodles

Serves 4
Prep time 20 minutes
Cook time 30 minutes
Total time 50 minutes
Dietary Diabetic, Gluten Free, Vegan, Vegetarian
Meal type Lunch, Main Dish
Misc Pre-preparable, Serve Cold
Website Inspiralized
Put an exciting *spin* on traditional salad and turn it into "noodles"! Simple combine cucumber, carrots, tofu and a delicious creamy dressing for a tasty lunch or dinner.

Ingredients

  • 1 14-ounce package firm tofu, drained
  • 2 tablespoons reduced sodium tamari or soy sauce
  • 3 English cucumbers (about 6 cups)
  • 2 carrots, peeled (about 1 cup)
  • 1/4 cup tahini
  • 3 tablespoons rice vinegar
  • 2 tablespoons water
  • 1 teaspoon sesame oil
  • 1 clove garlic, minced
  • 1/4 teaspoon salt
  • 2 stalks green onion, sliced (for garnish)

Directions

Step 1
Preheat oven to 400°F. Line a baking sheet with parchment paper.
Step 2
Cut tofu into 3 slices and place between two towels. Place a heavy object such as a cast iron skillet on top to squeeze out the moisture and let sit for 15 minutes, if possible.
Step 3
Cut tofu into cubes and toss with tamari. Let sit for 15 minutes, if possible. Place tofu cubes on baking sheet and bake for 30 minutes, turning once, or until slightly crisp on the outside.
Step 4
Meanwhile, use a spiral slicer to cut the cucumber and carrots into noodles. Alternatively, use a julienne peeler to cut vegetables into long strips.
Step 5
In a small blender or food processor, combine remaining ingredients to make the dressing. Add more water, 1 tablespoon at a time, if necessary, to reach desired consistency. The dressing should be thin enough to pour but not too watery. Refrigerate until ready to serve.
Step 6
In 4 bowls, divide the cucumber, carrots, and tofu. Toss with dressing and serve cold. Garnish with green onion (and sesame seeds if desired).
Step 7
If making this recipe ahead of time for individual meals, portion out the vegetables and tofu into containers. Before serving, pour out any excess water that has been released from the cucumbers. Store the dressing separately and combine just prior to serving.

Cucumber Tahini Bowl

Cucumber Tahini Bowl


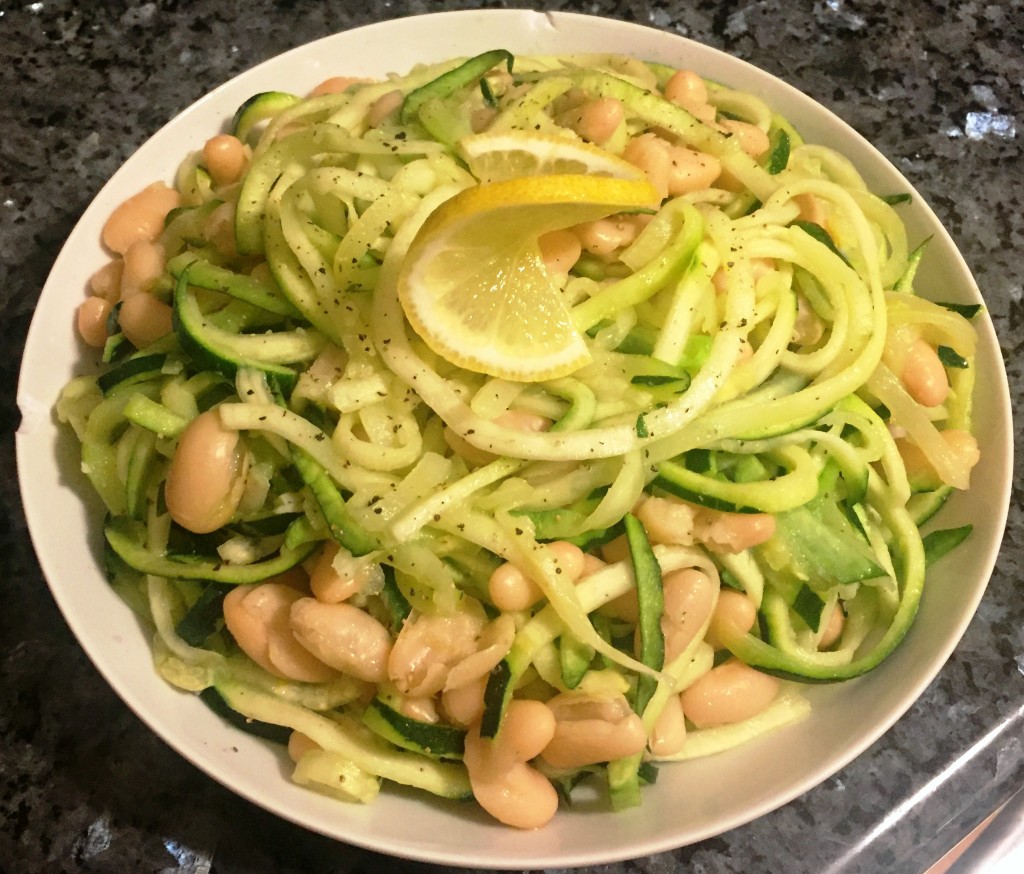
Lemon Garlic Zucchini Noodles


Lemon Garlic Zucchini NoodlesThis quick meal can be whipped up in about 15 minutes. Other than a spiral slicer, you could also use a julienne peeler or the grater attachment on a food processor. This recipe is completely plant-based without any animal products, but the combination of vegetables, beans and healthy fat will satisfy your appetite.
Optional additions include pine nuts, sauteed spinach, or cherry tomatoes.

Lemon Garlic Zucchini Noodles

Serves 4
Prep time 10 minutes
Cook time 5 minutes
Total time 15 minutes
Dietary Diabetic, Gluten Free, Vegan, Vegetarian
Meal type Lunch, Main Dish
This plant-based entree can be ready in about 15 minutes. It contains no refined grains, no animal products, and doesn't contain any of the top 8 common allergens.

Ingredients

  • 6 cups zucchini, spiral sliced (2-3 zucchinis)
  • 2 tablespoons olive oil
  • 2-3 cloves garlic, minced
  • 2 tablespoons lemon juice (about 1 lemon)
  • 1/2 teaspoon lemon zest
  • 1 3/4 cup white beans (or 15 ounce can, rinsed and drained)
  • Salt and pepper to taste

Directions

Step 1
Heat oil in a large skillet over medium heat. Add garlic and cook until fragrant, about 30 seconds.
Step 2
Add zucchini and cook for 1-2 minutes or until just tender, stirring often. Stir in beans and remove from heat. Add lemon juice, lemon zest, salt and pepper. Serve immediately.


Bulgogi Mushrooms

Bulgogi Mushrooms

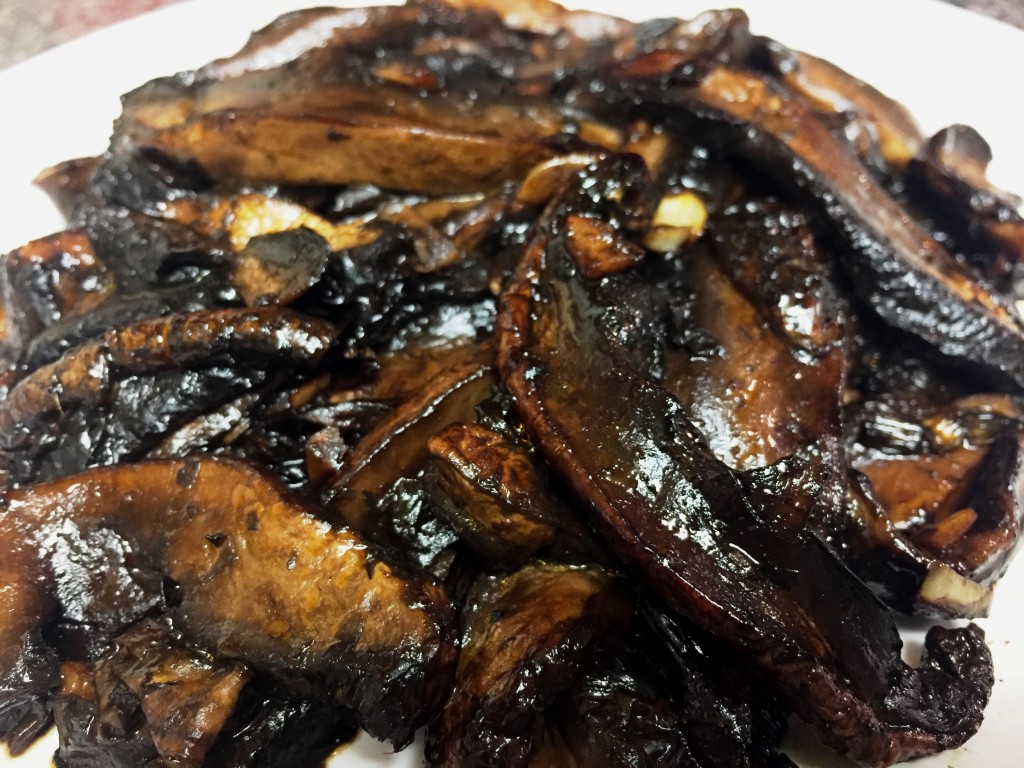
Traditional bulgogi is a popular Korean dish of thinly sliced marinated beef that is usually grilled, but often stir-fried in home cooking. This simple recipe replaces the meat with vegan-friendly yet meaty-textured portabello mushrooms.

If you need this recipe to be gluten-free, be sure to use tamari or soy sauce that says gluten-free on the label. If you do not use reduced sodium soy sauce, use about 2 tablespoons instead of 1/4 cup and add an extra 2 tablespoons of water, or else it will taste way too salty.


Bulgogi Mushrooms

Serves 4-6
Prep time 2 hours, 10 minutes
Cook time 5 minutes
Total time 2 hours, 15 minutes
Dietary Diabetic, Gluten Free, Vegan, Vegetarian
Meal type Main Dish, Side Dish
Traditional bulgogi is a popular Korean dish of thinly sliced marinated beef that is usually grilled, but often stir-fried in home cooking. This simple recipe replaces the meat with vegan-friendly yet meaty-textured portabello mushrooms.

Ingredients

  • 1lb portabello mushrooms (sliced)
  • 1/4 cup reduced sodium soy sauce or tamari
  • 1/4 cup rice vinegar
  • 2 green onions (thinly sliced)
  • 2 tablespoons water
  • 1 tablespoon gochujang
  • 1 tablespoon sesame oil
  • 4 cloves garlic (minced)
  • 1 teaspoon ginger (minced)

Directions

Step 1
Combine marinade ingredients and add sliced mushrooms. Cover and refrigerate for 2 hours.
Step 2
Heat a skillet over high heat. Drain the sauce from the mushrooms, reserving leftover sauce, and place mushrooms into the pan. Stir occasionally until tender, about 5 minutes.
Step 3
If desired, use leftover sauce as a dipping sauce for another dish. Serve in a lettuce wrap, in a taco, or with Korean side dishes.


Slow Cooker Bourbon Chicken

Easy Slow Cooker Bourbon Chicken - better than the food court! | Guess Who's Cooking | Healthier, dairy-free, low-sugar, nut-free, egg-free, can be made gluten-free

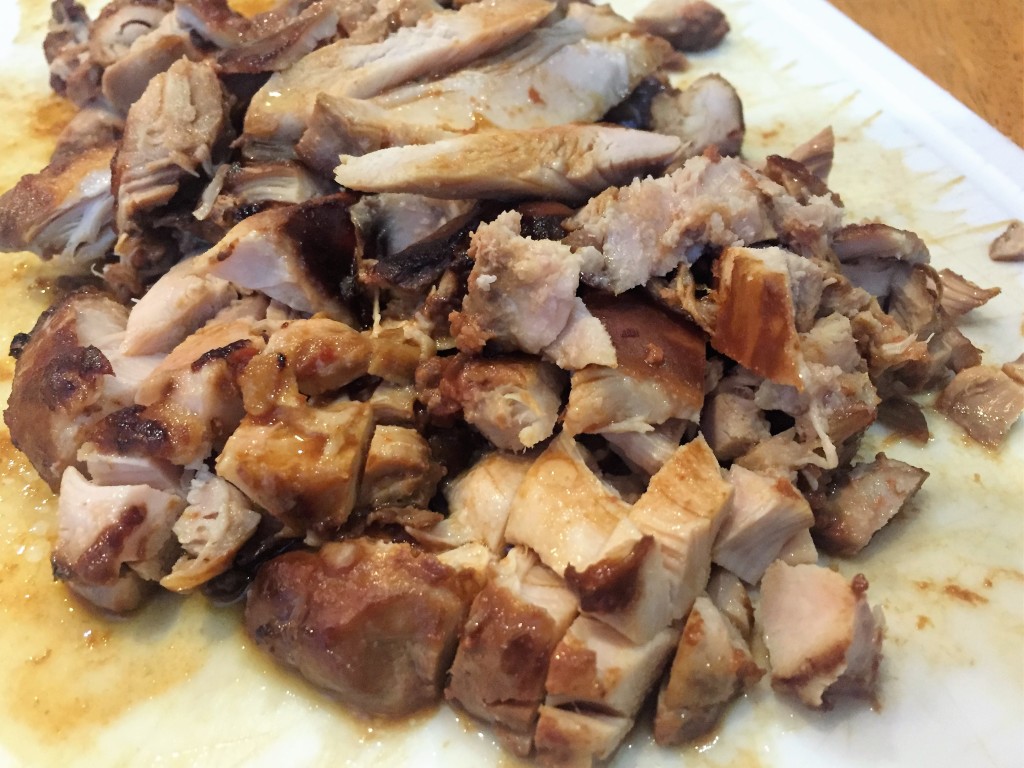
Bourbon chicken is often found in food courts but is covered in sticky (sugary) sauce. This recipe drastically reduces the added sugar (almost 1/2 cup in most recipes) to just 1 tablespoon, but you could give or take a little. If you stick to 1 tablespoon, you’re using about 1/8 of the sugar added to most recipes. You can also use chicken breasts, but it will be less traditional, and less tender and juicy. Chicken thighs are still considered a lean meat, but be sure to remove the skin or buy skinless chicken. This recipe uses low and slow heat to keep the chicken juicy, rather than any added fat. If you are not serving this meal right away, you can also skim the fat from the sauce once it is cooled or refrigerated. Also, use the best quality chicken you can afford – organic and free-range is preferred. If you cannot afford or find that, at least aim to buy chicken without antibiotics.

Although the name includes bourbon, there is none in this particular recipe. If you’d like, you can add 2-4 tablespoons of bourbon and reduce the apple juice by that amount.

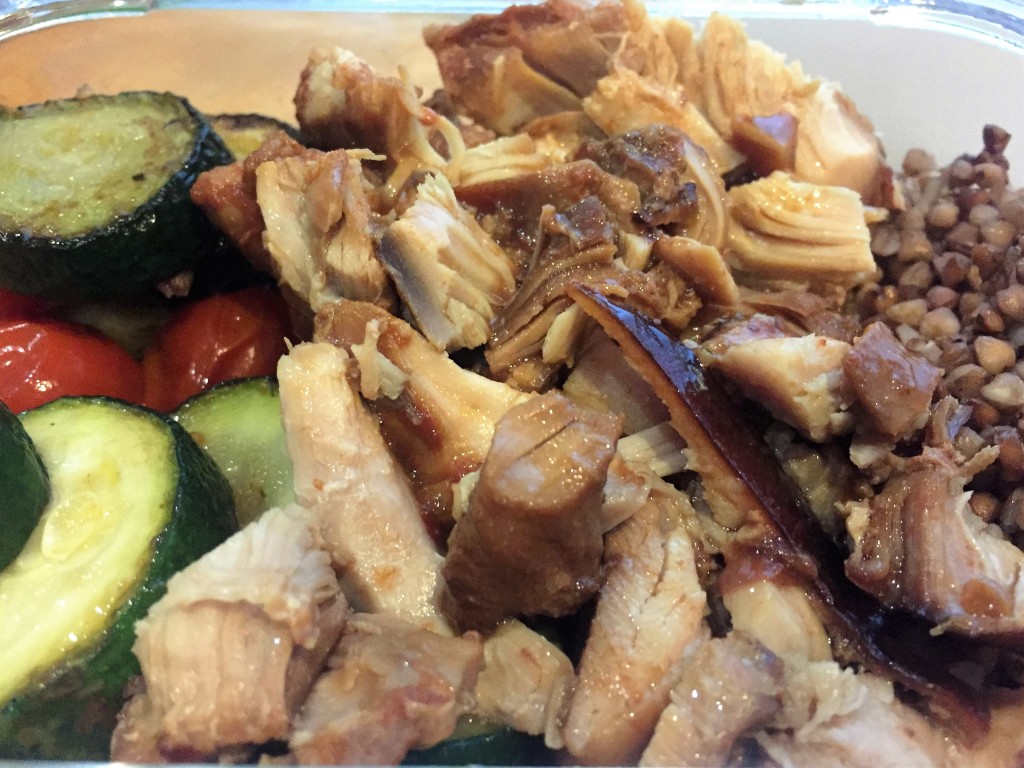
Serve this meal with your choice of cooked whole grain (buckwheat – pictured, quinoa, brown rice, wild rice, etc.) and a green salad or other vegetables.


Easy Slow Cooker Bourbon Chicken

Serves 5-6
Prep time 10 minutes
Cook time 4 hours
Total time 4 hours, 10 minutes
Meal type Main Dish
Make juicy and flavorful chicken at home, similar to the bourbon chicken in the food court, except with much less sugar and better quality ingredients.

Ingredients

  • 1 1/2lb boneless skinless chicken thighs (organic and free-range preferred)
  • 1/4 cup low sodium tamari or soy sauce
  • 1/4 cup apple juice (or substitute white wine)
  • 2 tablespoons tomato paste
  • 1 tablespoon apple cider vinegar
  • 1 tablespoon sugar
  • 2 cloves garlic (minced)
  • 1 teaspoon ginger (minced)
  • 1 pinch red pepper flakes

Directions

Step 1
In a medium bowl, whisk together all ingredients except the chicken.
Step 2
Place chicken in a slow cooker, then pour sauce over. Move the chicken around so that it is covered with sauce and in an even layer.
Step 3
Cook on high for 4-6 hours.
Step 4
Remove chicken from slow cooker and slice. Optional: Pour sauce into a saucepan and simmer over low heat to reduce it until thickened, or mix a little cornstarch or arrowroot starch with water, then stir into sauce and cook, stirring constantly, until thickened.
Step 5
Pour remaining sauce over chicken. Serve over your favorite whole grain (try buckwheat, quinoa, or brown rice) and with a green salad.

Easy Slow Cooker Bourbon Chicken - better than the food court! | Guess Who's Cooking | Healthier, dairy-free, low-sugar, nut-free, egg-free, can be made gluten-free


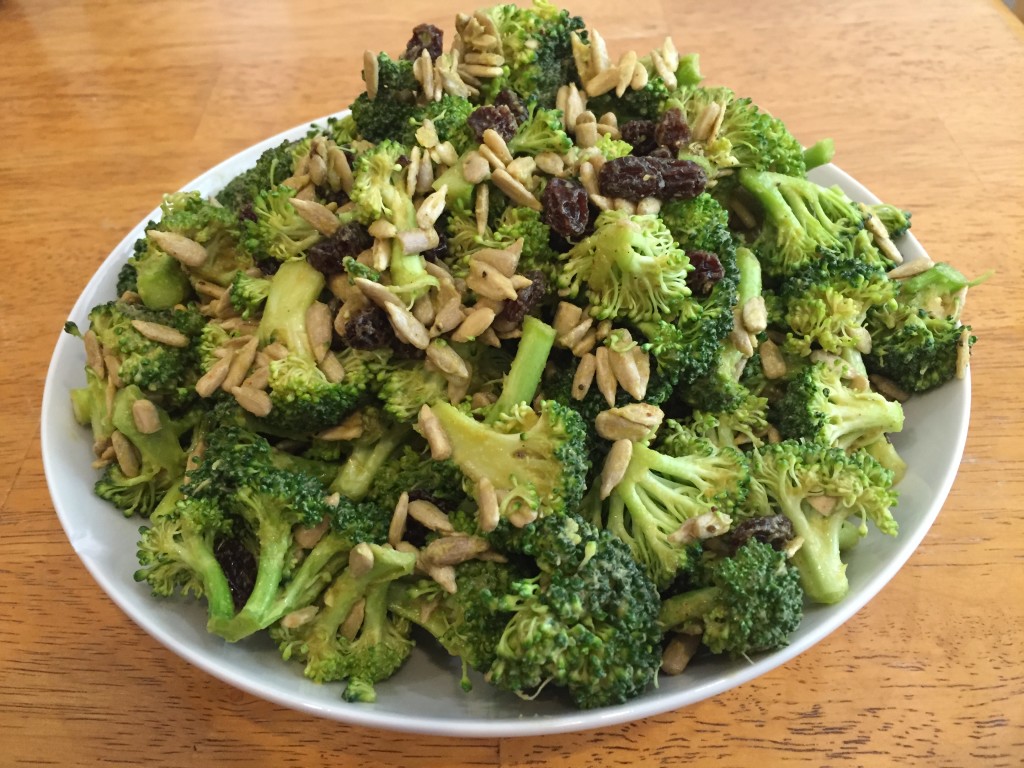
Vegan Bacon-Flavored Broccoli Salad

Vegan Bacon-Flavored Broccoli Salad | Guess Who's Cooking | Healthy, plant based, vegan, vegetarian, dairy free, egg free, gluten free, low carb, low sugar

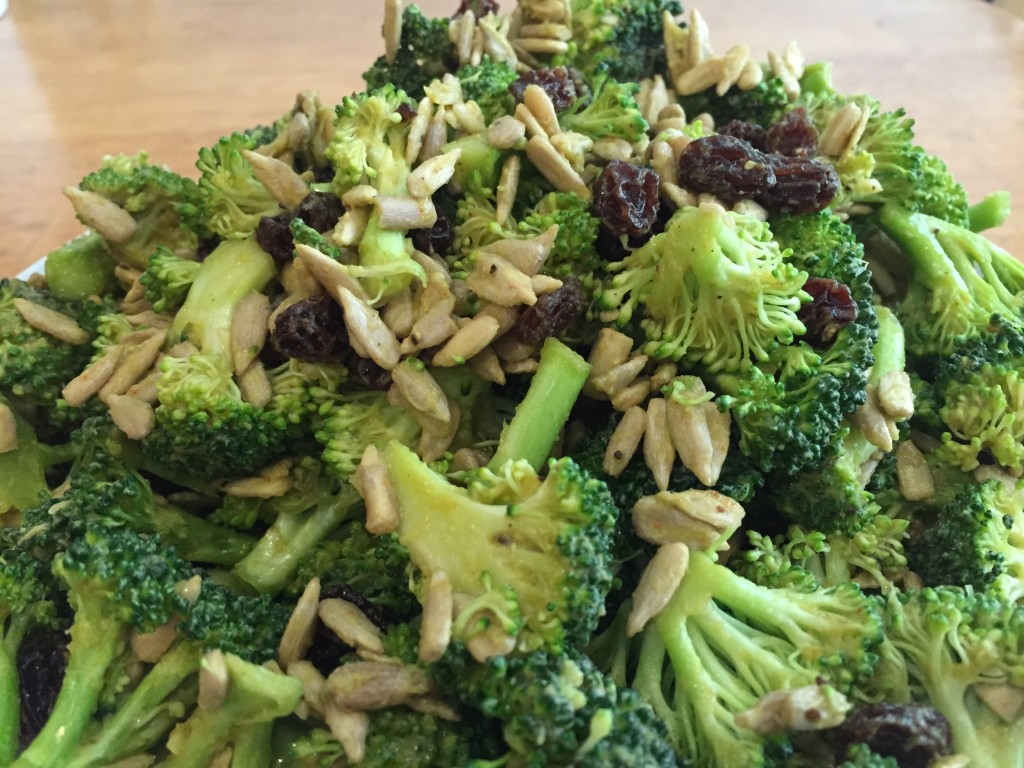
Traditional broccoli salad is typically made with mayo, sugar, and bacon. This healthy twist on an old classic is completely plant-based, replacing mayo with mashed avocado, cutting way back on sugar so you can appreciate the natural sweetness of the raisins, and uses creative seasonings to replace the flavor of the bacon. Make 1 1/2 times the dressing recipe if you prefer it to be a bit creamier.

Vegan Bacon-Flavored Broccoli Salad

Serves 6
This twist on classic broccoli salad omits all animal products, replacing mayo with mashed avocado, using seasonings to mimic bacon flavor, and greatly reducing added sugar.

Ingredients

  • 5 cups broccoli florets
  • 1/3 cup raisins
  • 1/3 cup roasted sunflower seeds
  • 3/4 - 1 cups avocado (about 1 large)
  • 1 tablespoon lemon juice
  • 1 teaspoon maple syrup
  • 1 teaspoon salt
  • 1 clove garlic (minced)
  • 1/4 teaspoon smoked paprika
  • 1/4 teaspoon black pepper

Optional

  • dash liquid smoke

Directions

Step 1
Place broccoli, raisins and sunflower seeds into a large bowl.
Step 2
In a medium bowl, mash the avocado until no chunks remain, then add remaining ingredients (or combine all ingredients in a blender or food processor and blend until smooth). Combine avocado mixture with broccoli mixture. Refrigerate for at least 1-2 hours for dressing to soften the broccoli.
Vegan Bacon-Flavored Broccoli Salad | Guess Who's Cooking | Healthy, plant based, vegan, vegetarian, dairy free, egg free, gluten free, low carb, low sugar